Today we’re featuring kindergarten teachers Cathryn Prudencio and Sharon Jensen. The class has been exploring dinosaurs, and I joined them for a lesson at the National Museum of Natural History that answered the question, “How do dinosaurs get to the museum?” Below you will find images from the lesson, as well as reflections from Cathryn and Sharon.

When the kindergarten class needs to pick a new topic to study, the children always start out by answering the question “What would you like to learn about?” in their journals. Then the students draw what they are interested in. We also explore different ideas for topics throughout the year, and when it’s time for a new topic we brainstorm ideas as a group. We vote to narrow the choices down to the top three or four, and then vote again for our final topic. This way we make sure that the students are truly involved in choosing what they will be learning about, and they are satisfied that it was a decision made fairly. This is how we ended up doing a unit on dinosaurs as our last unit before the kindergartners graduated.

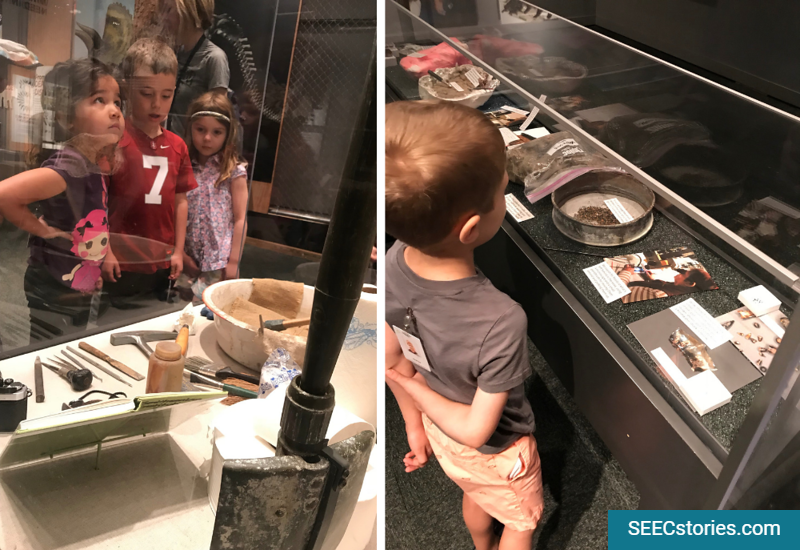
The objective of this lesson was to deepen the understanding of what a paleontologist does on a dig, and what tools and procedures are used. We used the pictures hanging up in the exhibit to support what we were talking about, and to help the children think about what was needed for the dig. We also used the objects on display to talk about the materials needed and how they were used, supporting this with objects passed around for the children to see and hold. Doing this, we not only reinforced information from a previous lesson, but we also prepared the children for their own miniature dig in the museum.
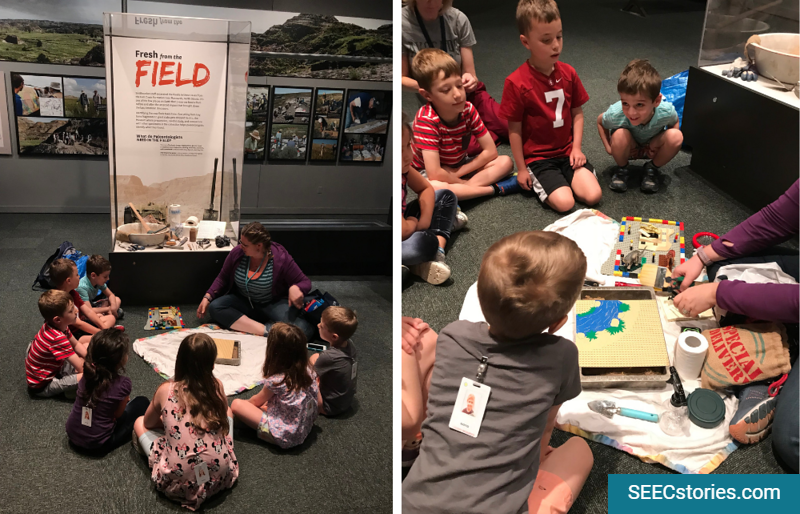


Something that surprised us during the lesson was how the children really took turns and then worked together on the “dig site” in the museum space. Sometimes they get so excited about an activity that it can be hard for them to be patient and wait their turn.

The most ineffective part of our lesson was most likely the read aloud. Even though it explained the process of getting the dinosaur bones from the discovery part to the display in the museum, and all the people involved in the process, it was rather long and made our lesson longer. By the time we finished the story, the children had been sitting for some time. However, this was okay because we already talked about the process so much and the people involved, that it was a way to reinforce what we were teaching. Even though the read aloud was very long, we were still surprised at how well they stayed engaged and listening.

In the beginning, when putting the puzzle together, the children were super excited, but that soon faded when they were trying to figure out which piece went where. Again this was okay, because they did try and got pretty far with it. Eventually they just lost interest.
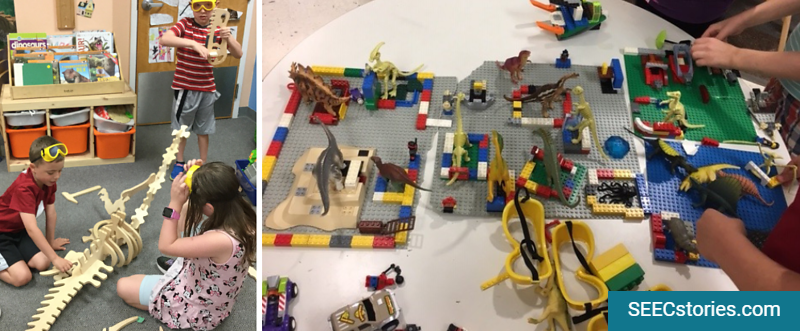
Later in the classroom, we left the section of the museum for the children to play with. On their own they created several additional sections of the museum using Legos, dinosaurs and some blocks. It took up the entire table and throughout the week there were more additions. Written labels the children made to identify objects, for example, and more “tourists” made from Legos were added to see the “exhibit.” It was awesome!
After exploring dinosaurs it was time for our kindergartners to graduate! For more dinosaur ideas, visit our dinosaur Pinterest board.
