Teacher Feature: Kindergarten Class Explores Paleontology

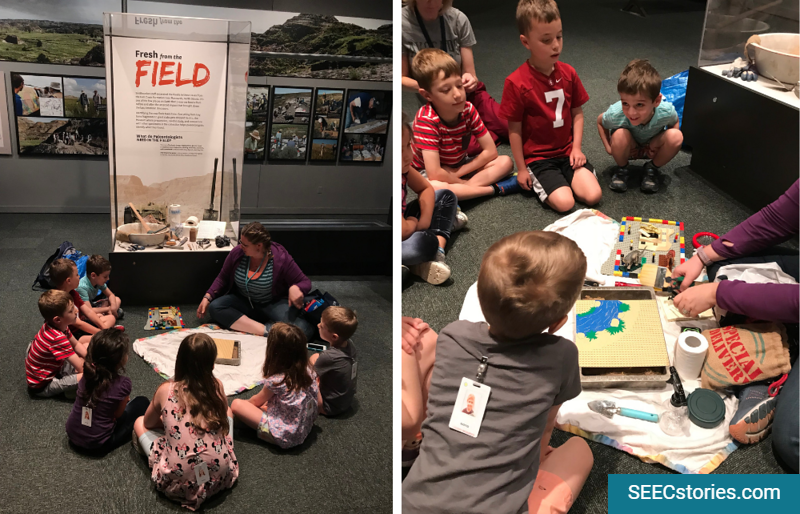
Today we’re featuring kindergarten teachers Cathryn Prudencio and Sharon Jensen. The class has been exploring dinosaurs, and I joined them for a lesson at the National Museum of Natural History that answered the question, “How do dinosaurs get to the museum?”  Below you will find images from the lesson, as well as reflections from Cathryn and Sharon. 

Children gathered around a box filled with dirt and toy dinosaurs

When the kindergarten class needs to pick a new topic to study, the children always start out by answering the question “What would you like to learn about?” in their journals. Then the students draw what they are interested in. We also explore different ideas for topics throughout the year, and when it’s time for a new topic we brainstorm ideas as a group. We vote to narrow the choices down to the top three or four, and then vote again for our final topic. This way we make sure that the students are truly involved in choosing what they will be learning about, and they are satisfied that it was a decision made fairly. This is how we ended up doing a unit on dinosaurs as our last unit before the kindergartners graduated.

Children looking at pictures of paleontologists
The class went to The Last American Dinosaurs exhibit; a temporary exhibit while the new Hall of Fossils: Deep Time was being renovated. The group’s first stop was at a wall of photographs from a 2013 trip to North Dakota made by a team of paleontologists from the museum. They stopped and carefully looked at the photographs, making observations about what the paleontologists were wearing and why. Some of their observations included: hats to keep them cool, pants to protect their legs from sun burn and the risk of getting cut from sharp tools, and gloves to both protect their hands and protect the fossils from the oils on their hands.

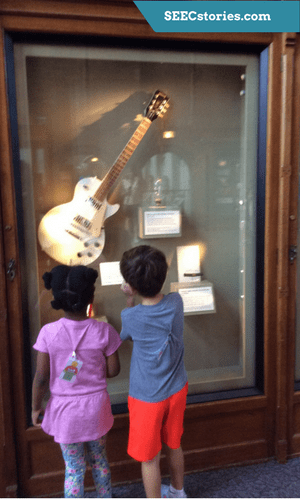
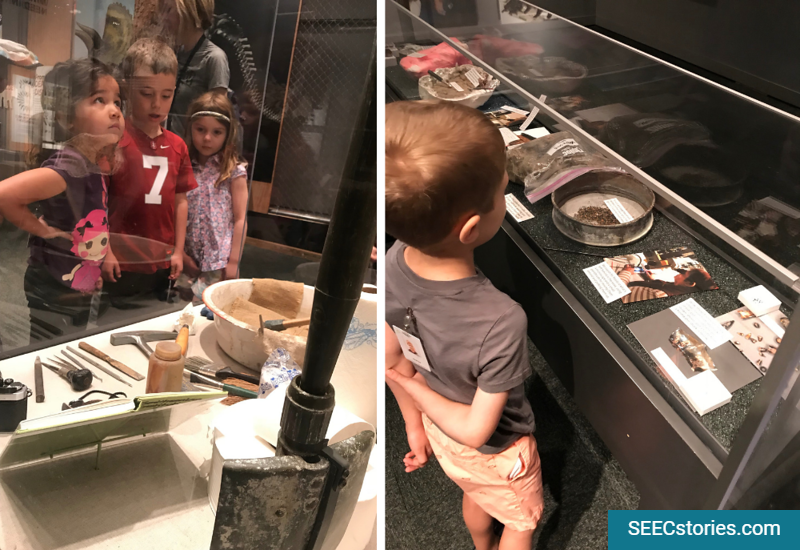
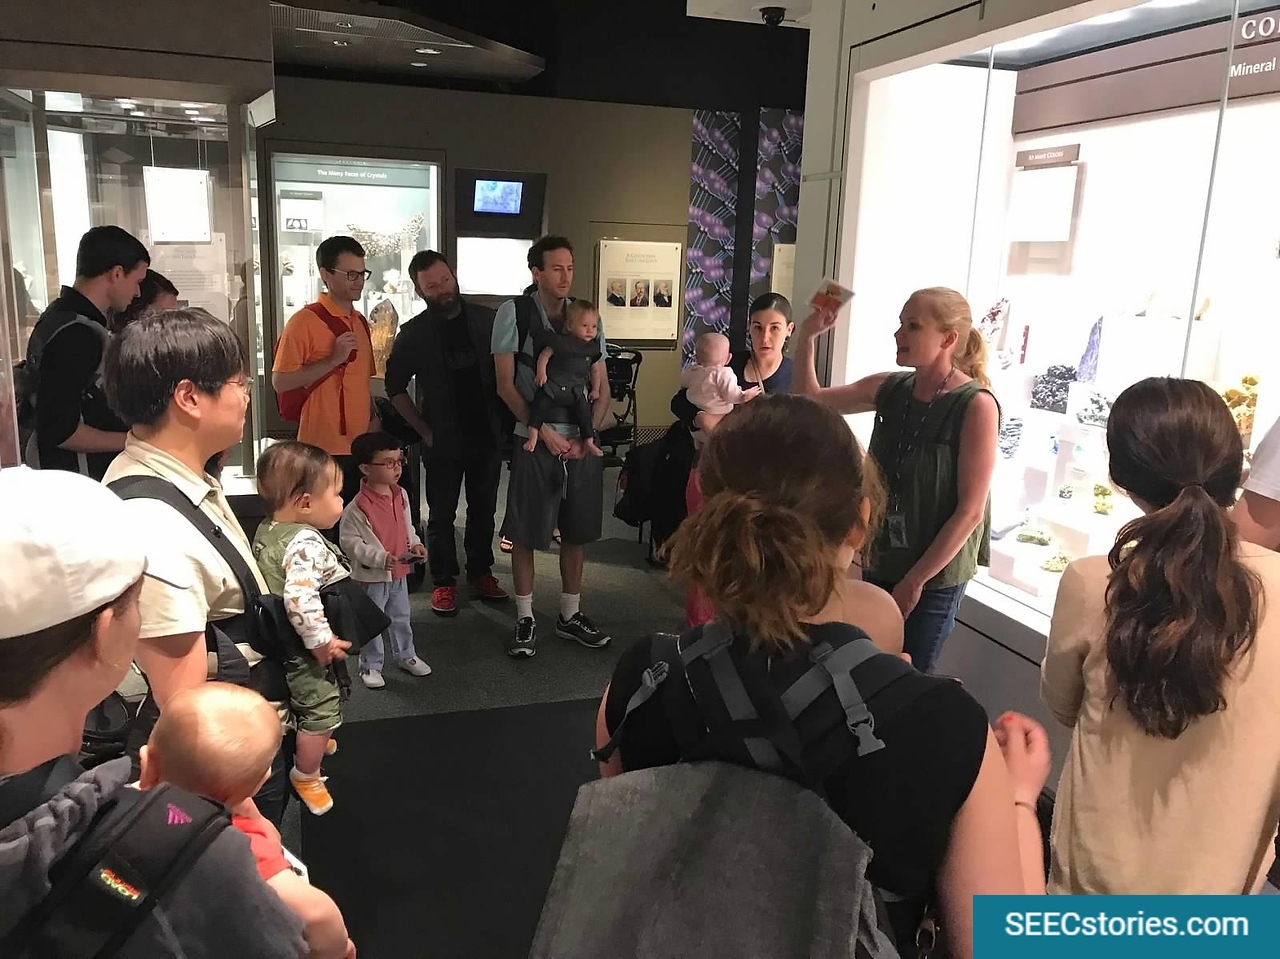
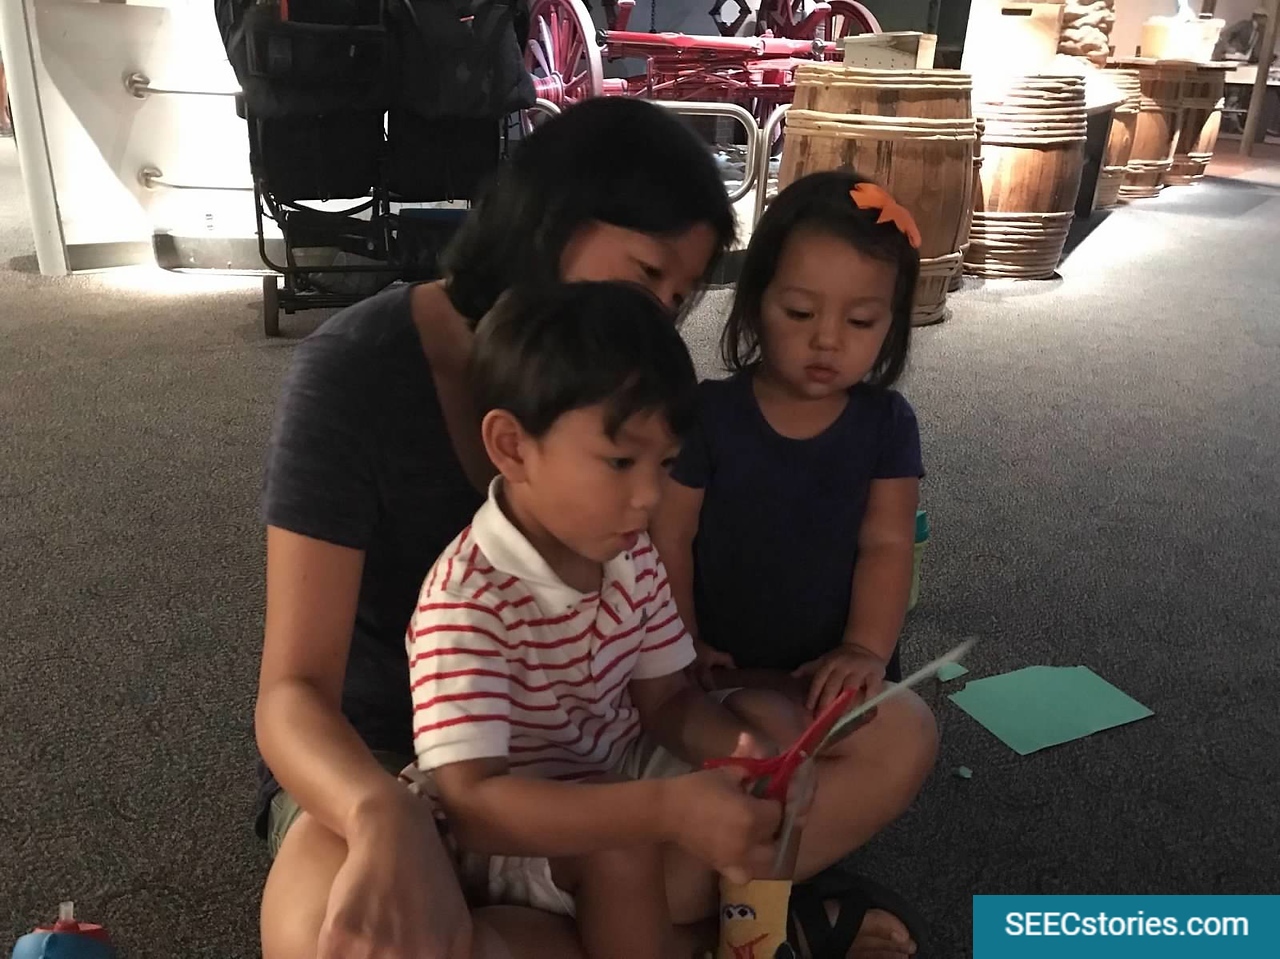
The objective of this lesson was to deepen the understanding of what a paleontologist does on a dig, and what tools and procedures are used. We used the pictures hanging up in the exhibit to support what we were talking about, and to help the children think about what was needed for the dig. We also used the objects on display to talk about the materials needed and how they were used, supporting this with objects passed around for the children to see and hold. Doing this, we not only reinforced information from a previous lesson, but we also prepared the children for their own miniature dig in the museum.

Children looking at tools used to dig for dinosaur bones
Next, they did more careful looking at exhibit cases display tools that paleontologists use. The children excitedly called out what they saw, and Cathryn read the label for them to glean more information.
Children sitting in a circle looking at archaeology tools
After careful looking and making observations, the class sat down to talk more about what paleontologists do, and how they get a dinosaur to the museum and on display. They named tools that paleontologists need and Cathryn brought out a version of each tool they named. Next, brought out a Lego model of a dinosaur hall that might be in a museum. She explained that to find out how the dinosaurs get to the museum, they must go back in time to when the paleontologists began their dig.
Children wearing googles pretended to excavate
The children all donned goggles to protect their eyes, and got to work on a dig. One child used a chisel and hammer to scrap off the “hard top layer”.
Children sitting in a circle around a pan filled with dirt and dinosaur bones
Next, the children got to work using the tools to uncover what was buried beneath the ground. They were excited as the found what the believed to be dinosaur skeletons. Sharon asked how they could tell what kind of dinosaur it was, and the children responded that they should look at the heads and neck.

Something that surprised us during the lesson was how the children really took turns and then worked together on the “dig site” in the museum space. Sometimes they get so excited about an activity that it can be hard for them to be patient and wait their turn.

Children sitting in a circle listening to a book about dinosaurs
To learn what happens next, Sharon read the book How the Dinosaur Got to the Museum by Jessie Hartland.  The story follows the journey of a Diplodocus, discovered in Utah in 1923 and its journey to the National Museum of Natural History. The children were impressed to see the numerous people involved in getting the Diplodocus from the ground to the exhibit hall. They also were shocked to hear that it took seven years for the Diplodocus bones to be assembled in the gallery.

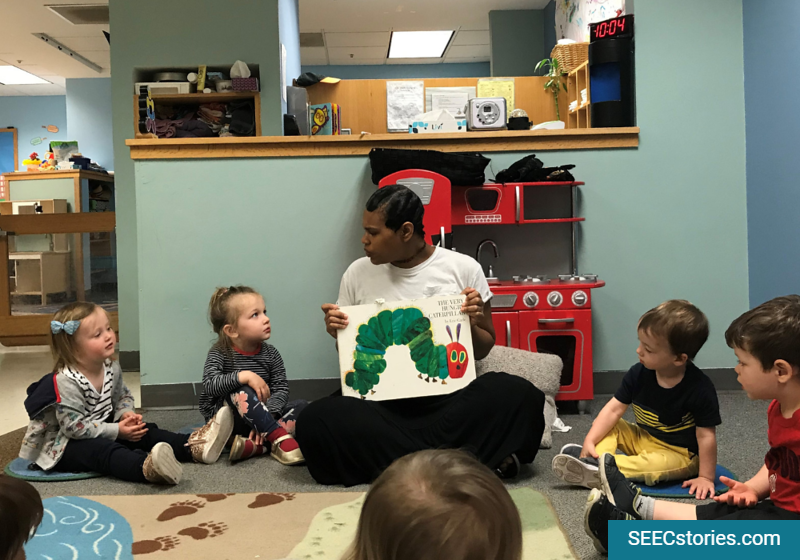
The most ineffective part of our lesson was most likely the read aloud. Even though it explained the process of getting the dinosaur bones from the discovery part to the display in the museum, and all the people involved in the process, it was rather long and made our lesson longer. By the time we finished the story, the children had been sitting for some time. However, this was okay because we  already talked about the process so much and the people involved, that it was a way to reinforce what we were teaching.  Even though the read aloud was very long, we were still surprised at how well they stayed engaged and listening.

Children looking at and holding pretend dinosaur bones
The children noticed that some of the bones were hard to tell exactly what they were. Sharon reminded the class that it took seven years to put the Diplodocus together, and while it might not take seven years to put the puzzle together, it might take them longer than the time they had in the museum. The group was reassured that they could continue work back in the classroom.

In the beginning, when putting the puzzle together, the children were super excited, but that soon faded when they were trying to figure out which piece went where. Again this was okay, because they did try and got pretty far with it. Eventually they just lost interest.

Children playing with legos and toy dinosaurs
That afternoon the children continued to work together to put the skeleton together. They also used Legos and plastic dinosaurs to create their own dinosaur exhibit hall.

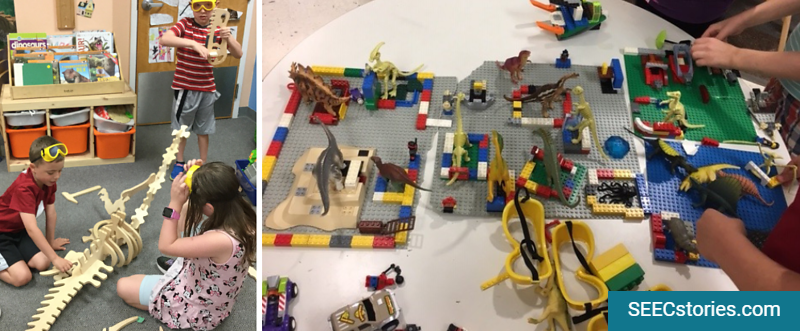
Later in the classroom, we left the section of the museum for the children to play with. On their own they created several additional sections of the museum using Legos, dinosaurs and some blocks. It took up the entire table and throughout the week there were more additions. Written labels the children made to identify objects, for example, and more “tourists” made from Legos were added to see the “exhibit.” It was awesome!


After exploring dinosaurs it was time for our kindergartners to graduate! For more dinosaur ideas, visit our dinosaur Pinterest board.

How Books Help Young Children Develop From Head to Toe

“How Books Help Young Children Develop From Head to Toe” was originally published on November 19, 2017. We are posting it in celebration of our up coming professional development workshop Emergent Literacy using Objects on November 21, 2019.


This week’s blog is written by Melinda Bernsdorf. Melinda has been working in the classroom with toddlers and twos for a decade and strongly believes in the magic of a good book. She studied Developmental Psychology and Learning at St. Joseph’s University and was an educator at SEEC from 2014 – 2018. When traveling, she always brings home a children’s book (or two!) to add to her library. For this blog, she drew on her experiences as a toddler teacher to write about books and how they can help children develop physical skills. 

SEECstories.com (1)

Children’s literature is so fantastic with funny stories, catchy rhyme schemes, and interesting information presented in novel ways. Educators and researchers often praise children’s books, citing their importance in supporting vocabulary development, but children’s books can also meet developmental needs of infants and toddlers beyond language acquisition. These other developmental domains, such as motor skills, are often overlooked when talking about the importance of providing literature to young children. Although it may seem counterintuitive, when young children engage with books, they are also engaging their bodies in ways that help them grow physically.

SEECstories.com (2)When our toddlers begin the school year, they devote a lot of their resources to the development of their emerging physical skills. It takes a lot of energy and hard work to figure out the complex series of muscle movements needed to walk, climb the stairs, hold a peer’s hand, or interact physically with another toddler. In one of our toddler classes, we used Eric Carle’s From Head to Toe as a platform for our students to work on these physical skills in meaningful and enjoyable ways while also integrating vocabulary and early literacy skills in our lessons. Our class was so inspired by this book, that we decided to create a unit that focused on body movement and used the book as jumping off point.

SEECstories.com (4)
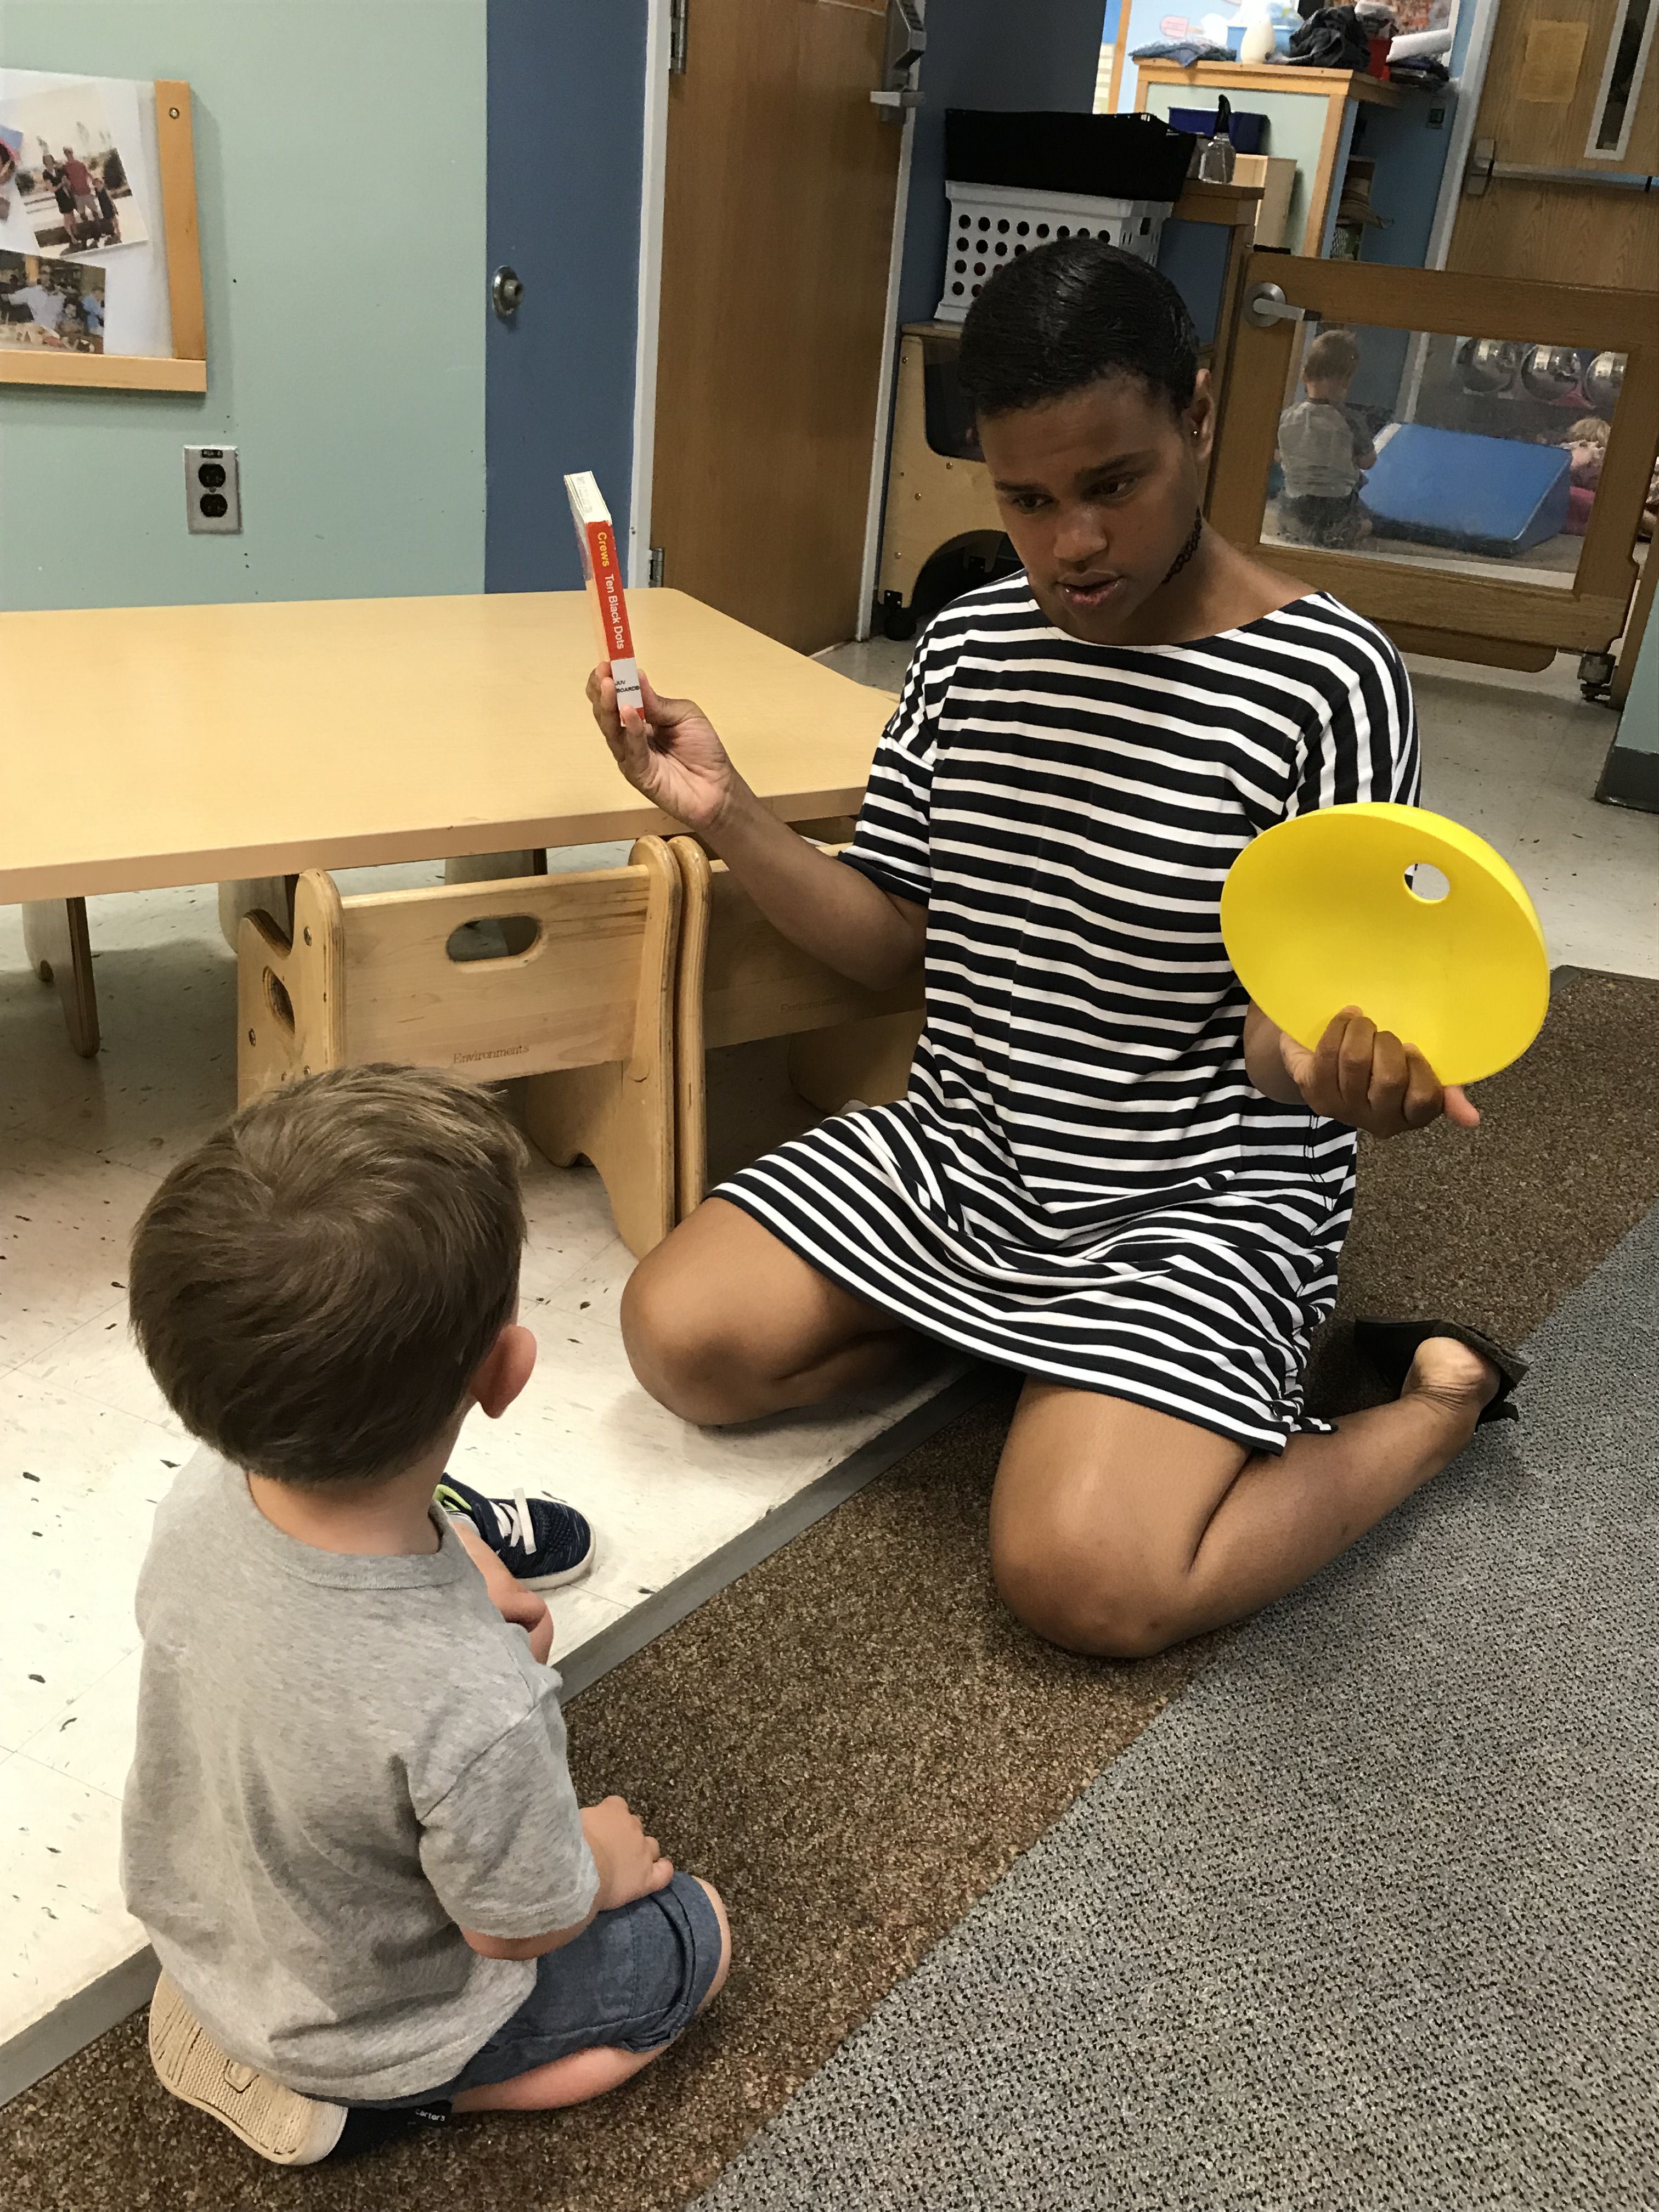
Toddlers are intrinsically drawn to the repetition of a familiar and beloved book. Their interest in multiple exposures provides opportunities to increase their knowledge and contextual understanding of the new vocabulary. Additionally, these multiple exposures allow children to mirror and repeatedly practice movements depicted in the images of the book. Often these movements link directly to physical skills that toddlers are working on mastering. The book, From Head To Toe, was a great fit for developing physical skills because of its simple, repetitive narrative that drew in our students, and for its playful directives that allowed each child to practice moving their individual body parts like each animal. We decided to create a unit using From Head To Toe that focused on one body part each week. Using the book as a starting off point, we were able to explore how we can use our arms and hands, legs and feet, and head and neck.

SEECstories.com (5)First, we set up the room to give our students many opportunities to freely play and explore the book and concepts we were covering. We had copies of the board book on the bookshelf and a bulletin board showing each animal. We moved the climber directly below the bulletin board to both give them access to the board, enticing them to practice physically going up and down the stairs, and to encourage them to extend their hands to touch the pictures.

SEECstories.com (6)During circle time, our toddlers held photographs of animals’ feet, legs, knees, and toes, as they were encouraged to bend their own knees, wiggle their own toes, and kick their own feet. They gained mastery over their actions in a controlled manner, while also increasing their ability to sit in one place for an extended period. This helped them to expand their capability to focus on one thing, which is very different kind of physical work for toddlers.

SEECstories.com (7)In our classroom, we invited our students to continue using their arms and hands in meaningful ways with art activities and sensory choices that connected to From Head to Toe. They loved waving their arms like a monkey while throwing the paper packing material in the air!

SEECstories.com (8)We did not just focus on gross motor movements, but spent time finding, identifying, and moving our facial features. We also practiced the small muscle movements that are involved in communication by smiling, frowning, and using our mouths to form different sounds.

SEECstories.com (9)
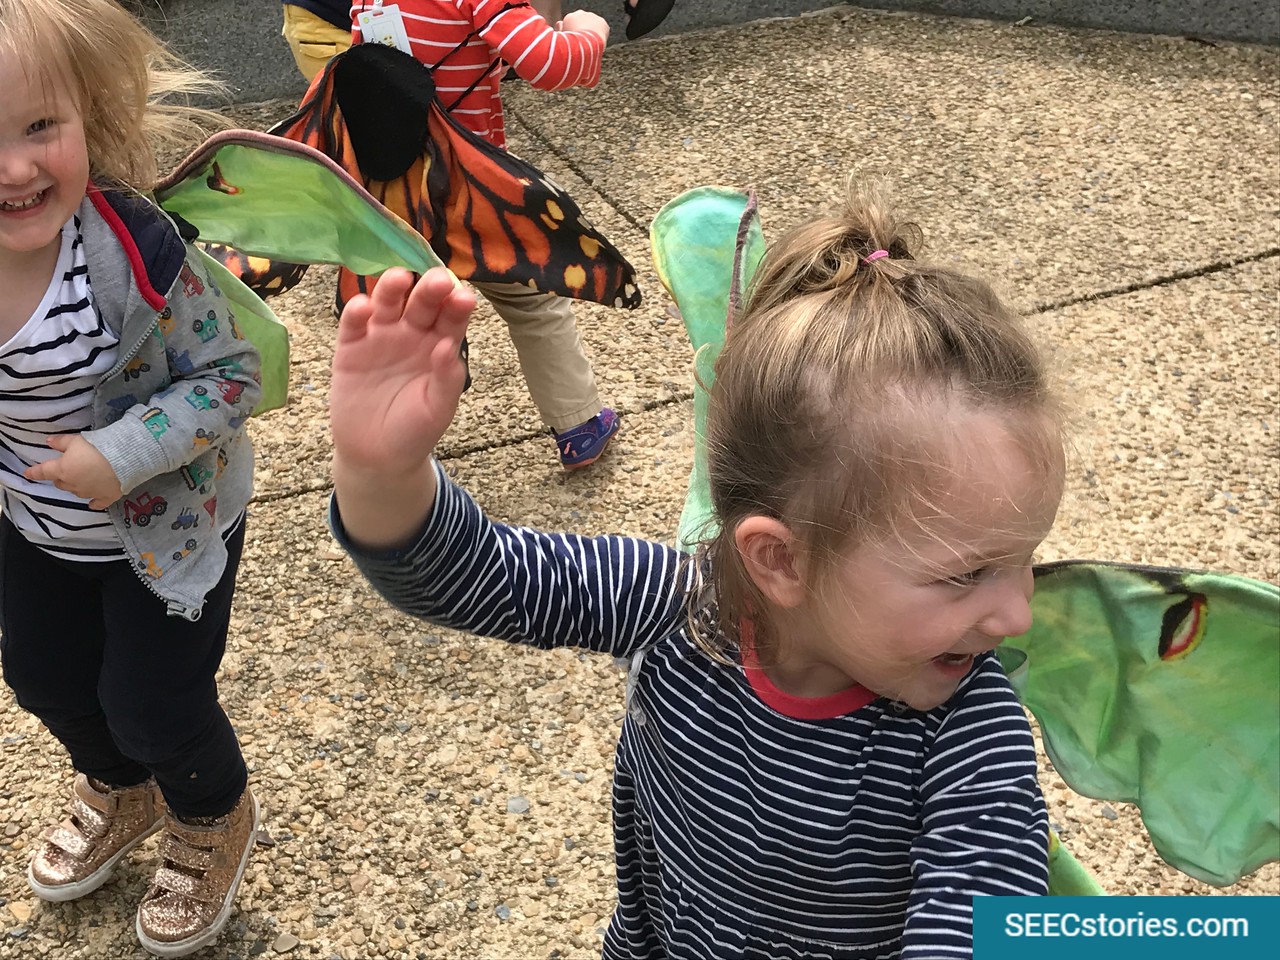
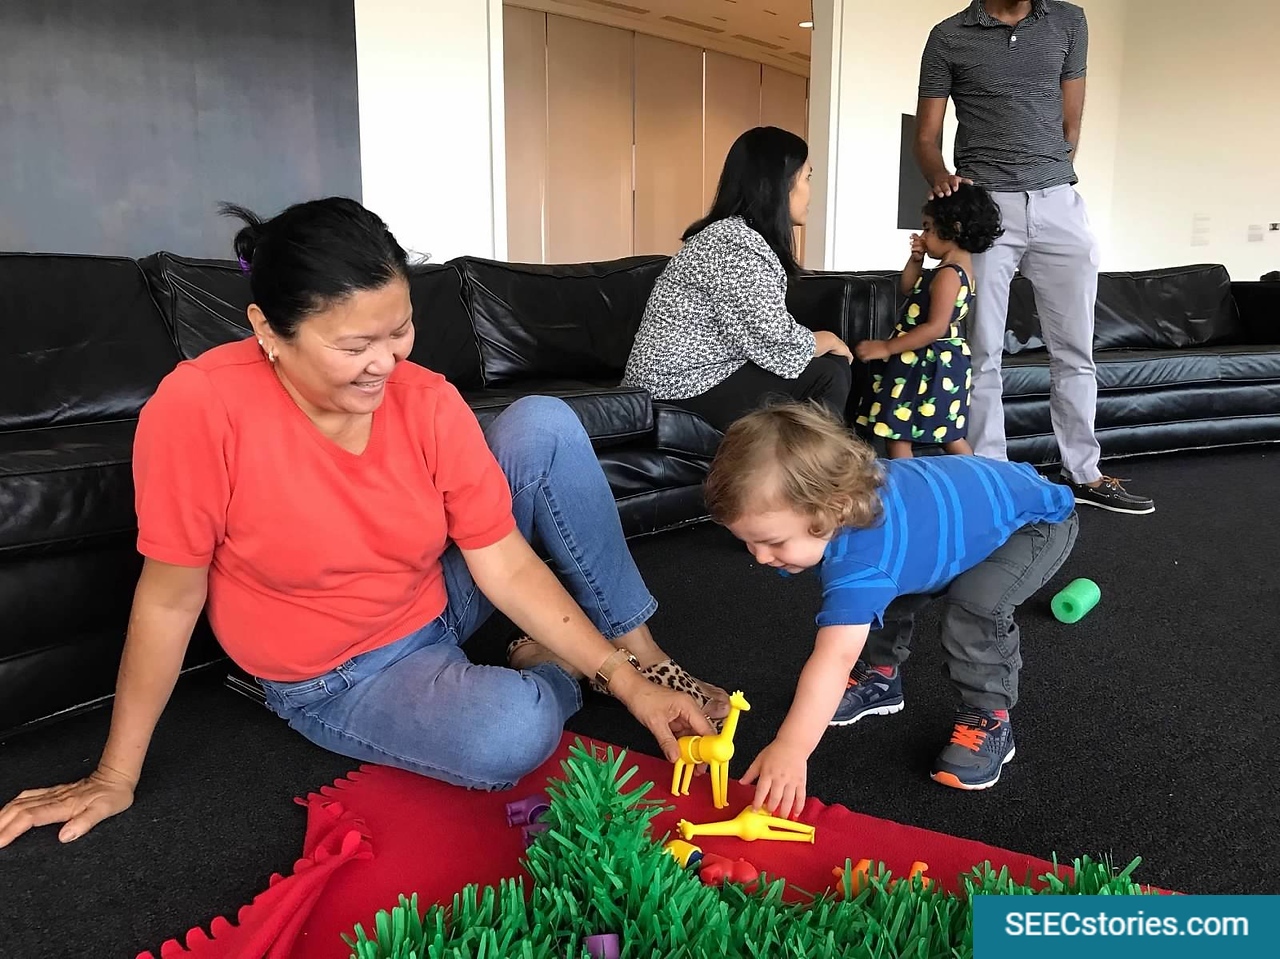
We also brought the book into the museum, stomping our feet alongside an elephant, clapping our hands next to a seal, and bending our necks with a giraffe.

SEECstories.comAcross these lessons and experiences, the constant was Eric Carle’s book. We referred back to the work, over and over again, not only because our students loved it and asked for it (which they did!), but because we could offer them the chance to work on the difficult physical tasks of developing new motor skills, without asking them to shift their attention and devote resources to a new topic of exploration. By choosing an age-appropriate, well loved book, we were able to extend our students’ focus, offering them meaningful learning opportunities in multiple disciplines while they were engaged and having fun. We allowed them to do the hard, physical work of being a toddler in a way that was exciting, enticing, and very enjoyable.

Interested in learning more about literacy and young children? Check out our upcoming seminar Emergent Literacy Using Objects.  

Looking for other books that help young children practice their emerging physical skills, check these out: 

What Makes a Preschool Successful?

Children sitting in a circle around a pretend fire made out of fabric and cardboard. Trying to get warm

As is often the case I was scrolling through SEEC’s Twitter feed one morning on the metro and I came across an article from Scientific American entitled, How to Prime Preschoolers for Success. The article focuses on a few key points:

Preschools should focus less on memorization of letters and numbers.

Conversations build language skills and that aids in future academic achievement.

Programs that support executive functioning skills like multi-tasking, impulse control, and focus also support children academically and socially.

I am always looking for articles that reflect our practice, but truth be told it can often be difficult because of our unique setting. In fact, even after working at SEEC for seven years I often find it difficult to articulate to those who aren’t in early childhood what SEEC does and why it’s so valuable to young children. This article really spoke to me and got me excited about how well aligned our approach is to the research.

Playfulness

The article highlights Tools of the Mind  a curriculum that, in preschool, centers around play.

In a Tools PreK classroom, a play theme unifies the room. The year begins with adaptable play themes close to children’s lives, and over the course of the year, as children’s levels of make-believe play, self-regulation and executive functions develop, the play themes develop as well.

Researchers who have studied Tools suggest that children performed better on executive function tasks than those in schools who did not use it. The research suggests that these results were likely tied to the fact that children are able to play and therefore, have to plan (in fact, with Tools they actually formally plan their play), collaborate, and problem-solve. And in addition to practicing these important skills, the play itself is innately interesting to a child and therefore, they are more engaged.

At SEEC, we think similarly about play and engagement. Our faculty finds creative ways to incorporate play in museum settings. For toddlers, we may bring toy airplanes to accompany us on a trip to the National Air and Space Museum. For preschoolers, we may pretend to build a campfire in front of a painting that looks like a good campsite.

Choice

Teacher showing a child a toy and a book

The article talks about the importance of choice noting a 2018 study from the Journal of Applied Developmental Psychology that suggests a correlation between autonomy and executive function skills. While SEEC does not utilize the Montessori-style activities as referenced in the article, we do think choice is extremely important. In fact, we follow an emergent curriculum and observe the children in play and conversation, using these interactions as to inspire classroom themes and activities. It is also part of our daily routines, faculty empower students to make personal choices and gain independence in their self-care. And though we often work on a tight schedule because of our museum model, we emphasize choice as much as possible in other areas, like art-making, play, and in the formation of classroom rules and routines.

Conversation

Perhaps the part of the article that was most exciting was its insight into the importance of conversations:

“…a higher quality and quantity of children’s turn-taking conversations helps them build their oral language skills, laying a foundation for reading and writing.”

Teacher crouching down to talk to children sitting on the floor

Conversation is one of the cornerstones of our practice. Even with our infants, you will observe faculty engaging in conversation. They do not simply speak at them, they watch for clues and respond to infants and toddlers in a respectful way that builds their understanding of vocabulary and concepts.  By preschool, we see children having turn-taking conversations in the classroom and the museum. Many of our faculty members employ modified thinking routines from Project Zero or looking strategies commonly used in museum education. It is during these conversations that we observe children not only using language skills, but also practicing focus and self-regulation. Because they are also actively involved in the conversations (i.e. truly be listened to and shaping the conversation itself) they are naturally more engaged and likely to learn.

This type of rich conversation doesn’t have to take place in museums only. Educators can do this through dialogic reading, the use of objects in the classroom, the natural environment or by using museum resources. In fact, this combination of book, object, and visual can be highly effective. But as the article mentions, educators need to be trained to be effective. Its not always easy allowing for   autonomy while also supporting a calm environment in which children can be heard.

Conclusion

As our understanding of teaching and learning grows, I hope that preschools will move away from models focused strictly on rote memorization.  At SEEC, we hope to help educators see how they can support rich learning environments in and out of the classroom while allowing for choice and play. Reciting your ABC’s and counting to 10 are important skills for preschoolers, but with the properly trained educators we can help plant the seeds for children who will be successful leaders, collaborators, and problem-solvers.

Take Your Baby to a Museum! It will be awesome!

New addition to the family and desperate to get out? Why not grab your infant carrier and take your baby to a museum? Museums are quiet, climate controlled, and full of visual stimuli for you and baby to explore. And now, more and more museums are specifically catering to this audience. Our neighbors on the National Mall are becoming more and more family friendly. A great way to find out about family friendly events is to visit the Smithsonian’s event calendar and select the Kids and Family category.

You don’t need a special event to visit with your baby though. Below, you’ll find reasons why we think exploring a museum with your baby is awesome and our suggestions on how to have a successful visit with your youngest family member.

The Why

  1. It’s Quiet

Museums are quiet. Sometimes quieter than your home which will translate to a calm soothing environment for you and baby.

Mother holding her child. The child pointing to a picture of a painting
  1. Brain Stimulation

This is a great place for you both to learn. For adults, you are able to read exhibit labels and increase your visual literacy. For babies, a museum provides an opportunity to receive great visual stimulation from the objects while also learning to adapt to new environments. In addition, they are also building vocabulary as you describe what they are seeing (more details below).

  1. Lots of Places to Sit

There are usually lots of places for you and baby to sit and take a break. If a museum doesn’t have many benches, they will often provide gallery stools (just ask at reception). Take baby out of the carrier or stroller and find a spot to sit and spend some time looking at the art.

Father and daughter looking up at lights
  1. Free

If you live in or near D.C., museums are free. This means you can spend as much or as little time in the museum as you want. There is no need to feel guilty if you only last 20 minutes. Talk about budget friendly!

  1. Temperature Controlled

The temperature in a museum is always just right. Summers and winters are brutal and often limit a new parent’s ability to organize an outing with their child. Museums offer large temperature-controlled environments for you and baby to shed layers on cold days or to cool down during hot summer weather.

  1. Food and Coffee

Museums are one stop shops. There is usually a café attached  so you don’t have to transition or travel to a new space for a beverage or a meal.

Museums offer lots of space for movement. Babies like to be on the go and museum galleries are great places for a stroll while you both are also actively learning and looking. You could also park the stroller and lay out a blanket to allow baby to get in some tummy time near an exciting object in the gallery. If you are not feeling comfortable doing this in the gallery, try starting in a common space like a courtyard or in the lobby. The National Portrait Gallery and Smithsonian American Art Museum have a wonderful space for this type of activity in their sunny covered central lobby.

The How

Parents standing next to a statue of a giant blue rooster
  1. Pick the Right Museum

When possible, start by visiting a museum with which you are familiar and comfortable. Being able to navigate the space easily will reduce the stress of taking your baby out on this type of adventure for the first time. Knowing the width of hallways and where the elevators are located will enable you to relax and enjoy exploring this new environment. In addition, it is important to choose a collection that is engaging for both you and your child. A museum of miniatures might be great for a solo adult visit, but would probably be too small for your baby’s field of vision. We recommend galleries with large graphic objects for babies.

  1. Make it Social

Grab another caregiver  to join you on your visit. This will allow your babies to have new social interactions and provide you time to hit a short pause on the baby talk and also enjoy some adult conversations.

  1. Set Up a Timeline

Plan to visit the museum during a time you think you and your child might enjoy it the most. Even if your child ends up sleeping through the whole event, they are still absorbing  the environment and learning from that experience.

Parents standing in a circle listening to a teacher talk
  1. Let Go (Babies make sounds, it’s ok!)

While museums prefer that sound is kept to a level that allows all patrons enjoy the objects, this does not mean that visitors need to be silent.  Patrons and museum staff understand that babies make sounds, and may get upset and cry. It’s ok! Try not to spend the whole time worrying about it. Instead, understand their coos and chirps as part of your ongoing dialogue as you explore the galleries.

  1. Narrate to Baby

This is a great habit to incorporate throughout your daily routine, but especially in the museum. Babies may not be able to respond with words, but your new baby is listening and picking up language and verbal skills from your dialogue. Since babies’ eyes may not yet be able to see all the sharp details of the objects, it is important to describe the works so you can help them better “visualize” the museum’s collection.

Parents standing in a circle looking down at a series of colored squares aligned on the floor
  1. Bring Hands on Materials

To enable children to develop deeper connections with what they are seeing, bring something along that relates to the object, with which they can interact. For example, if you are going to a natural history museum bring along some faux fur or snake skin so that they can touch these materials while observing the creatures in the animal hall. This allows the object to come “out from behind the glass” and interact with the child.

  1. Attend a Baby Museum Class

Not ready to head out on your own? Try joining a baby in museum program at a local museum. If you’re in D.C., check out SEEC’s Bring Your Own Baby infant program: here . During this guided visit you’ll join other families with new babies and explore the galleries with an engaging and supportive educator. By the end you’ll feel excited and empowered to take independent museum explorations with your baby!

Teacher Feature: Toddlers Explore Butterflies

This week’s teacher feature shows how one of SEEC’s toddlers classes explored caterpillars and butterflies by reading books, looking at sculptures in the Smithsonian Pollinator Garden, and pretending to be butterflies by wearing wings and flapping arms. Below you will find images from the lesson as well as reflections from the educators, Nuriya Gavin, Stephanie Lopez, and Julia Smith. 

Teacher and children looking at butterflies

Preparation:

We were transitioning from a unit on construction and building to a unit on animals. A couple of weeks before this lesson, we had explored the idea that animals build different types of homes for themselves. For our lesson, we explored butterflies and talked about the process of a caterpillar building a chrysalis and becoming a butterfly.

Children playing with blocks. Children looking at a diorama of a house. A child wearing a construction vest and safety googles
Before learning about bug homes, the class had been exploring architecture and buildings. They visited the National Building Museum, the Dolls’ House at the National Museum of American History, and Are Years What? (for Marianne Moore) by Mark di Suvero at the Hirshhorn Museum and Sculpture Garden where they learned about principals of engineering.

In addition to connecting to the idea of animals as builders, we were drawn to learning about bugs and insects because the weather had been getting warmer and we were seeing more bugs out. We started eating snack outside and would see ants and other bugs as we ate. The children were also fascinated by the worms and grubs they dug up in the dirt box on the playground.

Children sitting in a circle listening to "The Very Hungry Caterpillar" being read
To start the lesson, toddler Educator, Nuriya Gavin, held a morning circle where she introduced the topic and read “The Very Hungry Caterpillar” by Eric Carle. 

For objectives, we were hoping to show the children that some animals and bugs build homes by focusing on the caterpillar building a chrysalis. We wanted to introduce children to the life stages of the butterfly and help them to gain an understanding that even though the caterpillar, chrysalis, and butterfly all look different, they are the same organism. Lastly, we wanted for our class to experience an outdoor butterfly habitat and have the opportunity to hunt for bugs while outside.

Lesson Implementation:

Children sitting and standing in a circle pretending to be caterpillars and butterflies
In addition to reading the book, Nuriya led the class in flapping their arms like a butterfly and passed around butterfly puppets and toy butterfly replicas for the children to hold and explore.

As a toddler class, we keep our circle times short but engaging. We typically start by asking the children what they already know about the topic we are going to explore. Then we will give them some new information usually using a book or video. In this instance, we talked about the bugs we were already familiar with and liked hunting for before turning our attention to butterflies. We discussed butterflies as we read The Very Hungry Caterpillar by Eric Carle. We picked this book because of its big format and interactive design. We had butterfly puppets which we used to demonstrate how a butterfly moves. Knowing that some of our children get nervous around flying bugs, we wanted to give our children the opportunity to explore the toy butterflies before experiencing the real thing. To finish the circle time, we gave the children a chance to move their bodies and flap their arms like wings.

Teachers and children looking at a chrysalis
The class gathered around sculptures of a caterpillar, chrysalis, and butterfly which are part of HABITAT, a Smithsonian-wide exhibition. The caterpillar, chrysalis, butterfly sculptures are featured in the Bug B & B exhibit.

For our museum outing, we chose to visit the wooden sculptures that are part of the new HABITAT installation. These caterpillar, chrysalis, and butterfly sculptures happen to be in the Pollinator Garden which is an area that we frequent. We often walk through the garden on our way to other visits and take the opportunity to check out the flowers and watch them grow, as well as look for bugs such as bumblebees. We noticed the new installation popping up around the Smithsonian museums and the National Mall. We were excited to make use of the new sculptures and very happy that we could tie it right in with our lessons!

Children pretending to be butterflies, while wearing wings
Educators, Nuriya, Stephanie, and Julia, found a safe space near the sculptures in the Pollinator Garden where the children could engage in free play. While playing, some children began crawling like a caterpillar which inspired the educators to encourage the children to pretend to make a chrysalis and then to emerge from that chrysalis as a butterfly.

In general, when we approach objects, we let the children look at them and explore them individually at first before explaining the purpose of our visit. This allows the children to form their own ideas and experience a deeper understanding. In this case, when we let the children look at the wooden sculptures of the butterfly, caterpillar, and chrysalis, it triggered their imagination. They began flapping their arms like wings which reinforced the simple but important concepts that butterflies have wings, that they can fly, and that the movement of the wings is called flapping.

We encouraged the children to flap their arms like wings because from a practical point of view the children in our class can only sit or stand quietly for so long before they really need to move their bodies. So, we found a nice contained space within the garden where the children could continue pretending to be butterflies. Children this age need very concrete reminders of their physical boundaries. The stone bench that encircled this area was perfect for defining boundaries and freed us to engage even more actively in the play because we didn’t have to worry about the children running off.

We found it useful to both observe and actively join in on play. Sometimes watching gives us a better idea of what children are thinking as they play. For example, Julia watched the children starting to crawl along the benches pretending to be caterpillars. As she watched, she thought that they might be interested in exploring how a caterpillar becomes a butterfly so she pretended to curl up into a chrysalis and burst out like a butterfly. This was the perfect way to teach the children about one of our more complicated subjects – the idea that the caterpillar, chrysalis, and butterfly are all the same organism. Pretending to be the caterpillar, then forming the chrysalis, and finally emerging as a butterfly helped the children to realize that it was the same animal going through different stages. Since the children were partaking in free play, Julia opted to jump right into the play by physically pretending to be a caterpillar going through a metamorphosis. She provided the example and the children were able to decide if they wanted to join in going through the stages or if they wanted to continue with their free play.

Reflection:

Toddlers playing outside pretending to be butterflies while wearing fake wings
Children were free to play and engage with the materials in whatever ways they wanted. While some children chose to partake in the metamorphosis game, others watched, others continued to play by themselves, and some went back and forth between the group game and individual play.

To follow up this lesson, we continued to learn about different bugs. When we learned about worms, we talked about how caterpillars and worms are different because worms don’t have legs. While playing with model magic, some of the children decided that they wanted to make caterpillars, so we talked about how caterpillars move. Since they had many questions and   seemed curious, we watched a few videos showing caterpillars moving, eating and transforming into a chrysalis and butterfly.

Children outdoors looking at a leaf
The educators unexpectedly found milkweed on the way to the sculptures. While this was not part of the planned lesson, they stopped to talk about the relationship between the monarch butterfly and milkweed.

For other teachers trying out this lesson, we recommend really thinking about physical outdoor spaces that you could use for free play. We don’t think our lesson would have gone as well if we hadn’t had a safe space to allow the kids to play for a long time. In a more open environment, we would likely have cut the play much shorter as the kids got more excited and wanted to run and spread out. Play always works best when everyone, children and teachers, are comfortable.

Toddlers sitting in a circle looking at different spiders
After the lesson, the toddlers continued to explore bugs. For one visit they went to the National Museum of Natural History’s O. Orkin Insect Zoo’s tarantula feeding.

If we had the opportunity to do this lesson over again, we would have incorporated the milkweed that we saw in the pollinator garden and tied it into the lesson plan more thoughtfully. We could have spent some time talking about monarch butterflies and exploring their unique relationship with the milkweed plant. It also would have been nice if we had seen more actual butterflies or caterpillars, but that is harder to plan.

10 Ways to Make Transitions Easier for You and Your Child

i-NvxPVnr-X2

Mealtime, ending play time, leaving school, going to bed, these are just a few of the many of transitions your child works through every day. Transitions can be difficult for young children whose brains are still maturing – they haven’t developed the type of self control that adults have. To make matters worse, a child’s day is often dictated by factors that have little meaning to a child. Why does it matter if you have to be at a meeting or their big brother needs to be picked up?  Tensions between adults and children quickly arise and often a power struggle results.  Fear not, here a few SEEC-proven strategies to make transitions easier for everyone!

Visual Schedule and Calendars

Calendar time is often an important component of early childhood classrooms. Children take turns serving as the calendar helper, often sharing information with the class about birthdays or special events. Similarly, most classrooms will also have a visual representation of their day.  Visual schedules in the classroom and at home help give children autonomy, provide them with a sense of time and routine, and it can eliminate having to repeat yourself. It helps to make the calendar with your child so that he or she is invested in it. Let the child choose colors, decorations, or the location.  A schedule enables children to take ownership and is a great way to prepare them for any changes to their normal routine.

i-2QbFfn4-X2

“Give Me Five”

Early childhood educators around the world will use the phrase “Give me five.” We might ask them to hold up five fingers or to literally say “five.”  For younger children, an educator might simply hold up their hand while they get on the child’s level and try to make eye contact. This ensures that they pause what they are doing and take in the fact that their current activity is about to conclude. After “five” we may also give them “two: and when time has ended we may ring a gentle bell or sing a song. Either way, this helps alert them that their activity will be ending soon, and we will be moving on to the next part of our day.

Timers

Since time is not a concrete concept to young children, visual timers are a great way to help a child see the passing of time. Sand timers come in all different lengths and are a favorite in the SEEC classrooms. These show the children when time is up and helps to keep adults and children honest about deadlines. If children can see the change coming, they can more easily transition to the next activity.

Routine

Having a routine is essential for a child. If they can usually count on things happening in a specific order, they are less likely to be upset.  A routine can be especially important for drop-offs. We find that the most successful drop-offs occur when the child has been prepared and knows the routine. This routine could include the adult helping the child put items in their cubby and then reading one book or drawing one picture together before leaving. Staying longer or changing the routine actually makes the transition harder. Sticking with the plan allows your child to recover from the separation quicker and over time will make transitions a breeze!

i-t3czXhf-X2.jpg

Save It

If a child is still playing, building, or creating when it is time to move on to the next activity, offer to save what they are working on. Part of the anxiety of transitioning occurs when children think their masterpiece will be destroyed. When possible offer to save their creation – you may even want to create a special place projects that are still “under construction.”


i-DrfvV9w-X2

Don’t Start What We Can’t Finish

Sometimes, there is just not time to squeeze something extra into an already packed schedule. Leaving something fun just as a child gets started can cause them to feel frustrated and angry. That being said, not doing something they want to do can be equally as frustrating. If you have to say no, give the child a choice of two things they could do instead. With older children, you can think together about a time when you might be able to return to the activity. Maybe there will be more time tomorrow to paint – just make sure that you follow up.

Ease Into It

We try not to create drastic changes in energy levels between activities. For example, we don’t have playground time directly before nap, instead we have lunch, quiet story time, and then nap. This helps children slowly decrease their energy level and relax, making the transitions feel less severe. Its always good to avoid getting the kiddos wound up just before bed time.

Songs and Lighting

We often use songs and lights to help children through transitions. When it is time to stop playing, we will sing the clean-up song, and when it is time to eat we will sing “Open-Shut them.” As we transition from lunch to nap, we may dim the lights while the children finish their meal and turn on the nap time music.  This provides a physical reminder that a change of activities is coming and helps them mentally prepare to rest.

i-tpxkRZd-X2

Participate in the Transition

Having the children help clean up, set the table, etc. allows them to be an active member of the transition. Participating in the transition usually makes them more interested in the next move and thus, more willing to go along with it.


How do transitions go in your house? Have a great way to help your child change from activity to activity? Please share!


SEEC SHARES: Kicking Off the New Year

It being September, it seemed like a perfect time to examine how our faculty is transitioning into the new year. Like most classrooms, SEEC is busy getting to know their new students and families, and helping children get accustomed to new routines and expectations. I hope you enjoy reading about some of their unique approaches.

Getting to Know Each Other

3
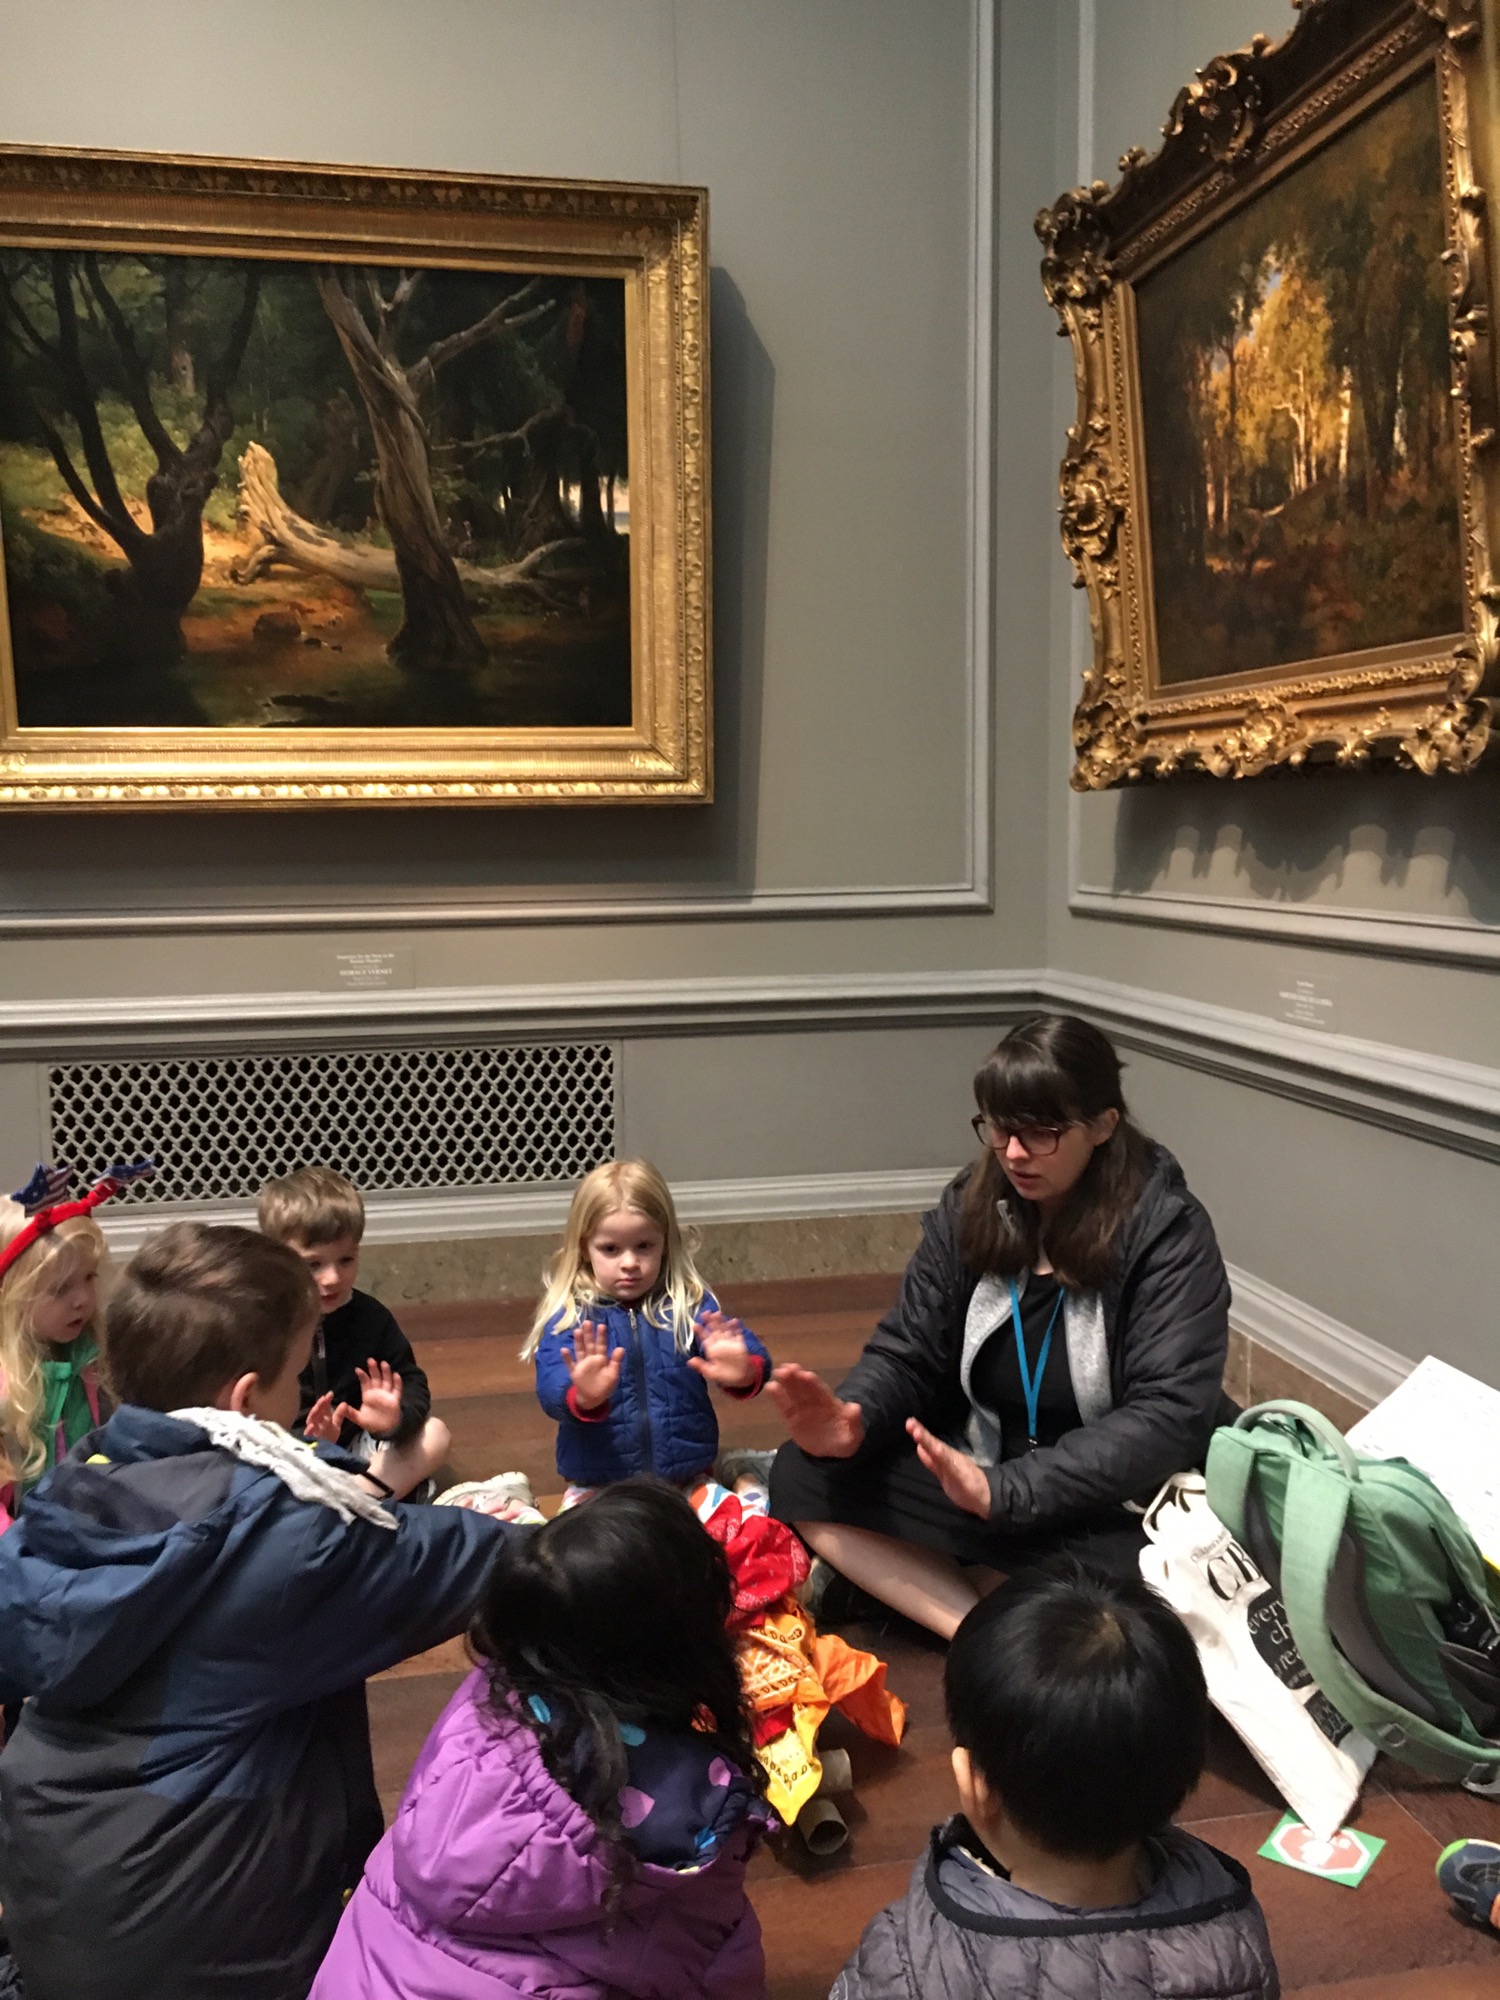
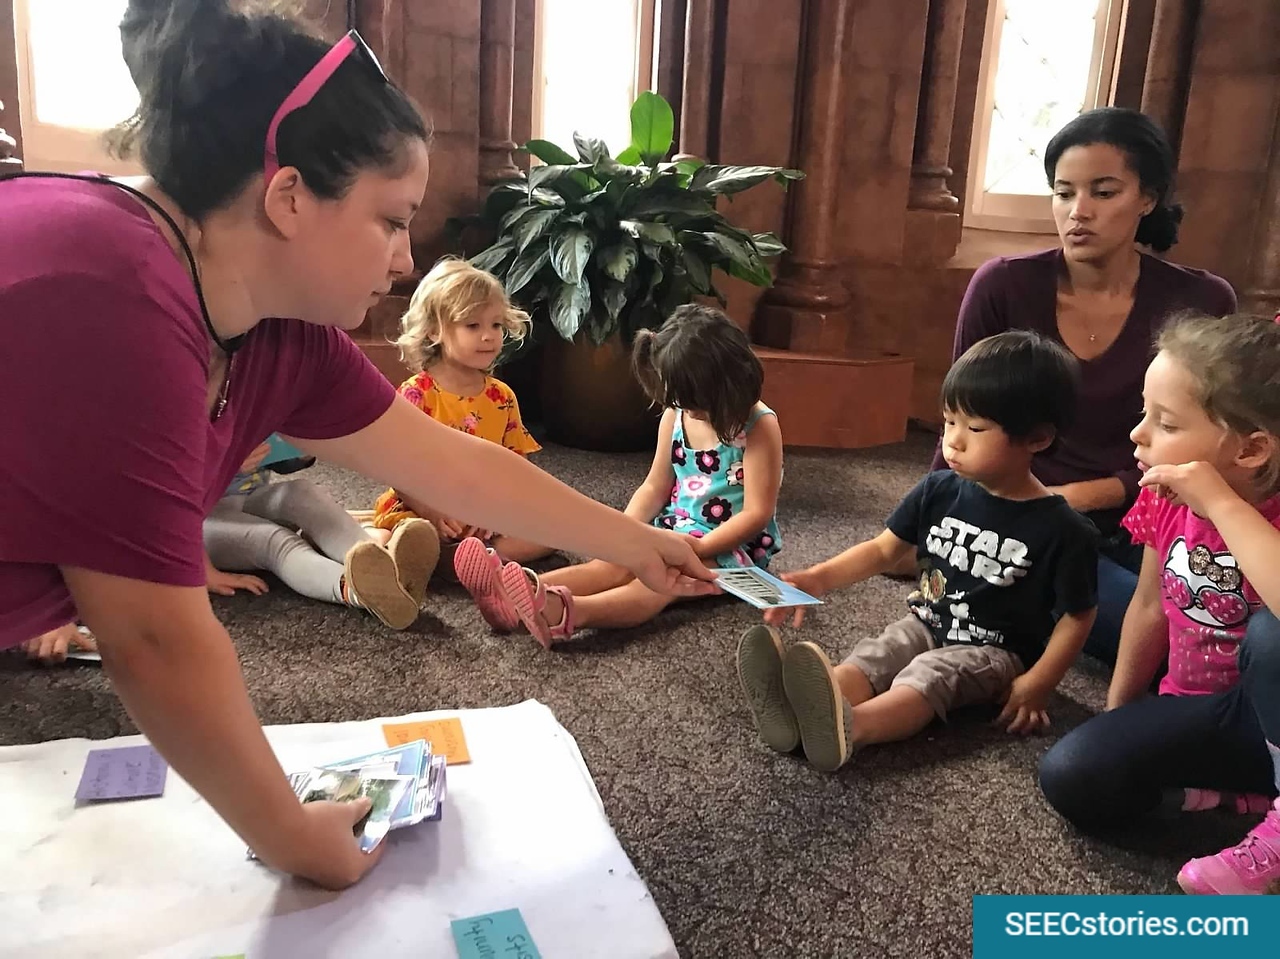
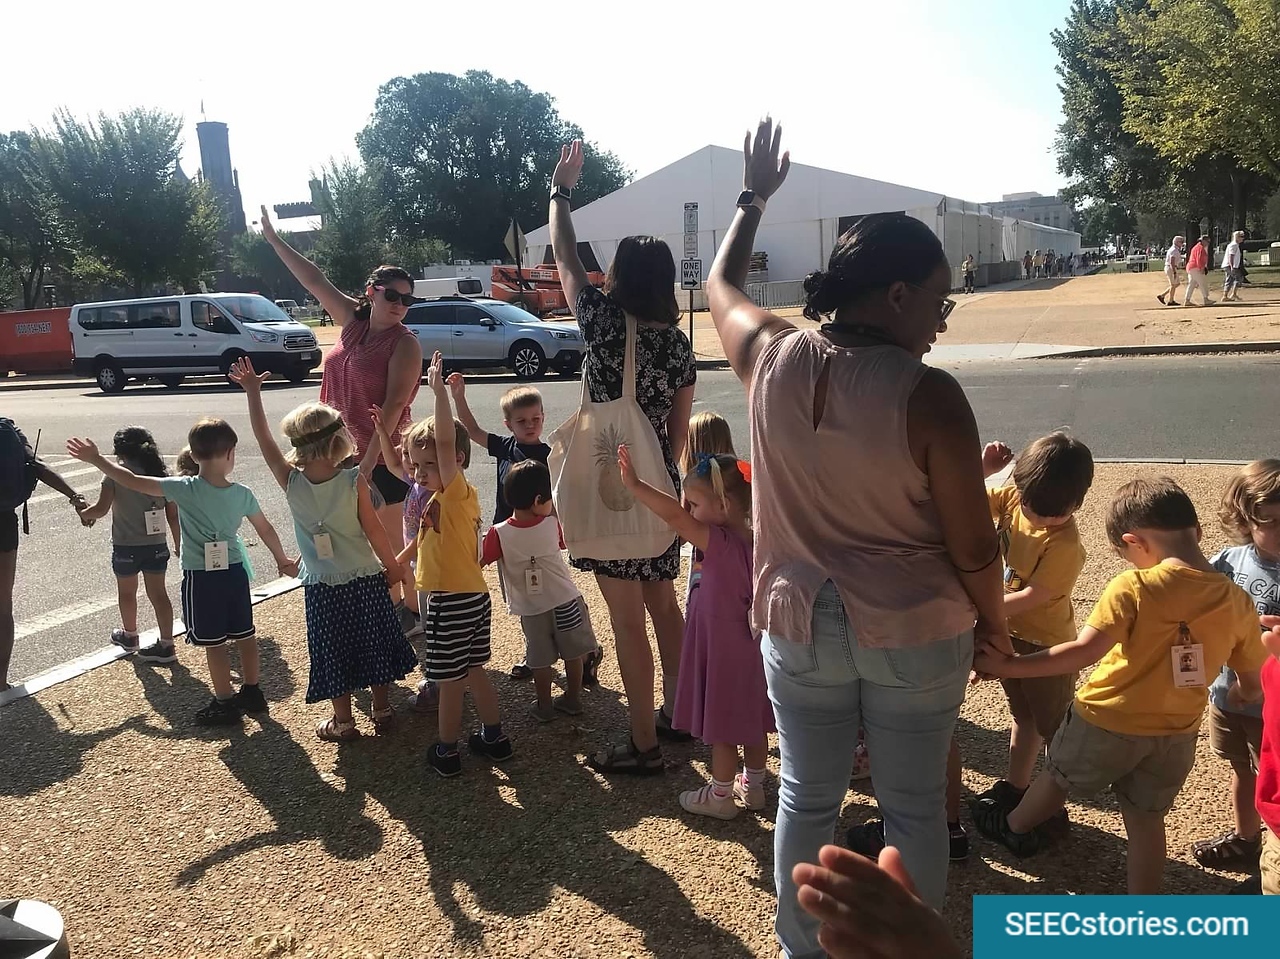
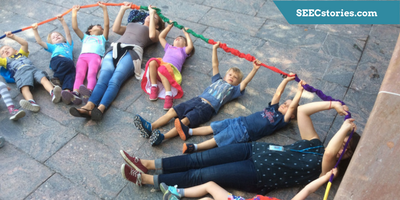
Our threes and fours devoted an entire day getting to know each other. They kicked things off when the PreK-4 class received a photo of a friend in the PreK-3 class and were asked to match the person to their photo. Once they found a match, the two classes practiced walking on trains. At SEEC, our classrooms walk, holding hands with a partner and positioning teachers in the front and back — like a train. They chose the National Gallery Sculpture Garden as an outdoor space to play team building games with a long, stretchy rope. After which, they read a book about friendship. The PreK-4 classes ended the day by giving their younger friends thank you cards.

Team Building and Classroom Culture

1 
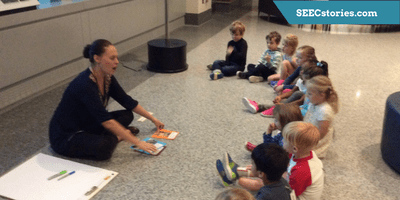
In keeping with our emergent curriculum, another PreK-4 class decided to work as a team and spent the morning discussing school year expectations. The educators were careful to record the children’s thoughts as well as their own. They plan to use this discussion as a permanent part of the classroom and the foundation for a successful school year. My personal favorite part of this lesson was that they solidified this idea of teamwork by visiting an exhibit at the American History Museum illustrating how to make a circuit. Students had to make a

1connection with their bodies between two metal poles to complete the circuit.

Getting to Know Ourselves

The toddler class began their second week of school by exploring their hands and feet. Not only was this an important way to learn about their own bodies, but it was a way to underscore their classroom routines. In this case, the teaching team emphasized hand-washing (a new independent activity for the toddlers) and walking on trains. It was also an opportunity for the class to practice using their “walking feet” in the museums and on the sidewalks.

Routines

2SEEC is lucky to have both an art and music educator and the first few weeks of school are always spent getting to know our newest students in the infants classrooms. This allows the children to acclimate to their daily routines and slowly get to know and build relationships with our enrichment staff.

Community

2

To get an overview of the Smithsonian community, kindergarten visited the Castle where there are small displays from most of the museums.

Our kindergarten class, which often includes students new to our school, spent some of their first days getting to know their community. While we are lucky to have such a large campus to explore at SEEC, I know that is not the case for every school. However, I love the idea of learning about one’s community both inside and outside of the school walls. Such an exploration opens up opportunities to explore natural surroundings, get to know people who work at the school, to visit nearby businesses, or to observe the roads and vehicles nearby.


I hope you have enjoyed reading about some of our approaches to launching a new school year. Hopefully your year is off to a good start too. As always, please feel free to share your thoughts and ideas here.

Originally posted September 2017.

Top 5 – Back to School Edition

Fresh pens, paper and backpacks at all the stores. Heavier traffic in the mornings and afternoons.  Cooler weather.  All tell-tale signs of another school year beginning.  We’ve compiled a Top 5 list of Back to School ideas, which will hopefully inspire you and get your school year off to a great start!

1. Nose wiping station.  The start of fall brings refreshing breezes, but also germs.  We love this idea for a Nose Wiping Station that we found on Montessori Mama and How We Montessori.  Pick a corner of the classroom and set up a shelf with tissues that the children will be able to reach.  Hang a mirror above the shelf so children can see themselves as they wipe their nose to make sure they clean it sufficiently.  Not only will this station keep germs from spreading, it will also encourage self-help and health skills. (Image from How We Montessori).

6a0147e1d4f40f970b015432d37f1f970c-800wi

2. Class collage. This SEEC 3-year-old class made a class collage at the beginning of the year to honor individuality while also creating a classroom culture. Using collages are a great way to talk about multiple, unique parts that make up a whole. The class visited and observed “Dam” by Robert Rauschenberg at the Hirshhorn Museum and Sculpture Garden, and made their own class collage, complete with photos of their faces.


3. Documentation.  Documenting can seem daunting when you’ve got so many other things going on at the beginning of the year, but these ideas could make it easier, while making learning more visible in the classroom. The image on the left is from the TransformationEd blog and features their Rabbit Road, which depicts their learning process during their inquiry on Rabbits. Displaying the journey on a linear road is a concrete way that children can see their work over time as they explore a topic.  The image on the right is from the Science Notebook, Teaching, and Technology blog, which depicts another documentation idea – choose a space in the classroom (that children can see) to display blank sheets representing each month of your school year.  At the conclusion of each month (or throughout) add images or work that share what the class has been doing.  Keep them up all year long, even as you switch out other displays and documentation, to help children see their work and progress over the whole school year.


4. Organizational hacks.  In our opinion, there are few greater feelings than starting a new year with an organized classroom.  This yahoo list has 15 organizational hacks from around the web that will help you feel fresh and ready. (Image on left from Motherhood On a Dime, image on right from Organized Cassroom)


5. Exploring Questions.  Fostering a sense of wonder and curiousity is something we take very seriously here at SEEC.  One of our four-year-old classes spent a considerable amount of time exploring questions last September and October to set them up for an inquisitive year.  To read more about their unit, click here.


For more Back to School ideas, visit our Pinterest board here.  Happy Back to School everyone!

Painting With Tea: Connections

14

Did you enjoy painting with tea? Take this activity one step further by reading a story and heading out into the community with your child. It will allow them to make connections and to understand tea in a broader context. Here are few suggestions to get you started, including those used during the original lesson.

Museum Visit:

If you’re in the D.C. area these exhibits would provide great ways to create an in-depth look at the process of making and drinking tea:

Detail of Julia's Kitchen

Julia’s Kitchen @ The National Museum of American History- This is a great place to explore someone else’s kitchen and make comparisons to your own. Ask your child how they think Julia would make her tea? Take turns pointing to the different tools (including the tea pot and kettle) she would use in her kitchen to make it. You can even sing “I’m a little teapot!”

Tea Set by John Satterfield @ Smithsonian American Art Museum- This tea set looks different and very modern. Talk about how it would feel to drink tea from the cup. Mime pouring tea for a tea party and taking pretend sips. Compare this set to cups and tea sets you might have at home.

Russian Tea by Irving Wiles @ Smithsonian America Art Museum- Start by asking your child what they see. Talk about the social aspect of drinking tea. Explain how it was used to gather people together. Discuss what these ladies might be talking about and create a pretend dialogue for the subjects of the painting.

Teal Bowl with Stand @ Freer Sackler Galleries- This is a great way to talk about geography and tea culture in other parts of the world. Bring along a map to show your child where the tea cup is from. Talk about how it is the same or different from a tea cup at home. Ask them how it would feel to hold this cup.

Community Visit:

No museum nearby or just don’t have the time? Here are a few visits you can do in any neighborhood!

Home goods store- Check out the different vessels for holding tea including cups and pots. Discuss how they are the same or different, and which you would choose to hold your tea.

Coffee Shop- Talk to the barista about how they brew tea and what types of tea they carry. Ask about differences between the teas available in the shop. You could also ask which are the most popular and then share a non-caffeinated variety with your child.

Grocery Store- The tea aisle at the grocery store is a wonderful place to discuss the varieties of tea. There are so many choices! Discuss with your child the different types of tea and how they are packaged (loose leaf, bags, triangle bags etc.). Talk about the different flavors and decide on a couple to take home and taste. To take it one step further, and take some time when you get home to research how that particular variety is made.   You might even cut open the bags to see what is inside.

Books:

Grab one of these great books from your local library!

Azuki Loves Green Tea by Rebekah Mullaney

Tea with Milk by Allen Say

Listen to the Wind: The Story of Dr. Greg and 3 Cups of Tea by Greg Mortenson

Coming to Tea by Sarah Garland


Have other ideas on how to connect tea painting to other activities and literature? Please share!

Painting With Tea

We Tried It Every Way, So You Don’t Have To:

Painting with Tea

4

“Which of these will work best?” “Can I use this instead?” “How much of this would be ideal?”  These are just a few examples of the questions we ask ourselves as we prepare activities for our family programs. Project ideas are everywhere, but more often than not, they don’t show all the details. SEEC’s faculty knows that what you see isn’t always what you get. In this blog, we’ll provide a peek behind the curtain and show you an example of how a SEEC educator goes about creating a project and ensuring that it provides the best opportunity for the child to be creative and feel successful. In other words, we’ve tried it a million different ways, so you don’t have to.

The Original Activity

This week it’s all about tea! Our featured activity comes from our Toddler Trailblazers family program, Tea TimePainting with tea is an activity provided during the playful choices  portion of the program as families arrive. Children were provided with watercolor paper, shallow bowls with tea bags and tea, paint brushes, smocks, and wipes.  Both brushes and tea bags were provided in case a child felt more comfortable using a familiar tool rather than the tea.  A variety of tea types were set out including black, green and herbal teas (hibiscus, passion fruit, cherry, and blueberry). The teas were pre-brewed to allow the water time to cool before the bags were handled by the children.

We don’t give any additional instruction because we want to emphasize the importance of process-based art.  We want to encourage the children to create without a pre-determined outcome and enjoy the process of creation without the need to achieve a specific finished product. With this project, children may create something figural/representational or abstract. Whatever the child’s choice, the experience will result in joyful painting and a final product full of vibrant hues of watercolor.

Trial and Error

Here are some of the questions we asked ourselves when preparing this project:

  • Which types of tea work best?
  • How long should they be brewed?
  • What tools work well to paint with tea?
  • What should we paint on?
  • How do I contain the mess?
  • What’s the best way to dry the finish work?

I tried out some of these approaches myself and then I recruited some young friends (ages fives and two) to help me test it out! Here’s what I found.

Types of Tea (option 1)

4

Tea Brewing (option 1)

1

Painting Tools

Painting Base

Less Mess

Drying

2

After all that trial and error, here is what we decided would help most achieve the successful outcomes with this project!

Painting with Tea Final Conclusions (1)

We hope this was helpful and encourages you to try out this activity! Send us pictures of your creations and let us know how it went! Be sure to check back next week for ways to take this activity one step further by making connections to literature, museums, and community visits!