Teacher Feature: Toddler Class Explores Sailors

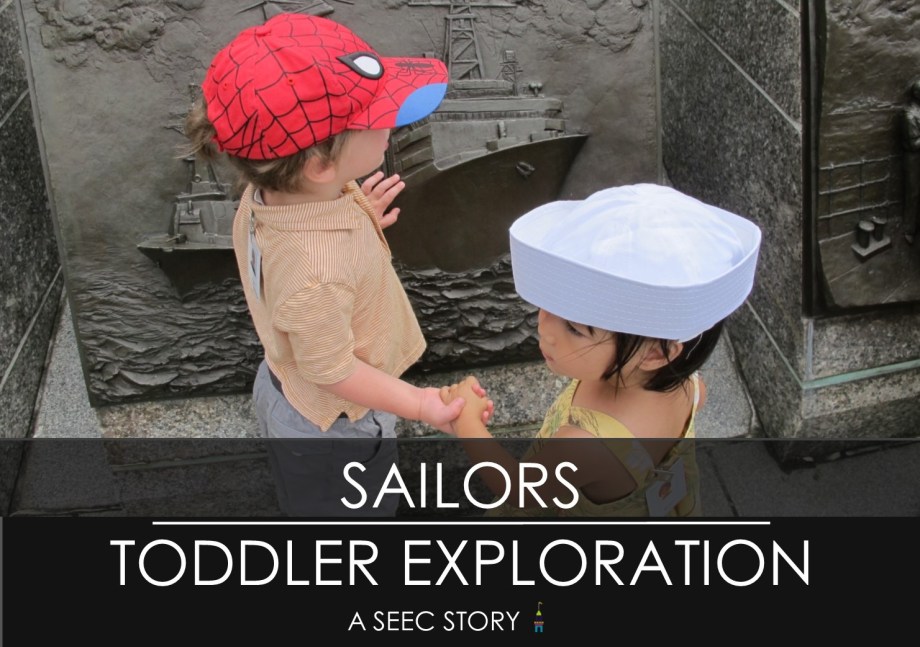
It’s teacher feature Thursday and this week we are featuring a lesson from one of our toddler rooms. The class visited the United States Navy Memorial to learn about sailors, which was part of their unit exploring heroes. The class began with a circle in the classroom where the teachers, Maya Alston, Erica Collins, and Elizabeth Kubba, introduced vocabulary and ideas about sailors. The class then walked to the United States Navy Memorial where they further explored these ideas while looking at The Lone Sailor statue, 26 high-relief panels that show elements of Navy life, and the signals flags. Below you will find images from the lesson as well as a reflection from Maya, Erica, and Elizabeth.

Cover Photo_Toucans

Here are some images from the lesson:

SEECstories.com

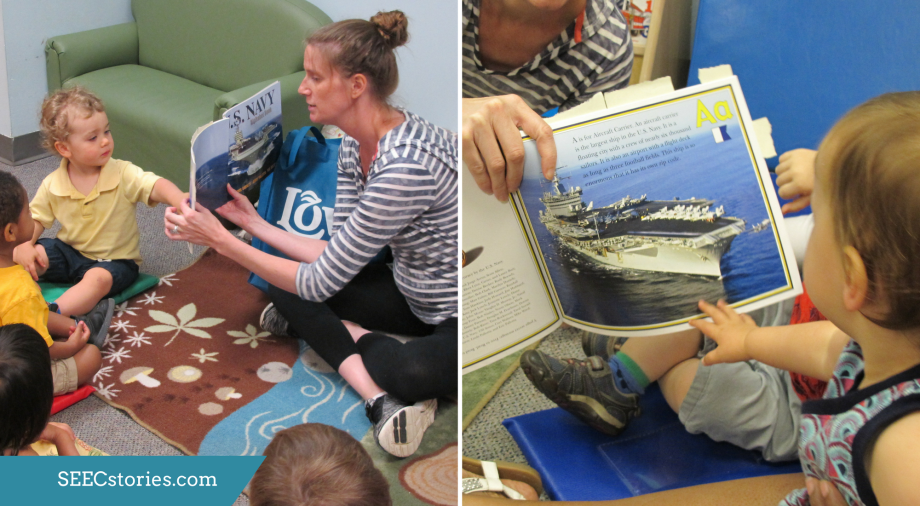
The lesson began with a classroom circle where Elizabeth read US Navy Alphabet Book by Jerry Pallotta (Author), Sammie Garnett (Author), and Rob Bolster (Illustrator). This toddler class’ interaction with the book was unique in that the children were encouraged to touch the pages. After Elizabeth read a page, she would pause and go around the circle giving each child the opportunity to reach out and touch images in the book. Sometimes she would guide them by asking “Can you find the boat?” and at other times she would narrate what they were drawn to, “Oh, you found the sailor’s hat!” This technique helped the class connect to the book, stay engaged, and ultimately built pre-literacy skills.

SEECstories.com (1)

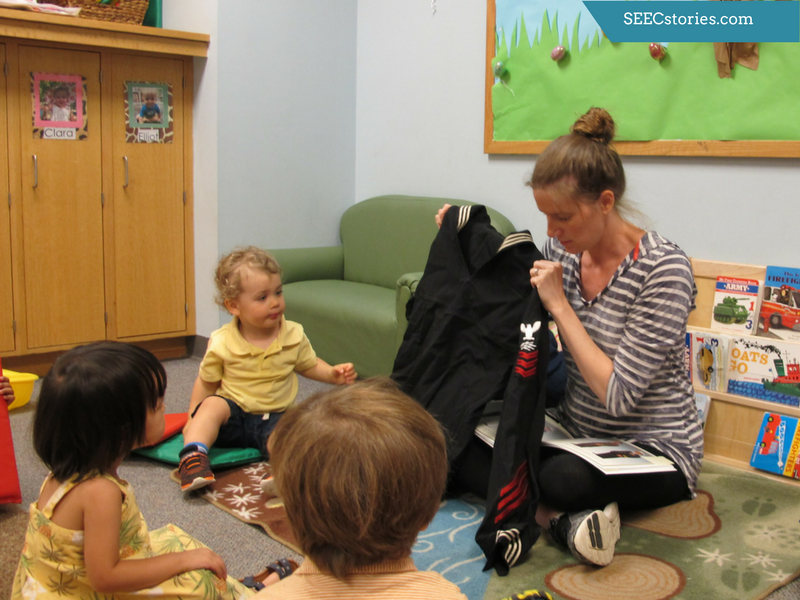
In addition to the book, the class had the opportunity to explore objects during the classroom circle, such as a Navy uniform. The class not only looked at, but also touched the uniform. This helped them build a deeper understanding of the uniform so they could relate it back to the book they had just read and later to The Lone Sailor statue at the United States Navy Memorial.

SEECstories.com (2)

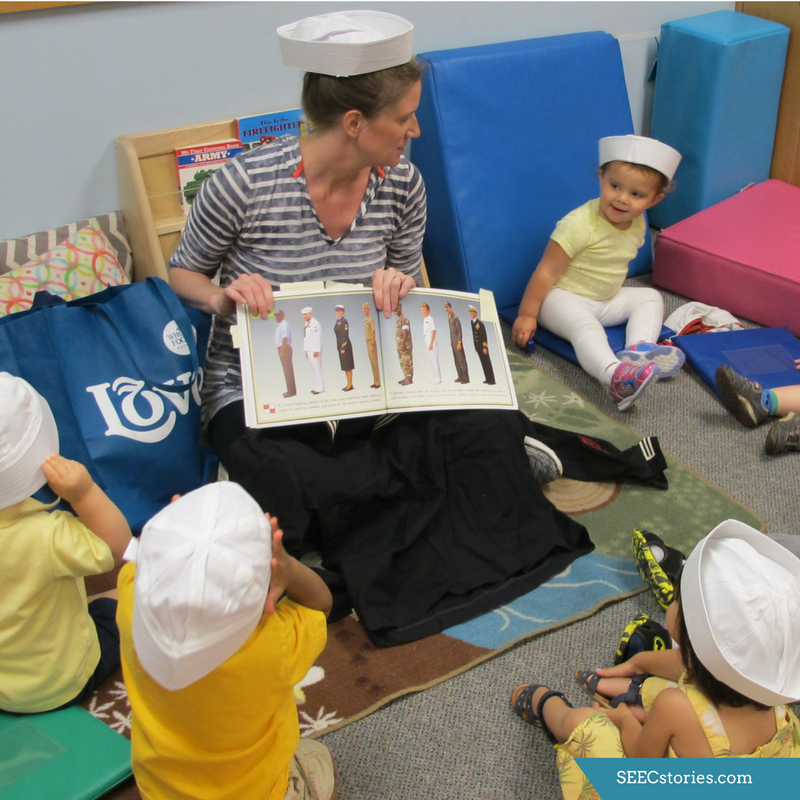
Each child was given a white child-sized Navy hat, which they could play with during the lesson. Elizabeth passed out the hats when she got to the page on Navy uniforms and then allowed the children to interact with the hats for the rest of the lesson. Passing out the hats in the middle of the story helped to re-engage the class with the circle and refocused their attention.
SEECstories.c

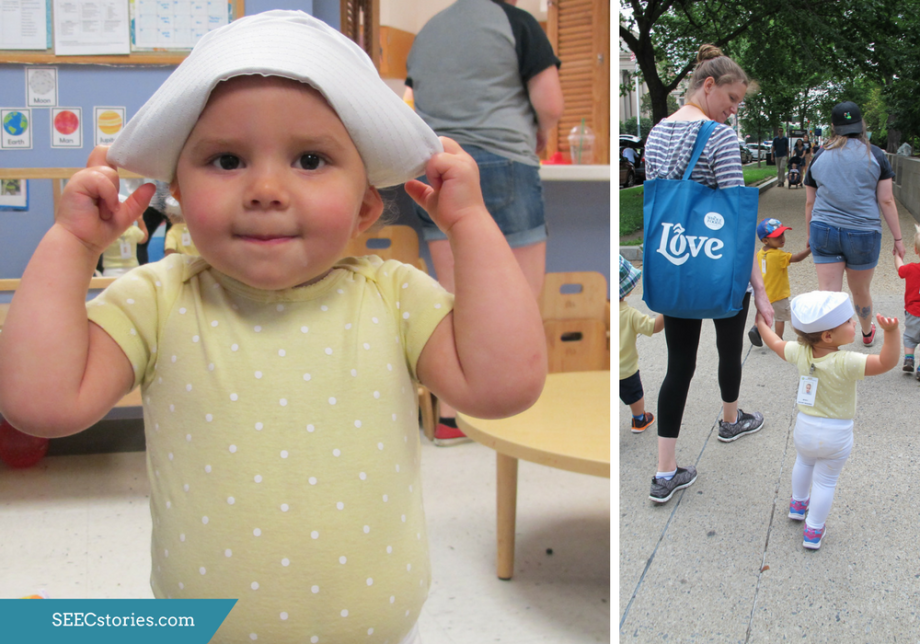
After circle, the class was given the opportunity to play more freely with the hats. They explored flipping them upside down and pulling the brims over their eyes. As the class was getting ready to leave, Maya, Erica, and Elizabeth gave each child a choice, they could either wear their normal sunhat outside or they could wear the Navy hat. Some children chose their normal hats and some chose the Navy hats. Giving toddlers a choice between two things can help ease anxiety around a transition, can help build their own autonomy, and can also help develop their communication skills.

SEECstories.com (3)

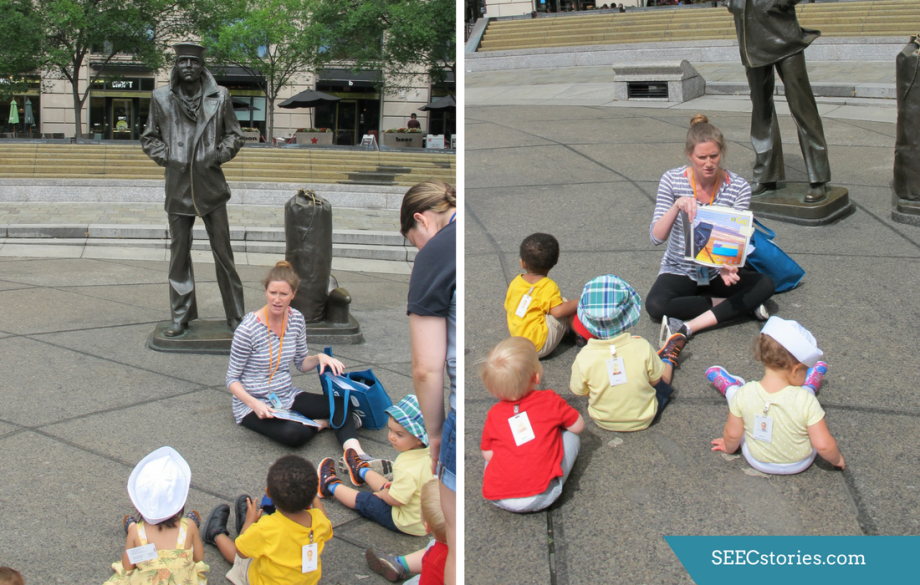
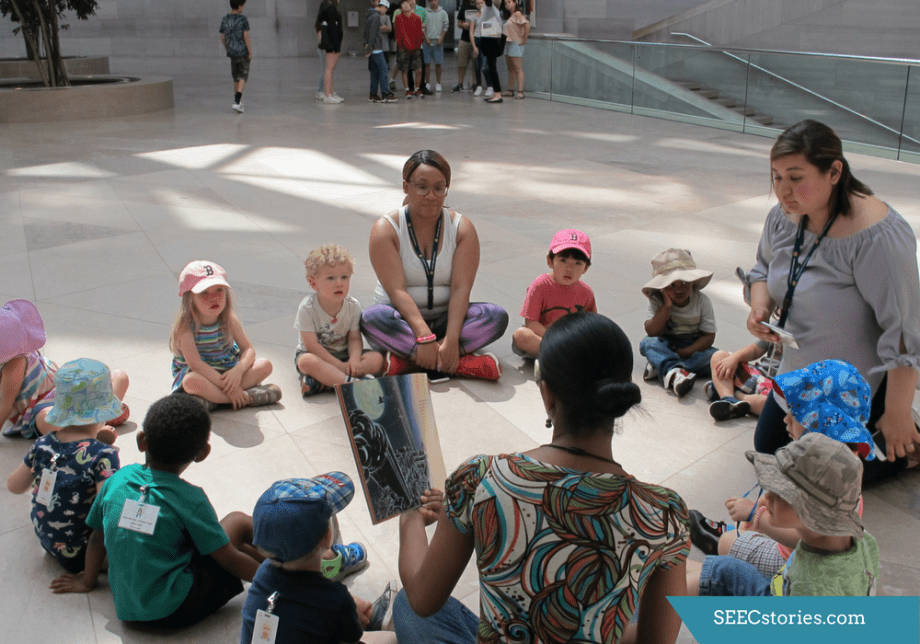
Once the class arrived at the United States Navy Memorial, they gathered around The Lone Sailor Statue. In order to orient the class, Elizabeth showed images from the US Navy Alphabet Book. This helped to build connections between activities they had done in the classroom and being at the Navy Memorial. The teachers then asked the class a series of both open-ended and guiding questions including “What do you see?”, “What could his job be?”, “What can you find?”, “Can you find his hat?”

SEECstories.com (4)

While class was talking about the things that they saw, one child pointed out the flags. The teachers commented that the flags on the mast looked similar to the some of the flags in the book. Since there was clearly an interest in the flags, Maya, Elizabeth, and Erica made a point of bringing the class closer so they could get a better look.

SEECstories.com (5)

While looking at The Lone Sailor, Maya, Erica, and Elizabeth pointed out the uniform and explained that it is one way to identify him as a sailor.  They noted the hat and compared the sailor hat to the ones on the children’s heads. They then encouraged the class to take a closer look. Some of the children chose to interact with The Lone Sailor statue. One even gave him a hug around the leg.

SEECstories.c (1)

The class then walked around the rest of the memorial, which included 26 bronze sculptures. Each sculpture offered many opportunities for discussion. The teachers followed the children’s lead. If a child pointed to something, the teacher would make a remark. Sometimes the teachers simply narrated what the child was doing. Other times the teachers asked questions like “How would you feel on a boat?” or “What do you think she is doing?”

SEECstories.c (2)

While the whole class explored the bronze sculptures at the same time, each child was allowed to move and explore at his or her own pace. It was clear that some children found certain elements of the bronze statues more captivating than others. When a child found something that drew her or his attention (like the chain above), that child was permitted to take the time he or she needed to explore before moving on to the next statue. Splitting the children into three groups, one group for each teacher, helped to make this possible.

A reflection from Maya, Erica, and Elizabeth:

Our toddlers seem to love superheroes. They often have Batman, Superman, Spiderman, Captain America, and Wonder Woman logos on the hats atop their heads, the shirts covering their bellies, and the shoes on their feet. In addition to these fantasy superheroes, our toddlers also spend a lot of time playing with firetrucks, marveling at sirens of ambulances and police cars, and giving a cheerful high five to the security officers who work in our museums.  We noticed these interests and decided to build a unit around the real-life superheroes in our community. Our goal was to help our class to grasp the idea of what being a superhero really is (someone who helps and protects others), to be able to recognize key characteristics of these community superheroes (uniforms, modes of transportation, etc.) and some of the ways these superheroes help and protect us (what do they actually do). During this unit we studied firefighters, military service members, doctors, nurses, park rangers, and the United States Park Police. Here, we will dive more deeply into one specific lesson, our lesson on sailors in the United States Navy.

For this lesson, we chose to visit the United States Navy Memorial. At the memorial, there is a large bronze statue called The Lone Sailor and multiple smaller scene sculptures depicting the history of the Navy. We knew these would be great for our toddlers to visit because the sculptures are easy to see and, even better, can be touched! We wanted the children to be able to recognize key features of a sailor’s uniform, the sailor’s hat, and their modes of transportation including ships, boats, submarines, and airplanes. We did a little research prior to the lesson by exploring the Navy Memorial website, reading the US Navy Alphabet Book, and speaking with a fellow teacher whose husband was in the Navy. Based on this research, we decided what characteristics of Navy sailors we wanted to focus on with the children during our classroom circle time and our community visit.

During the classroom circle time, we first read through parts of the US Navy Alphabet Book that we felt were developmentally appropriate for our age group, and highlighted the features we knew the children would see on the visit. We also allowed them to touch the images in the book. We often allow the children to touch objects in the books we read as it helps to focus their toddler wiggles. It also gives us the chance to assess if we are making the literacy connections between the word the toddlers hear and the object itself. We then showed the children two genuine Navy uniforms. We asked them to tell us what colors and other features they noticed. Answers we heard included “blue”, “white”, and “bird”.  After that, we brought out a sailor hat that they could take turns passing around the circle, which allowed them to gain a more concrete connection to the object and give them the opportunity to work on developing the social-emotional skill of taking turns. After taking turns passing the sailor’s hat, the children were ecstatic to find out that they were all getting their own sailor hats to wear on our visit!

While walking to the memorial, we modeled our thinking and wondered out loud about where we might find a sailor, how a sailor might look, and how to know if we found one. Once there, the toddlers quickly pointed out that the sailor hat on The Lone Sailor statue matched the hats their heads. We sat down in front of the statue and pulled out the US Navy Alphabet Book once more. We pointed to the objects we were seeing at the memorial that were also in the book. We asked open-ended questions including “What do you see?”, “What do you think his job is?”, and “What can you find?” Asking these questions prompted the children to look carefully at all the features of the large memorial space. One child proudly proclaimed that he had found flags that matched the flags in our book. When we could tell our toddlers were ready to move their bodies and explore more of the space, we walked them around to the smaller sculptures that were right at their eye level. This was one of the best parts of the lesson because it combined movement, careful looking, and touching. Because of this, the children spent quite a bit of time at each sculpture. They would point to features they recognized and often would name them as well. An added bonus was that it had rained earlier that day, so the boats and other features of the sculptures were wet. This really helped to make the connection that sailors are often on or near water. The children were able to put their fingers in small puddles of water that had collected on the statues and see droplets falling from the sailors’ bodies. If we redid this lesson on a sunny day, I would plan to bring water with us and use a spray bottle to talk about how water can sprays onto the boat as the sailors travel.

Overall, this lesson seemed to be a great success. We put the sailor hats out as choices in the classroom and noted that the children kept revisiting them over the next couple of weeks. We also put out My First Counting Book: Navy by Cindy Entin, which was a board book that the children could explore independently. These two things showed us that the children enjoyed learning about the sailors and helped to reinforce the connections over a long period of time. When doing this lesson in the future, we would like to add a water table with boats and submarines as an extension. We believe this extension would be especially effective because it would help the class connect the idea of water and sailors and connect well to the visit to the Navy Memorial.

Teacher Feature: PreK Class Explores Illustrators

It’s Teacher Feature Thursday!

This week we are featuring Amy Schoolcraft and Connie Giles of the three-year-old Wallaby class. The Wallabies were exploring books, and I joined the class for a lesson on Eric Carle and illustrators’ inspirations at the National Museum of African American History and Culture. Below you will find images from the lesson, and a reflection from Amy.

cover1.jpg

Here are a few images from their lesson on Illustrators:

SEECstories.com (27).png
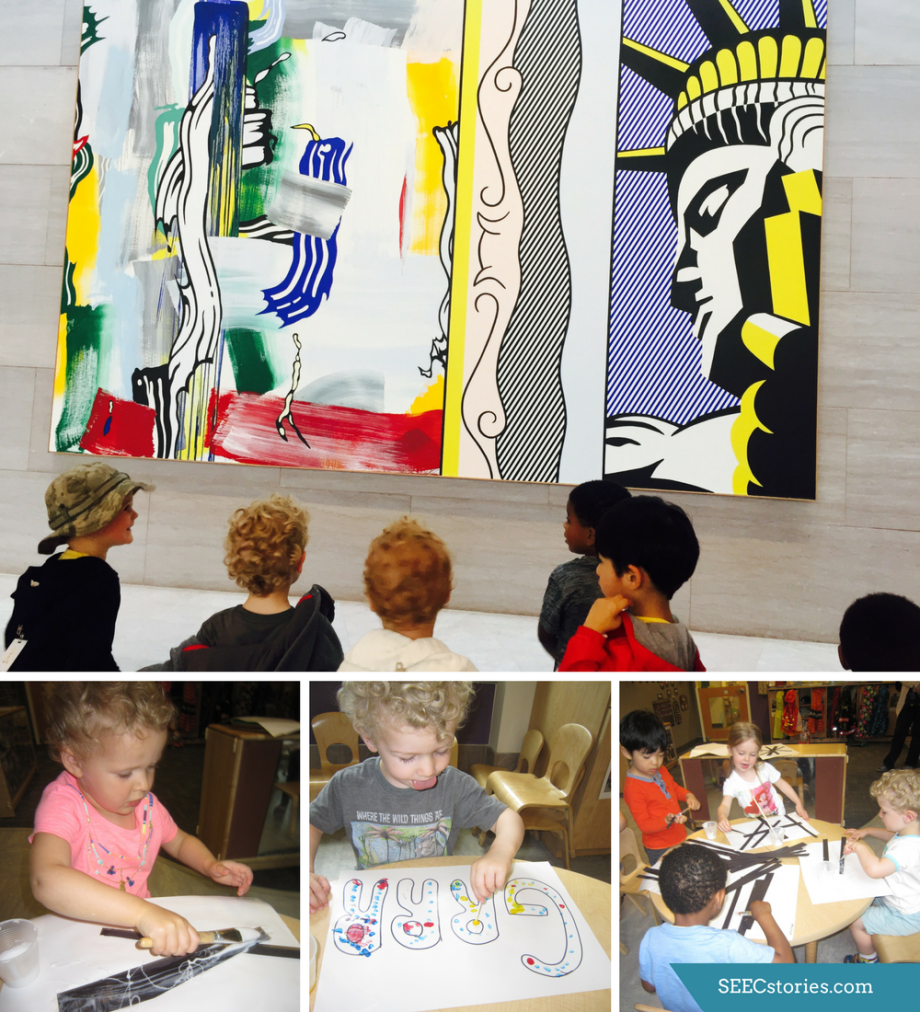
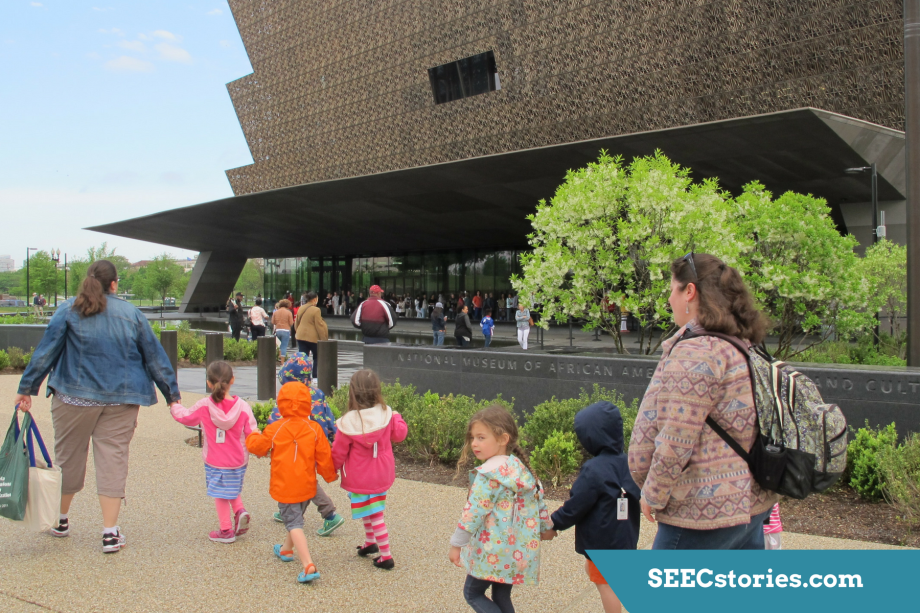
The class began their morning by heading straight to the museum before it got crowded.  Our students have been enjoying visiting the new National Museum of African American History and Culture, using it to explore a variety of topics including music, sports, theater, and architecture.

7The class went into the Visual Art and the American Experience gallery, where they found Transformation “Blue Horse” by local DC artist, BK Adams.  As soon as the group stopped in front of the artwork the children began making observations such as, “It’s three years old because it has a three on it”, and “It has wheels and a bike!”  Amy asked the children if the horse looked like the real horses they had seen when they visited the Park Police Stables.  They used their careful looking skills to examine the artwork further and said that it did not look like the horses they had seen because of the bike, number, lack of eyelashes, golden leg and eyes.

SEECstories.com (29).png
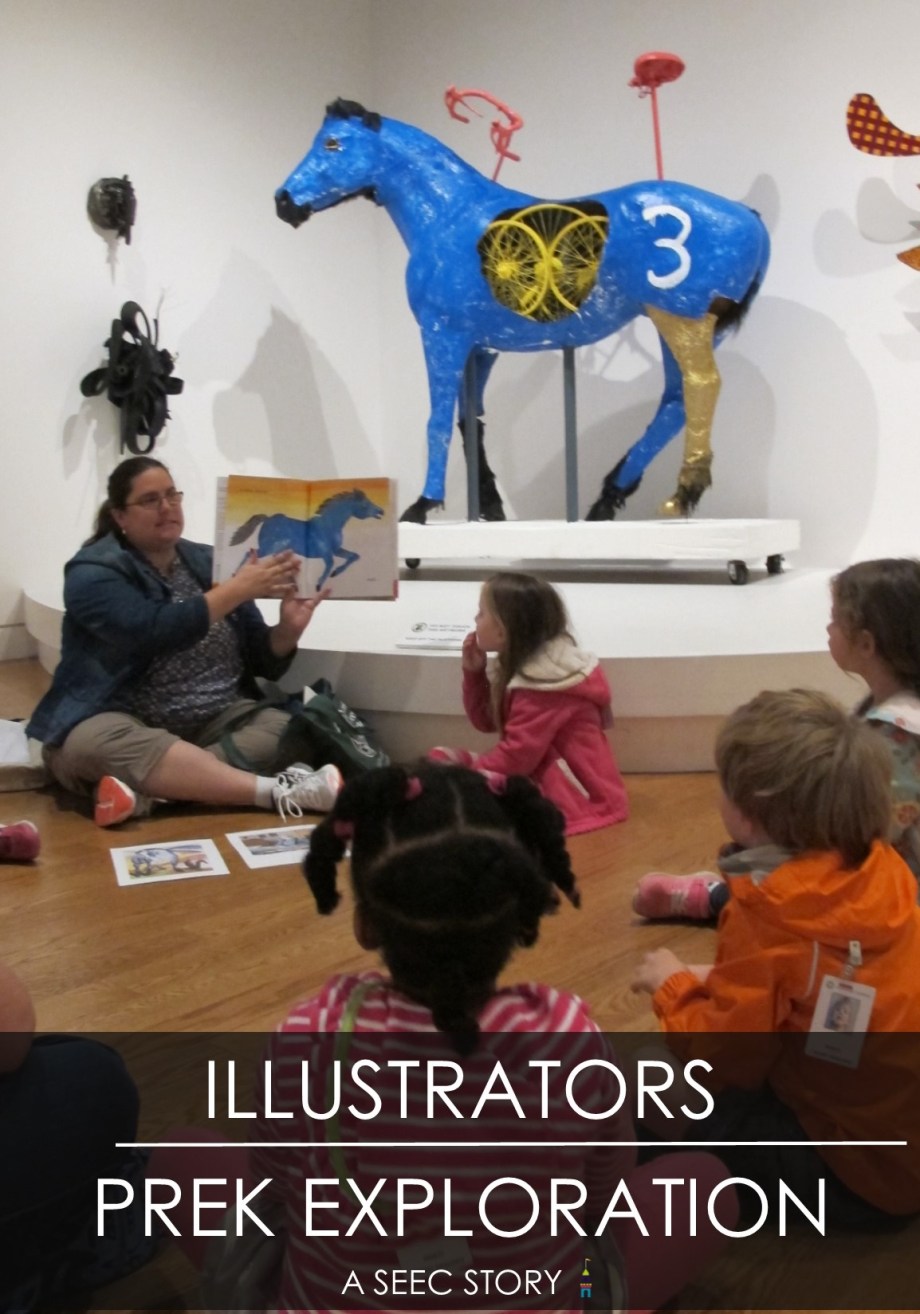
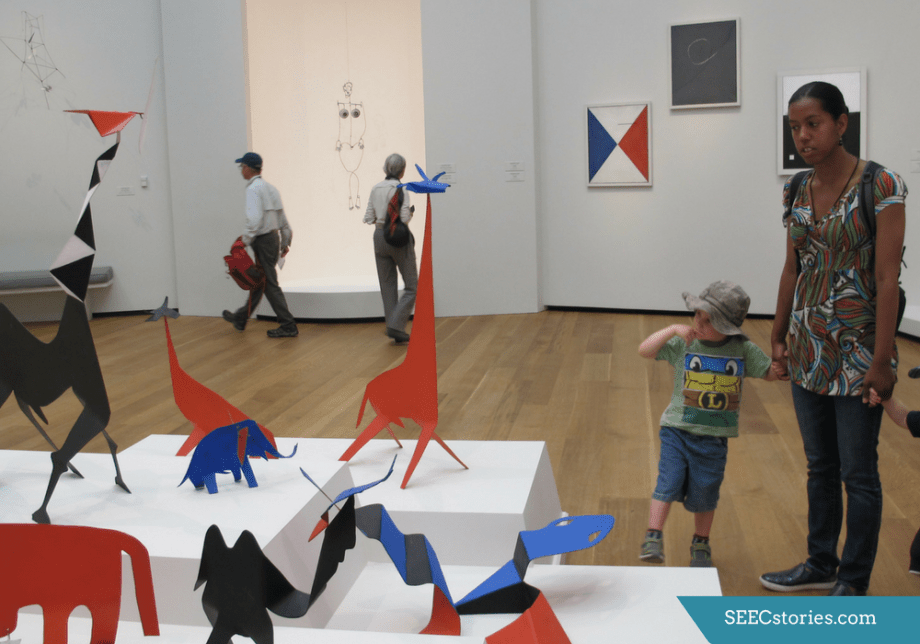
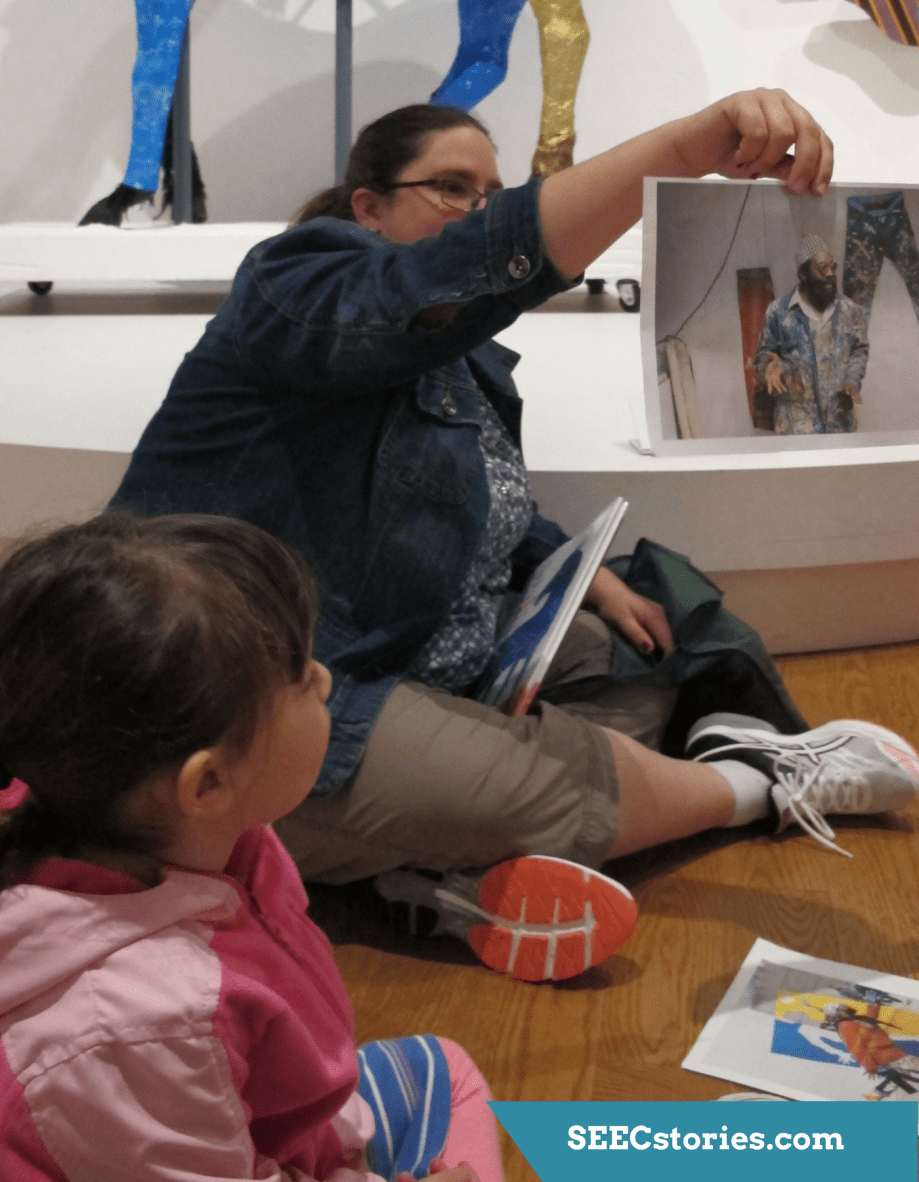
The class sat down and Amy introduced them to the artist of Transformation “Blue Horse”, BK Adams, with photos, some information about his background, and how he became an artist. They agreed that BK Adams must have used his imagination for his artwork since horses do not look exactly like the one he created.

5Next, Amy introduced another artist who made a blue horse artwork, Franz Marc.  She showed a print out of his piece Blue Horse 1. Amy explained that an author and illustrator saw Franz Marc’s horse painting, and was very inspired to use his own imagination to draw animals any way he could imagine.  This author and illustrator is Eric Carle, and Amy showed the class a photo of him, and introduced his book, The Artist Who Painted a Blue Horse, which was inspired by Marc’s painting.

6They read the book, comparing Carle’s blue horse to BK Adam’s blue horse.  They were happily surprised at all the imaginative animals, often exclaiming something like, “Wait a minute, that fox should be orange!”  It’s safe to say they enjoyed the book because at the end several children said, “Again! Again!”

2
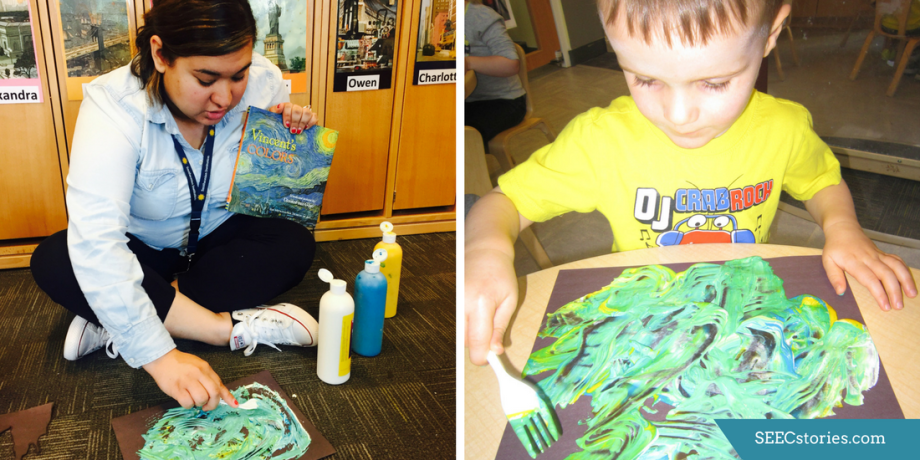
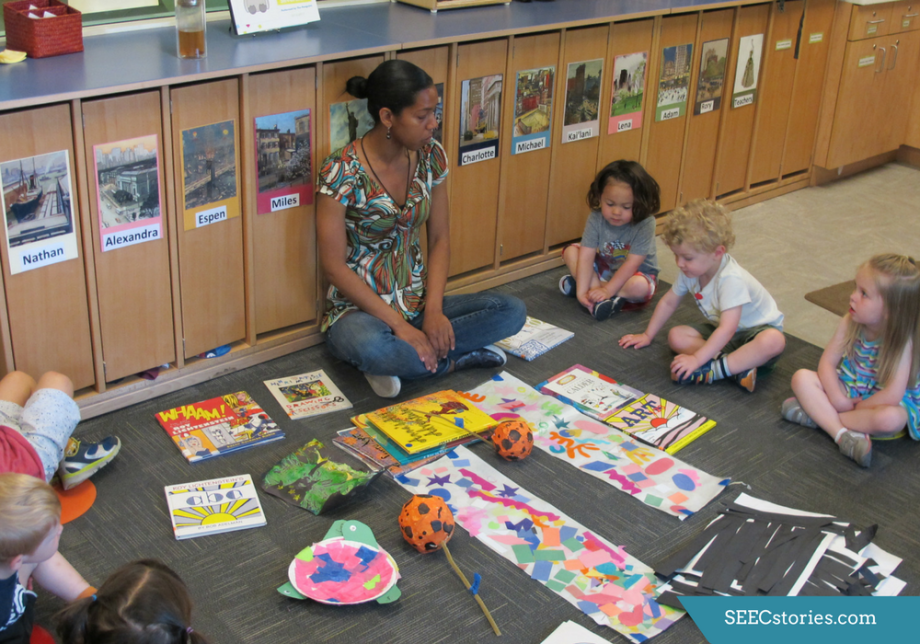
Amy then asked the class to use the artwork they had seen as inspiration to create their own imaginative animal.  She laid out the Marc print, a photo of Carle, the book and plastic animals to help inspire ideas.  Before drawing their own animal they brainstormed what animals they wanted to draw which included a green tiger, purple and pink bunny, a rainbow lion, and a normal prairie dog.

4Then the children set to work drawing their imaginative animals, using the art as inspiration.  As they drew they asked questions about what specific animal body parts looked like, and how to draw them.  Instead of simply providing an answer, Amy and Connie helped the children think about their questions and find answers through observing the art, book illustrations, and plastic animals.

3To wrap up the lesson Amy had planned to play a game, but the children requested to stop in the Cultural Expressions gallery to watch the video that surrounds the space, which they had seen on previous visits.  Amy, honoring the interest of the children, said they would decide which activity they would do through a vote.  Each child voted for the game or the video.  With a clear majority for the video, they headed to the space and decided they’d play their game in the afternoon.

2That afternoon they continued their exploration of Eric Carle through looking at his books and watching a video about him and his work.

31
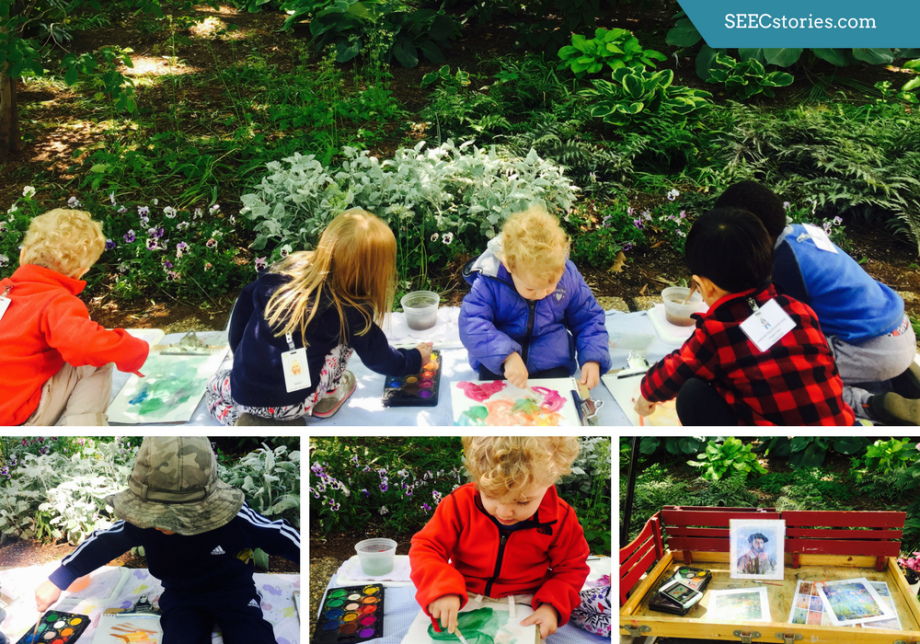
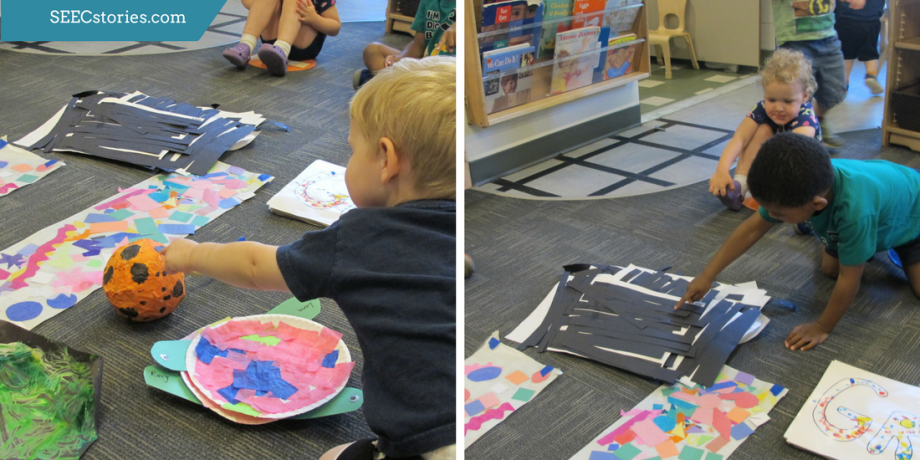
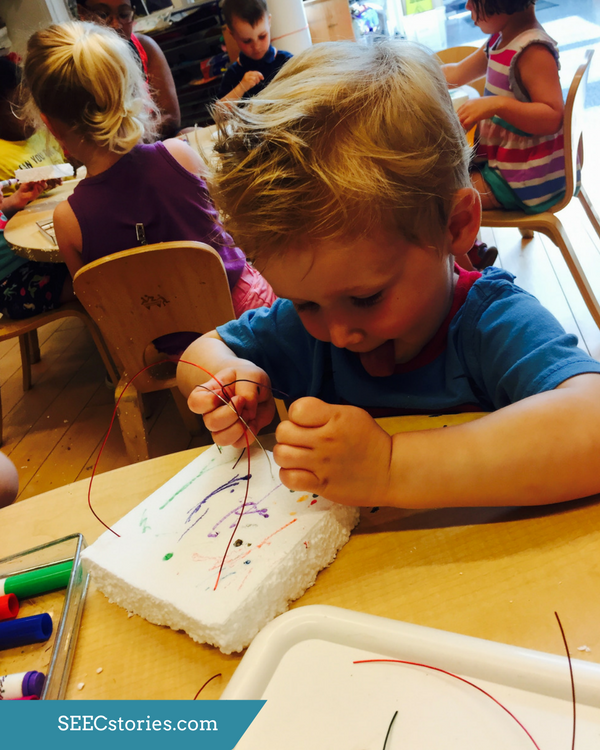
The children also used Carle’s technique of creating an illustration by cutting up paper that they had painted and creating a collage on a piece of contact paper.

SEECstories.com (28)

Following that, they played their game of “Guess that Animal!” Each child was given a turn to sit in the middle of the circle with a plastic animal on their head.  Their classmates gave them clues to help them guess their animal.  While none of the animals were as imaginatively colored as the ones they observed earlier in the day, there were plenty of features to focus on to give their friends clues, which connected back to their careful observations of animal features that morning.

A reflection from Amy:

Our class loves books and enjoys exploring books any chance they can get. We wanted to use their enthusiasm to help deepen their understanding of books and stories. So, we planned an entire unit dedicated to books. This particular week we were focusing on illustrators, including their style and technique. For this lesson, I chose to learn about Eric Carle, an author and illustrator that the class is familiar with, since we have read several of his books throughout the year. My original objective was to learn about Eric Carle’s illustration technique but while researching, I discovered that his book, The Artist Who Painted a Blue Horse, was inspired by the painting Blue Horse I by Franz Marc. This new information shaped the rest of the lesson and my new objective was to build on their knowledge of Eric Carle by exploring the idea of what inspiration is, how artists and illustrators use inspiration to create their work, and to find our own inspiration to create original illustrations.

We had planned to visit Hahn/Cock by Katharina Fritsch, a giant blue rooster sculpture at the National Gallery of Art. Unfortunately, the weather was not conducive for this outdoor visit. So, we opted for a visit at the National Museum of African American History and Culture to see BK Adams’ sculpture . The kids had been entranced by this sculpture as we passed by it earlier in the year, and it turned out to be a great way to revisit the piece in a meaningful way. Because it was a last-minute change, there was not time to research Adams’ artwork beforehand. Thankfully our museum educator did some quick research and was able to find information on the piece and the artist, which she was able contribute to the lesson.

This lesson turned out better than I had anticipated because the book, painting, and sculpture tied together so nicely. The kids were able to make a connection easily between the inspiration (Marc’s painting) and the result (Carle’s book). Also, having learned about horses earlier in the year, they were able to make comparisons of what they already knew about horses and what they noticed about the Transformation “Blue Horse” by BK Adams. It was clear in their animal illustrations that they were using their animal figures as inspiration and their imaginations to make their artwork unique.

I had hoped to play an animal guessing game in the gallery, and have a follow up activity back in the classroom directly after our museum visit where they would make an Eric Carle style collage.  However, as we were wrapping up the kids said that they wanted to visit one of their favorite parts of the museum: a video montage of important moments in African American culture. So, we postponed the game and artwork for later in the day and spent a little more time in the museum instead. In retrospect, I would not have done the collage at all since we did not focus on Eric Carle’s technique during the lesson, and it felt as though the collage wasn’t as meaningful as it could have been.

If you are considering visiting NMAAHC, my recommendation is to get there early since it gets quite busy and is a little noisy.


Following their lesson on illustrators, the Wallabies explored authors, story structure, and story-telling.  Be sure to check back soon for a Round Up of the Wallabies’ unit on books, and in the meantime, check out our All About Books Pinterest board!


Close Up: SEEC’s 2017 Staff Development Week

Each August our staff takes a week to reflect, assess, and prepare for the upcoming school year. Staff development week is a long-standing tradition at SEEC — one that we look forward to, to connect with our colleagues and lay the groundwork for the upcoming year. It is an especially important way to bring the entire SEEC team together. Our school is physically divided into three centers so staff development week makes us feel like one family and helps provide continuity across the program.

Team Building

2Melody Passemante-Powell, director of infant and toddler programs, kicked off the week with a team building presentation. She got the morning started by sharing inspirational quotes about education. This exercise had a deeper purpose though. It helped us see that while everyone believed that the education of young children is important, not all of us had the same perspective of how to achieve that. She used this as a launching point to think about how important it is for us to consider alternative perspectives and not make assumptions when interacting with staff, children, and families.


Anti-Bias, Objects, and Technology

1Our team at the Center for Innovation in Early Learning (CIEL) followed with a presentation on anti-bias education. SEEC has always been thoughtful about creating an inclusive learning environment, but with the opening of the National Museum of African American History and Culture and of course, current events, the issue has grown ever more important. We spent the morning focusing on the anti-bias education framework as outlined by NAEYC and considering it in terms of our unique school model. We concluded our time by asking faculty to begin building a tool that would help us reflect on the anti-bias nature of our classrooms, lessons, and relationships.  

3CIEL also led the group in an exercise reiterating the importance of connecting our lessons to the museum objects. SEEC believes strongly in facilitating activities and careful looking strategies that connect our lessons to the museum object, and we had fun demonstrating this with our colleagues. Our final CIEL segment was a collaboration with our administrative team that explored technology and early childhood classrooms. The large part of our presentation was thinking as a group about how we feel about technology and how it fits into our school. We are compiling the feedback in the hopes of continuing the dialogue.

SEECstories.com (2)Executive Functioning and Early Intervention

We were also lucky enough to have a few guest speakers. Occupational therapist, Judi Greenberg, from Child Development Consultants  led us in a great discussion about executive functioning skills. Greenberg reminded us of the importance of executive functioning and helped us think of ways we can help develop these skills in our students. She also reviewed signs that a child might be struggling with executive functioning and ways we can help them. We also had an informative session with DCPS’ Early Stages reminding us of their array of services and the benefits of early intervention. It felt great to know all the ways we can support our families.

SEECstories.com (1)Next Year

Of course there was a lot of time for our faculty to work on preparing our classrooms and they are looking great! Now that it is all wrapped up, we can’t wait for the children to arrive on Tuesday.

Top 5: Transitioning Back to School

Publication2

Transitioning back to school can be difficult for children, no matter their age.  Luckily, there are steps you can take to ensure a smooth and exciting transition to the school year.  Try out some of these ideas to ease back into the school year.

1. Create a Morning Routine – Waking up in time for school after a summer break can come as a shock to the whole family!  Try getting into your school year routine gradually the week before the start of school.  Wake up ten to fifteen minutes earlier every morning until you reach the time you’ll need to get up.  Set the alarm together; this will make your child feel included and develop math skills.  After waking up, practice the school morning routine.  If the bus will take the children to school, take a morning walk to the bus stop the week before school to get them acclimated.

SEECstories.com (47).png

2.  Talk about Feelings The start of school can bring up a lot of emotions.  Some children will be eager, while others will be more hesitant, and of course, there can be a combination.  Talk about how your children are feeling, and validate those feelings.  Share times when you might have felt the same way, i.e., when you met new people, or started a new job.  There are many books that can help get the conversation started.  Check out this list of back to school books from Gift of Curiosity for some ideas.

SEECstories.com (45).png

3. Talk about what to Expect – Just like adults, children feel more in control and less anxious when they know what to expect. Attend any school events prior to the start of the school year and learn a little bit about their future teacher and classroom.  Read their class list together and talk about who you know and who will be new friends.  Have an end of summer play date with future classmates to get the ball rolling.  If your child is still anxious about the first day of school, create a plan for the day, listing your morning routine, their school day, and after school activities.

SEECstories.com (46).png

4. Prepare Together! – Do some things that will engage your child in school and get them excited!  For example, go shopping together for their lunch box or make a list together of healthy lunch options.  Shop for the items on their school supply list together together, encouraging your child to check off each item as they put it in the cart.  Involving your child in the school preparation will make your child feel part of the process and also help them learn about nutrition, literacy, and math.


7.png

5. Document the First Day – The first day of school marks the beginning of another chapter in your child’s life.  Make it special by sitting down for breakfast together or including a note in your child’s lunch.  Snapping a photo is another great way to mark the occasion and share the moment with friends and family.  The Idea Room has put together a fantastic list of creative ideas for that first day photo!

Copy-of-20-Back-to-School-Photo-Ideas-683x1024.png

Plan on taking photos on every first and last day of school, and all throughout the year! You can create a book of each school year and include your child’s accomplishments from that school year, for example, started soccer, began reading chapter books, started wearing underwear, etc.  At SEEC, documenting each child’s growth is part of our practice, and our children love to look through their books and reflect on their own growth and memories.

It’s important to note, that if your child is feeling anxious and doesn’t want to pose for a photo, you should respect their feelings over snapping an Instagram-worthy shot. If they aren’t feeling it the first day, perhaps later in the week or year they’ll be feeling more comfortable, and you can get a photo then.


Want more ideas?  Visit our Back to School Pinterest board for more books, activities, and resources to make the start of the school year great!

Artist Round Up

One of our recent posts was a teacher feature from a two-year-old classroom on Alexander Calder. This class did not simply learn about Calder’s life and work and then move on to another topic. Rather, the teachers, Javacia Finney, Stephanie Lopez, and Shawna Williams, came up with lessons to allow their classroom to do an in-depth study on several artists. For each artist, the class looked closely at the work, learned about the artistic techniques used, and then created their own work inspired by the art. Below is a web that gives an overview of the artist lessons and images from the class’ lessons.

Web_Artists_Penguins


SEECstories.com

To start their artist exploration, the class viewed Yayoi Kusama’s Infinity Mirrors and Pumpkin at the Hirshhorn Museum and Sculpture Garden. The two year olds particularly enjoyed adding polka dot stickers to the Obliteration Room. They had so much fun that the Hirshhorn Museum highlighted them adding dots on this video. Back in the classroom, the class made their own papier-mâché pumpkins and added polka dots to a large piece of white paper that was hung up on a wall.

SEECstories.c

After learning that Impressionist painter Claude Monet took his painting supplies outside to paint beaches, gardens, and ponds in the actual outdoors the class decided that they would also try to paint en plein air. Javacia, Stephanie, and Shawna loaded up a red wagon and brought watercolors outside to paint in the National Museum of Natural History’s Pollinator Garden so their class could be inspired to paint the light, shadows, and flowers in the garden.

SEECstories.com (1)

The class went to the National Gallery of Art and looked at many Vincent Van Gogh’s paintings, including Self Portrait (1889), where they talked about self-portraits and noticed Van Gogh’s use of broad strokes and thick paint. Following the museum visit, the class mixed the colors yellow, blue, and white using forks instead of paintbrushes.

SEECstories.com (2)

Next the class learned about Roy Lichenstein’s Pop art. They viewed his Painting with Statue of Liberty as well as Look Mickey at the National Gallery of Art. To imitate Lichenstein’s dot technique, the two-year-olds painted with q-tips, which made different sized dots when pressed on the paper. The class also looked at Lichenstein’s sculptures, such as Brushstroke at the Hirshhorn Museum. Brushstroke was a class favorite because the class could easily see it while walking along the National Mall. Inspired by the contrasting black and white colors in the sculpture, the two year olds glued stripes of black paper onto white paper.

SEECstories.c (2)

For their study of Henri Matisse, the class learned about his technique, painting with scissors, when they visited examples at the National Gallery of Art. They worked on their own cutting skills by using scissors to cut lines into paper.

SEECstories.com (3)

As highlighted in their Teacher Feature, the class also learned about Alexander Calder. After learning about Calder’s mobiles, they began exploring his large sculptures and his playful animal sculptures. The class was given metal wire, a material that Calder himself used, to create their own sculpture or mobile.

SEECstories.com (4)

To conclude the unit and show off all the artwork, the class held an art exhibition. They carefully displayed all the artwork and made labels. Then they invited their families and friends into their classroom to see their art exhibition.

For more ideas about using art in the classroom, check out SEEC’s Pinterest pages on Teaching with the Arts, Color Mixing, Collage, and Self Portraits.

Biblioburro (Donkey Library) Revisited

You may remember a Teacher Feature from the spring that highlighted our kindergarten’s lesson on Luis Soriano and his biblioburro or donkey library.  During the lesson, Maureen Leary, the Kindergarten Spanish teacher, used books, videos, and a trip to a Smithsonian Library to encourage the children to think about the importance of libraries, and to learn more about a very unique library in Colombia – Luis Soriano’s biblioburro.  At the end of the lesson, Maureen wrote down the children’s questions for Mr. Soriano and asked if they wanted to help support his library.  They all agreed that they would like to help in some way, and they were busy with these efforts until the end of the school year.

1236038_10151651895909716_728206024_n

Photo used with permission from Luis Soriano.

To help, the class decided to create a book of their own that could be a contribution to the library.  They had just finished a unit learning about the ocean, so creating a bilingual alphabet book about ocean creatures seemed to be a logical fit.  Each child took a few letters of the alphabet and thought of an ocean creature that started with those letters in Spanish.

SEECstories.com (39).png

The class took photos in the National Museum of Natural History’s Sant Ocean Hall with their favorite ocean creatures.  With the guidance of SEEC’s Art teacher, they also created artwork for each creature, which was incorporated into the book. They worked individually with Maureen to look up information about their animals and chose one or two interesting facts to include in the book. All the text was done in both English and Spanish.

SEECstories.com (48).png

The class used Shutterfly to compile the artwork and photos, and to produce their book.  They each got a copy to keep for themselves, and they sent a book to Mr. Soriano so that he could have a copy in his biblioburro.

SEECstories.com (49).png

Maureen communicated with Luis Soriano throughout the project and was able to share their conversations with the children. The students had a lot of questions for Mr. Soriano, which he was happy to answer. Some of the things they learned about him and his work were that his grandmother taught him to read and instilled in him a love of books; he delivers books on Wednesdays and Saturdays; the kids in the villages can borrow five books at a time for up to one month; and he uses a small portable computer to keep track of all his books.

1
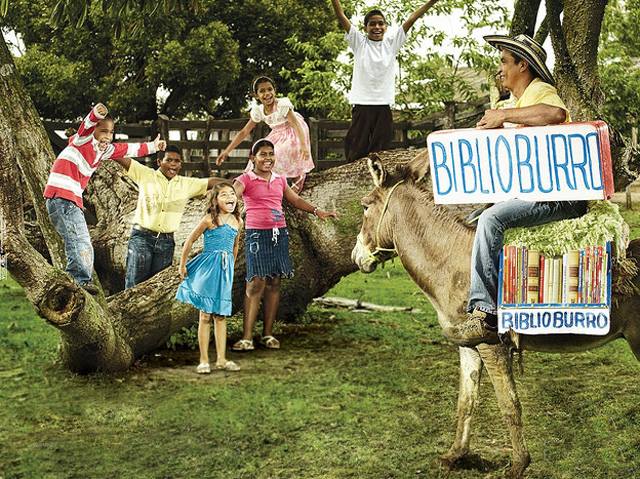
After learning so much about Mr. Soriano and his work, the children were eager to raise funds for his library renovation so they held a bake sale.  The day of the bake sale was filled with excitement! The students all brought in baked goods and took turns running the bake sale in our conference room.  The children were proud to share their treats with parents, teachers, and museum staff, while taking donations to send to the biblioburro.  They enjoyed counting the money, and sending it off to Mr. Soriano. Every last treat was sold and the class raised almost $500 to support Mr. Soriano’s library!

3Through this extension of the original biblioburro lesson, the kindergartners worked hard in the service of someone else and gained a sense of accomplishment when they finished the projects.  They gained a new appreciation for community service and helping others.  Their world view expanded as they explored something familiar (libraries) with the unfamiliar (donkey libraries).  Important skills were also built upon; for example, their Spanish vocabulary grew as they researched the names of their favorite ocean creatures; their math skills were expanded through counting the donations from their bake sale; their fine motor skills and creativity were developed through their artwork for the book. It was truly an interdisciplinary project that all of the students felt ownership in and one that allowed them to make a positive difference in other children’s lives.

Teacher Feature: Twos Class Explores Alexander Calder

This week’s teacher feature highlights a lesson from one of our two year old classrooms. Teachers Javacia Finney, Stephanie Lopez, and Shawna Williams brought their class to the National Gallery of Art’s newly renovated East Building. They used works of art made by Alexander Calder to teach about his life, techniques, and artwork. Below, you can find photos from the lesson and a reflection from Javacia, Stephanie, and Shawna.

Cover Photo


SEECstories.com (1)

Before visiting the National Gallery of Art, Javacia laid out all the artwork that the class had recently made. Since the class had been learning about artists, there was a plethora of work. Javacia led a discussion where the children talked about what they remembered about each artist and work of art.

SEECstories.com (4)

Rather than dismissing the group as a whole, she called on each child to point to a specific artwork before leaving the circle. This game allowed her to ensure that each child had the opportunity to be recognized as an individual and helped to smooth the transition.

SEECstories.com

Once at the National Gallery of Art, the class sat underneath Untitled, 1976, by Alexander Calder, a giant mobile that hangs from the atrium ceiling.  They made a circle and were encouraged to look up at the mobile as Javacia read the book Sandy’s Circus by Tanya Lee Stone.

Untitled design

As Javacia read, the children were able to take advantage of the amazing space. They continually looked up at the ceiling and pointed to the moving mobile. The class was so captivated by Untitled that Javacia said in her reflection that she believes that this moment will leave lasting memories for her class.

SEECstories.com (2)

Javacia passed out materials for the class to explore. The materials included pipe cleaners and metal wire. The class was encouraged to manipulate and explore the materials while looking up at Calder’s mobile. Javacia explained that back in the classroom, the children would have the opportunity to use even more materials and supplies such as scissors and glue to create their own mobiles.

SEECstories.com (3)

To see more examples of Calder’s work, the class went upstairs to the Calder Tower, which houses the largest collection of Calder art. The class walked around the room and described what they saw. Some children were particularly drawn to the sculptures of animals. Others seemed to gravitate towards the mobiles which produced shadows that moved across the space.

SEECstories.com (6)

After visiting the National Gallery of Art, the class worked on making their own art inspired by Calder, which was later displayed in the class’ very own art exhibition. Manipulating the metal wire provided the children with the opportunity to work their fine motor skills in a new way.

A reflection from Javacia, Stephanie, and Shawna:

What were your topics of exploration?

For the past few weeks we have been learning about different artists. Some of the artists in our unit of study included Henri Matisse, Roy Lichtenstein, Claude Monet, Vincent van Gogh, and Yayoi Kusama. On this particular day, we were learning about Alexander Calder.

How did this topic emerge?

We noticed that our students were interested in the sculptures that we saw while walking on the National Mall and in the sculpture gardens. We thought it would be a great idea to teach them about the artist who created these wonderful works of art.

Why and how did you choose the visit?

I chose the National Gallery of Art because I wanted to make use of Alexander Calder’s amazing 76-foot-long mobile that hangs from the ceiling of the East Building. The National Gallery has other Calder works, including an entire room in its tower that is completely dedicated to Alexander Calder. In this room, my class was able to see sculptures and mobiles from his entire career. To utilize both spaces, we had circle time under the large mobile in the lobby and then went upstairs to the tower to view more of his work.

What were your learning objectives?

  • Learn about the life and work of the artist.
  • Observe and speculate about the artistic intentions in specific pieces of art.
  • Learn about various processes and techniques used to produce works of art.
  • Use a variety of materials to make their own reproductions of the art.

During this specific lesson I read Sandy’s Circus by Tanya Lee Stone. This book describes the story of Calder’s youth and his making of wire circus figurines. After reading Sandy’s Circus, I gave out craft wire, pipe cleaners, and other materials. These materials encouraged group discussion, engaged the senses, and strengthened their fine motor skills. I then explained that the class would have the opportunity to create their own mobiles and sculptures back in the classroom. The children took full advantage of their opportunity to create and craft with the wire, which allowed the children to create without boundaries.

How did you prepare yourself for this lesson? Did you know about this topic beforehand or did you have to research?

To prepare for this lesson, I read several different books about Alexander Calder. The two books that I found most useful were Alexander Calder by Mike Venezia and Sandy’s Circus. I also used the internet as a resource. The National Gallery of Art has a great website and I relied on it heavily. After I had enough information about him, I was sure to visit the works at the National Gallery of Art and looked at all of his sculptures that are outside on the National Mall.

What was successful in terms of your preparation and logistics?

I think sitting and having our circle time underneath the large 76-foot long Alexander Calder mobile was definitely helpful. As I was reading and talking about Calder’s mobiles, I saw the children looking up in amazement. I feel that was a powerful experience that will have a lasting memory.

What recommendations would you have for another teacher trying out this lesson?

For another teacher trying out this lesson, I would let them know that an alternative place to have a circle is on the rooftop off of the Calder tower. This might be helpful if the museum is particularly crowded. My class was lucky in that we were able to sit under the Calder mobile in the lobby with minimal distractions. But since that mobile is in the lobby, it just takes one large group to make the space too loud or distracting for a class of two year olds. I often like to have backup locations for circles in my mind. This helps ensure that I can be flexible and my class can have the best lesson possible.

How did you follow up this lesson? What topics were explored?

Alexander Calder was the last artist we learned about. We had previously done similar in-depth studies of artists and had given the class the opportunity to create their own work inspired by the artists. For example, Claude Monet inspired lily-pond paintings, Vincent Van Gogh inspired Starry night paintings, Roy Lichtenstein inspired pop art, Yayoi Kusama inspired pumpkins and a polka-dot wall, and Henri Matisse inspired cut-outs. After the children were finished with all of their projects, we transformed our classroom into a museum by hanging up all of their artwork.  We ended this artist unit of study by having a special art exhibition and invited family members to come view their artwork.

To learn more about how this class studied Kusama, Van Gogh, Lichenstein, Monet, and Matisse, come back to read their round up on artists.


Explorers Round Up

We recently featured a toddler class lesson on natural wonders. This lesson was part of a larger unit on explorers. The web below shows some of the topics that the class investigated while learning about explorers. The highlights from the unit included camping, transportation, and outside play. The class ended the unit with their own adventure by riding on the DC Circulator Bus.

Web - DF-Explorers

SEECstories.com

To start their unit on explorers, the toddler class learned about the different places that they could explore. The teachers, Lauren Bundy, Katherine Custer, and Emily Romig, brought their class to the see an exhibit in the National Museum of Natural History called the 100 Years of America’s National Park Service: Preserve, Enjoy, Inspire. Learning about the different areas in the world through the collections, such as the picture above of Death Valley National Park, allowed the class to discuss places that they would like to visit and explore.

SEECstories.com (1)

When exploring new areas, having a map to navigate can be extremely helpful. So Lauren, Katherine, and Emily put out maps in their classroom to help their class of explorers learn to navigate. The toddlers were fascinated by maps and pointed them out whenever they saw them on their daily outings.

SEECstories.com (2)

The class turned their attention to exploring the bugs and insects on the National Mall. The class visited the Pollinator Garden, which is one of the gardens outside the National Museum of Natural History. By looking through handmade binoculars (toilet paper rolls taped together), the class was able to spy different aspects of the garden.

SEECstories.com (3)

For toddlers, exploring the outdoors means playing outdoors! This class took full advantage of SEEC’s playgrounds where they were able to play and partake in self-directed exploration. Playing outdoors is not only fun; it is also crucial for young children since they learn through play. Additionally, playing and exploring the outdoors helps children build appreciation to the natural wonders that occur outside and helps create the desire to help protect the environment.

SEECstories.com (4)

To continue their exploration, the class needed to pack their bags. During morning circle, the toddlers were able to choose which items they wanted to put in a suitcase. Later that day, the class went to the National Air and Space Museum’s America by Air to learn about traveling by plane and to see examples of things people packed in their luggage.

SEECstories.com (5)

The toddler explorers decided to go on a camping trip while at school. So the teachers setup a tent on the playground where they learned about campfires, made kid-friendly (no fire) s’mores, ate the s’mores inside a tent, and played with flashlights and shadows.

SEECstories.com (7)

Explorers need a way to communicate with their friends and family while traveling so the class learned about sending postcards. The toddlers made their own postcards, visited the post office, and then pretended to drop their letters off in a postbox.

SEECstories.com (6)

To end their unit on explorers, the toddlers went on their own adventure! The class boarded the DC Circulator Bus and rode it around the National Mall and monuments. At SEEC, toddlers often see and point out the buses as they go by, but they are rarely given the opportunity to ride the bus. Being able to board and ride the bus was such a hit that many of the toddlers did not want to get off even when it was their stop!

For other ideas check out SEEC’s Pinterest! If you are thinking about creating an explorers unit, be sure to check out our boards on camping, nature, play, and natural phenomena


Teacher Feature: Four Year Old Classroom Explores Rowing and Crew

It’s Teacher Feature Thursday!

This week we are featuring Jessie Miller and Will Kuehnle of the four-year-old Honey Bear classroom!  After showing an interest in games and physical play, Will and Jessie decided to embark on an exploration of sports.  They began by learning about the important traits of athlete, including teamwork, integrity, and persistence.   They continued their unit by delving into a different sport each week.  On this particular day, the class was learning about crew and rowing at the National Gallery of Art.  Below you will find images and descriptions of the lesson, and a reflection from Jessie.

Publication2

Here are a few images from their lesson on rowing and crew:9
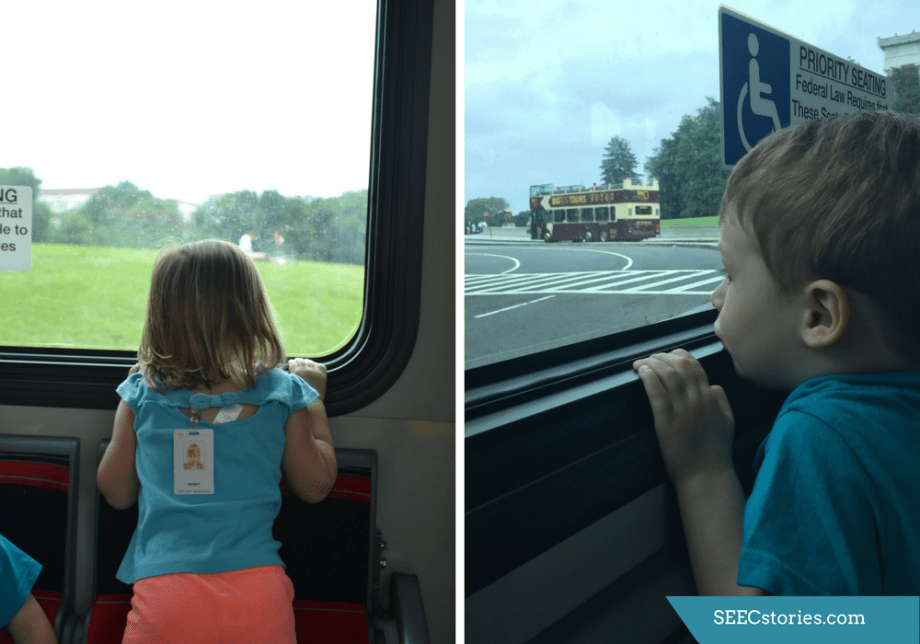
On their walk to the museum, the children pretended that their line formation was a boat.  Jessie reviewed the parts of a boat by asking the children to raise their hand if they were they were on the starboard, port, bow, or stern.

12
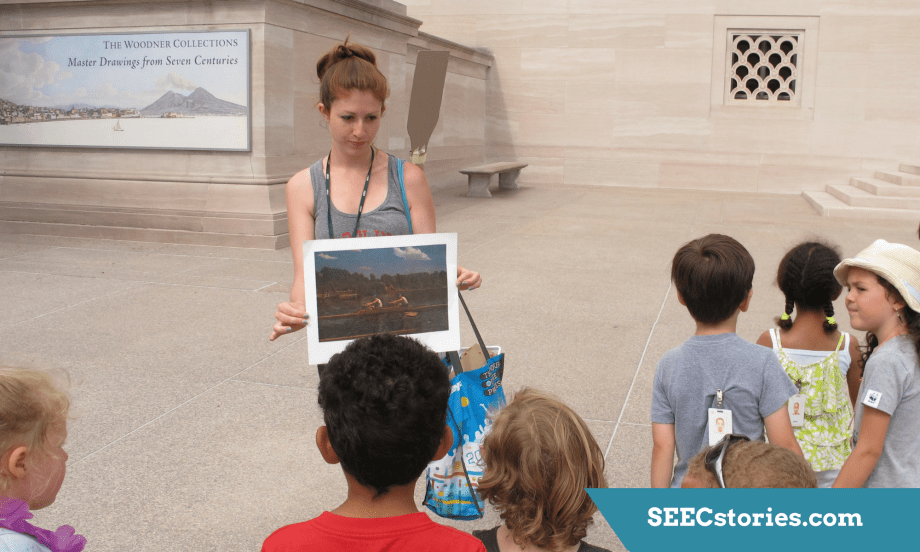
Once they got to their destination, the National Gallery of Art, Jessie showed the children a print of the painting that they would be looking for inside.  She also told the class that the painting was located in Gallery 68, and to keep a lookout for that number.  Given this information the class went inside with a purpose, and excitedly looked for the painting, noticing the gallery numbers.10
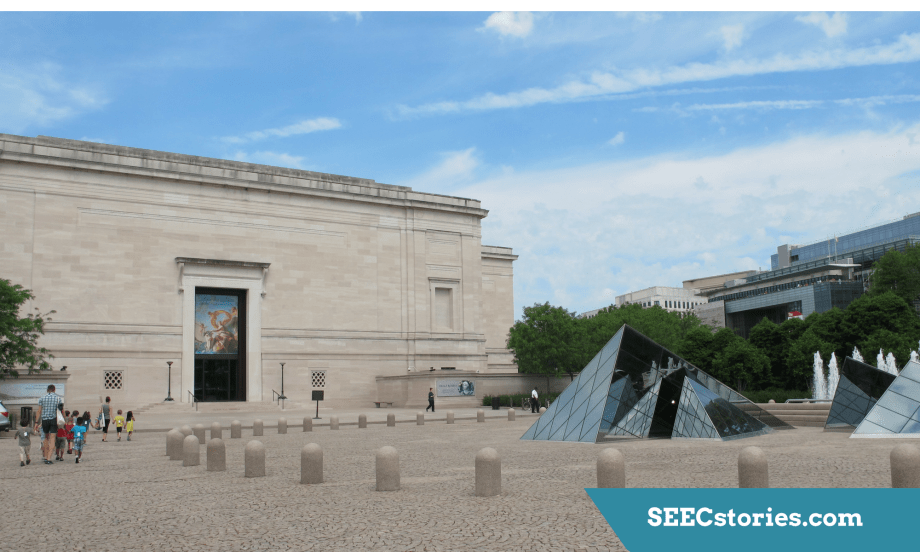
When they found the painting, The Biglin Brothers Racing by Thomas Eakins, they sat down and reviewed what they had learned about boats so far.  They remembered learning about parts of a boat and buoyancy.  Next they looked more closely at the painting and noticed two people in a boat.  The children enthusiastically shared memories of times they have been on or near a boat.  Jessie explained that this boat is used for a sport called crew, where teammates work together to row their boat in a race.

8Jessie shared that she was on a crew team when she was in college, and her job was that of a coxswain, the teammate who helps to steer the boat by shouting out directions and controlling the rudder. Jessie made a pretend rudder using yarn, cardboard and a basket, and she explained how each part was used to steer the boat.

5Then it was time to practice rowing!  Of course, Jessie couldn’t bring a boat into the gallery, but she brought items from the classroom that represented the parts of the crew boat to simulate the experience of rowing.  She took out the items one at a time and explained them:  The mat was to represent the water (and to ensure that the floor of the gallery would not be damaged).  A scooter acted as the seat in a crew boat that is on wheels so it can smoothly glide back as the teammate rows.  Next came blocks with shoes attached, which simulated the footplate – where crew members put their feet so that they are secure in the boat as they row.  Last came the oar, which Jessie had made out of cardboard. She took a turn on their constructed boat showing how a crew member rows the boat highlighting the importance of using your brain, muscles, balance, and teamwork.

7Then some of the children got a turn!  They put their feet in the boat shoes, and practiced sliding back and forth.

4
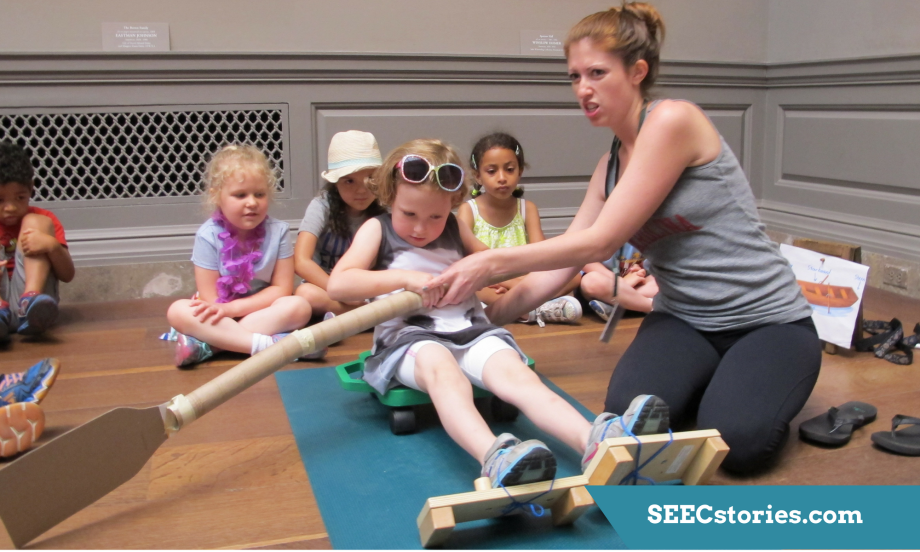
They used their muscles to pull the oar back as they pushed with their feet.  Through this simulation, the children were able to apply their observations of the painting to something concrete, which deepened their understanding of the concept and sparked excitement for the topic.  Due to time, only two children tried the boat in the gallery, but Jessie assured the class that they would all have a turn that afternoon back in the classroom.

1
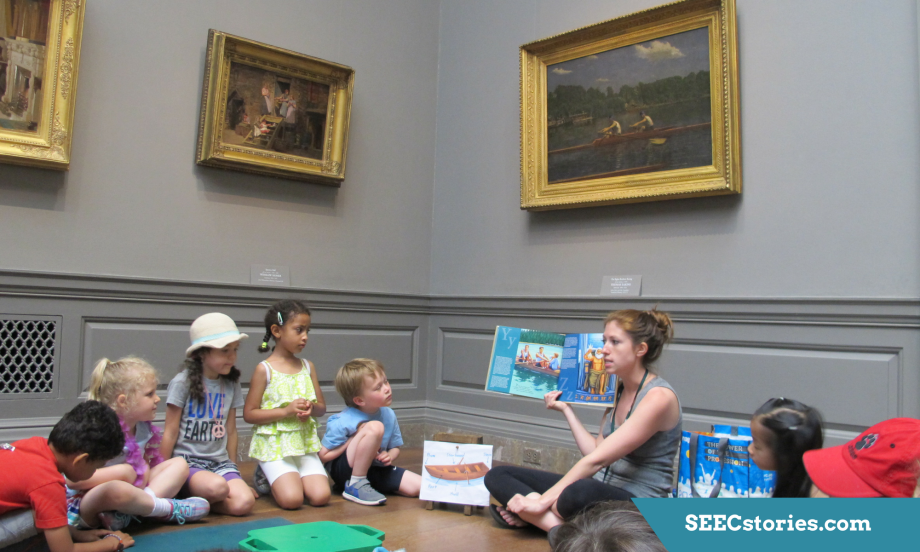
To end their circle, Jessie  read a page from G is for Gold Medal: An Olympics Alphabet by Brad Herzog about a young boy in the 1900 Olympics who won an Olympic medal for crew.

3To conclude the lesson the children shared observations and asked lingering questions.  They wondered where the life jackets were on the crew members, and noticed other paintings around the gallery of boats.  They were curious to know more about these paintings, and Will honored their inquiries by reading the labels out loud, and sharing his own observations.

SEECstories.com (34)
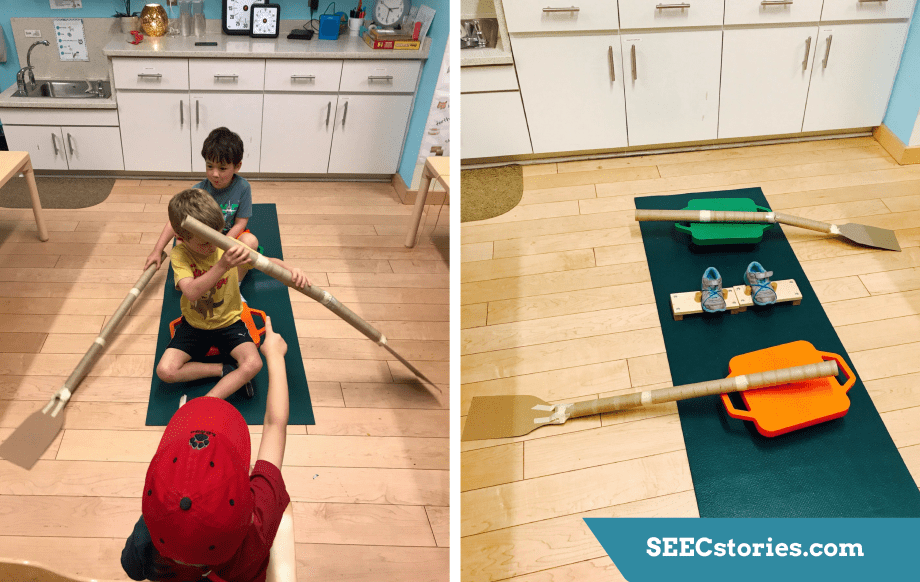
That afternoon, the children continued to explore rowing and crew by playing with the objects Jessie had created.  They enacted the painting they had seen that morning by having two crew members on the boat, and they added a coxswain at the front who helped steer the boat with instructions.

SEECstories.com (35)They also cheered on the US crew team team as they excitedly watched crew races from the Olympics on Jessie’s laptop.

A reflection from Jessie:

The Honey Bear teachers observed that the students gravitated towards games and play with a lot of physical movement. This led to our exploration of sports! We first focused on three tools an athlete needs when playing a sport including teamwork, persistence, and integrity. Afterwards, the Honey Bears began learning about some specific sports and how these tools are used in each. This lesson was done during our week about crew. I was inspired to teach them about this water sport because I was a coxswain for five years when I was in school. I was able to bring my previous knowledge, as well as enthusiasm, into the activities and lessons. I chose to take the Honey Bears to the painting The Biglin Brothers Racing by Thomas Eakins at the National Gallery of Art because it shows a clear picture of crew in action. The gallery is conducive for a lesson because it is usually quiet and has enough space for us to do a floor activity.

The objectives of the lesson were to scaffold the information we learned about boats that week, explore and learn new concepts involving a sport many of the students were not familiar with, and strengthen gross motor development with hands-on recreations of the rowing. Already having a vast knowledge on the subject allowed me to focus on the objectives and gathering of materials for the lesson rather than having to research the topic first. I see this as a benefit because I could spend more time going over the lesson itself as well as answer many of the children’s questions in the moment. My passion and excitement for the topic was also a benefit because the children could see my enthusiasm and therefore, become more interested themselves. I was pleasantly surprised to see how engaged and curious the children were about the topic.

I think the most effective part of my lesson was the ability to recreate the rowing in the museum. Being able to observe the crew painting, discuss the topic and then immediately role play the sport, gave the children multiple avenues to learn about a new subject. I believe the lesson reached and even surpassed the objectives I had set. The children were excited to share the previous information they had learned about boats such as where the bow, stern, hull, starboard, and port were located. They were also able to get first-hand experience with crew rowing by observing and discussing the painting, watching myself and a few of the students row in the museum, and practicing this sport on their own back in the classroom. To give the children even more exposure to the sport, we watched video clips of crew boats racing in the Olympics. This allowed them to see what they had been practicing in real life. They were all chanting “USA! USA!” as the boat representing the United States neared the finish line.

Although this variety of exposure to a sport helped the Honey Bears learn about a new topic, it is still not exactly the same as the real thing. It would have been helpful to have some of the real equipment rowers use and see an actual crew boat in real life. However, I will say it is much more beneficial for the children to be able to touch and actually use the objects to recreate the sport rather than just observing them in a museum, whether that is in a painting or inside a glass case. I believe this part of my lesson was successful even though there were a lot of materials to bring out and use.  I was also surprised to see how they calmly accepted the fact that only a few of them would be able to practice in the museum. Allowing each child to get a turn to row during the lesson would have taken too long and the children who wanted a turn back at school were given that opportunity.

The National Gallery of Art West Building is made up of quiet spaces that do not include things for children to explore through their sense of touch, as it is all visual. Therefore, we needed to make sure in advance that the rowing activity would be allowed in the space. We made sure to let the security know what our plan was, and use the materials in a way that were safe for the museum and its collections. We used a mat on the floor underneath the scooter so there would be no noise or scratches, and we had children practice one at a time with adult supervision. The children were able to practice back in the classroom two at a time, but I would have liked to build more oars and recreate an eight person boat with a coxswain and pretend we were participating in an actual regatta. I would have also liked to take the children down to the Potomac River in search of a real crew boat in action. I would recommend adding another week of exploration on this topic. The first week could be spent solely focusing on boats, buoyancy, and other nautical terms. The second week could be about crew rowing specifically.

After building on both topics and seeing how engaged the children were in the videos of Olympic racing, we are going to explore the Olympic games and see where this next topic takes us!


Be sure to check back soon for the Honey Bear’s Sports Round Up, which will provide a fuller picture of their unit, ideas on how to take a closer look at athlete’s tools, and specific sports in the classroom and the community.  For more ideas now, check out our Sports Pinterest board!

10 Things You Can Do Right Now with Your Child While Cooking

2

Making dinner or lunch? Why not include your child in the process! Cooking with your child is a fun way to work on math, fine motor, and gross motor skills. It also allows them to invest in the meal they are about to eat. Here are a few ways to make the experience extra child friendly:

  1. Re-write the Recipe: Go over the recipe you are going to make with your child. If 1possible, add images/drawings of the ingredients needed. Give your child a chance to “write” their own version of the recipe on a separate sheet. Going through this process helps your child build on their understanding of sequencing. Use “first….then…” phrases.
  2. Measure: This is an excellent way to work on math skills. Working with more than one child? Divide up measurements to smaller units to allow for more participation.
  3. Pour: This is a big milestone in a child’s development and requires a lot of practice. If you are worried about a big mess, place a plastic bin lid or plastic table cloth on the floor to create a pouring station.1
  4. Mix: Mixing is a great gross motor activity. Sing a song or count while mixing! If items are spilling out of the bowl, transfer a small portion to another bowl for your child to mix.
  5. Cut: Provide your child with a very blunt knife or a spoon to cut up soft items such as butter or bananas. While not all recipes include a child friendly item to cut, consider providing them with an item to cut that can be served as a side dish/appetizer. They will enjoy mimicking the way that you cut the tougher items.
  6. Cook: Baking, boiling, toasting, grilling, etc. is the magical transformation and the scientific part of cooking. While these steps of the process are the most dangerous for your child, they are also some of the most exciting. Allow your child to observe and “check on food” from a safe distance.2
  7. Serve: Serving the food is a great way to practice their balance and to develop upper arm strength!
  8. Share: Children are working hard on practicing this important social skill. Having them share the food over which they feel ownership provides great practice!
  9. Talk about Nutrition: Sometimes this conversation gets lost in the shuffle and excitement of the cooking process. Take a little extra time to explain to your child why we need different ingredients to make a nutritious and well balanced meal. Work with your child to sort each item on their plate into the different food pyramid categories (grains, fruits, veggies, proteins, etc.)
  10. Wash/Clean up: Ask your child to help clear the table and help with the dishes. Washing the dishes is a fun water play activity! Not ready to have them work at the sink with breakables? Fill a small tub with soapy water for them to wash a selected set of dishes!

Have fun cooking traditions or tips to share? We would love to hear them!