10 Ways to Make Transitions Easier for You and Your Child

i-NvxPVnr-X2

Mealtime, ending play time, leaving school, going to bed, these are just a few of the many of transitions your child works through every day. Transitions can be difficult for young children whose brains are still maturing – they haven’t developed the type of self control that adults have. To make matters worse, a child’s day is often dictated by factors that have little meaning to a child. Why does it matter if you have to be at a meeting or their big brother needs to be picked up?  Tensions between adults and children quickly arise and often a power struggle results.  Fear not, here a few SEEC-proven strategies to make transitions easier for everyone!

Visual Schedule and Calendars

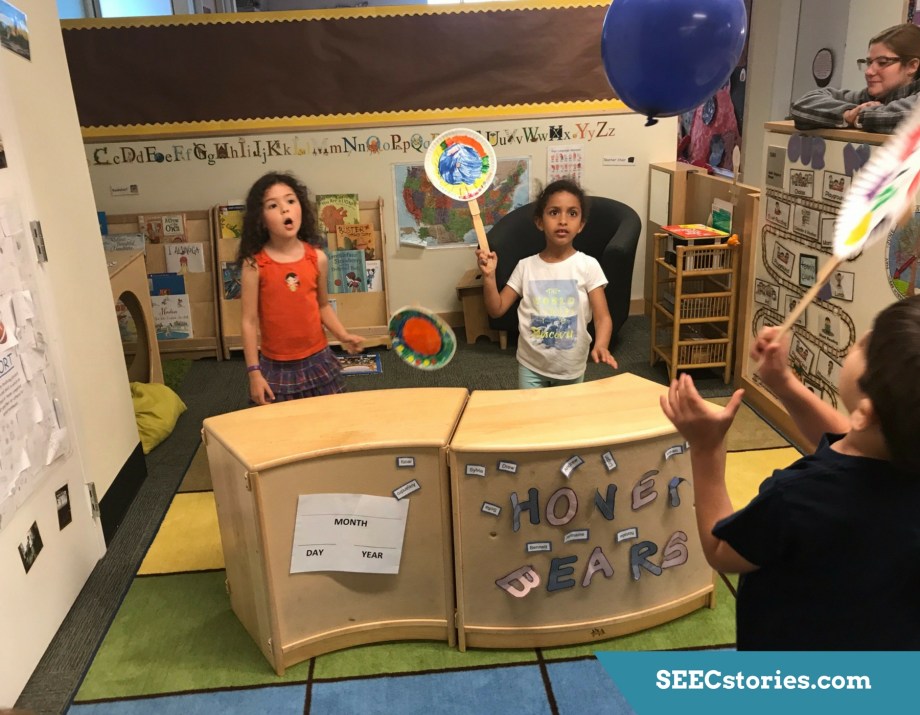
Calendar time is often an important component of early childhood classrooms. Children take turns serving as the calendar helper, often sharing information with the class about birthdays or special events. Similarly, most classrooms will also have a visual representation of their day.  Visual schedules in the classroom and at home help give children autonomy, provide them with a sense of time and routine, and it can eliminate having to repeat yourself. It helps to make the calendar with your child so that he or she is invested in it. Let the child choose colors, decorations, or the location.  A schedule enables children to take ownership and is a great way to prepare them for any changes to their normal routine.

i-2QbFfn4-X2

“Give Me Five”

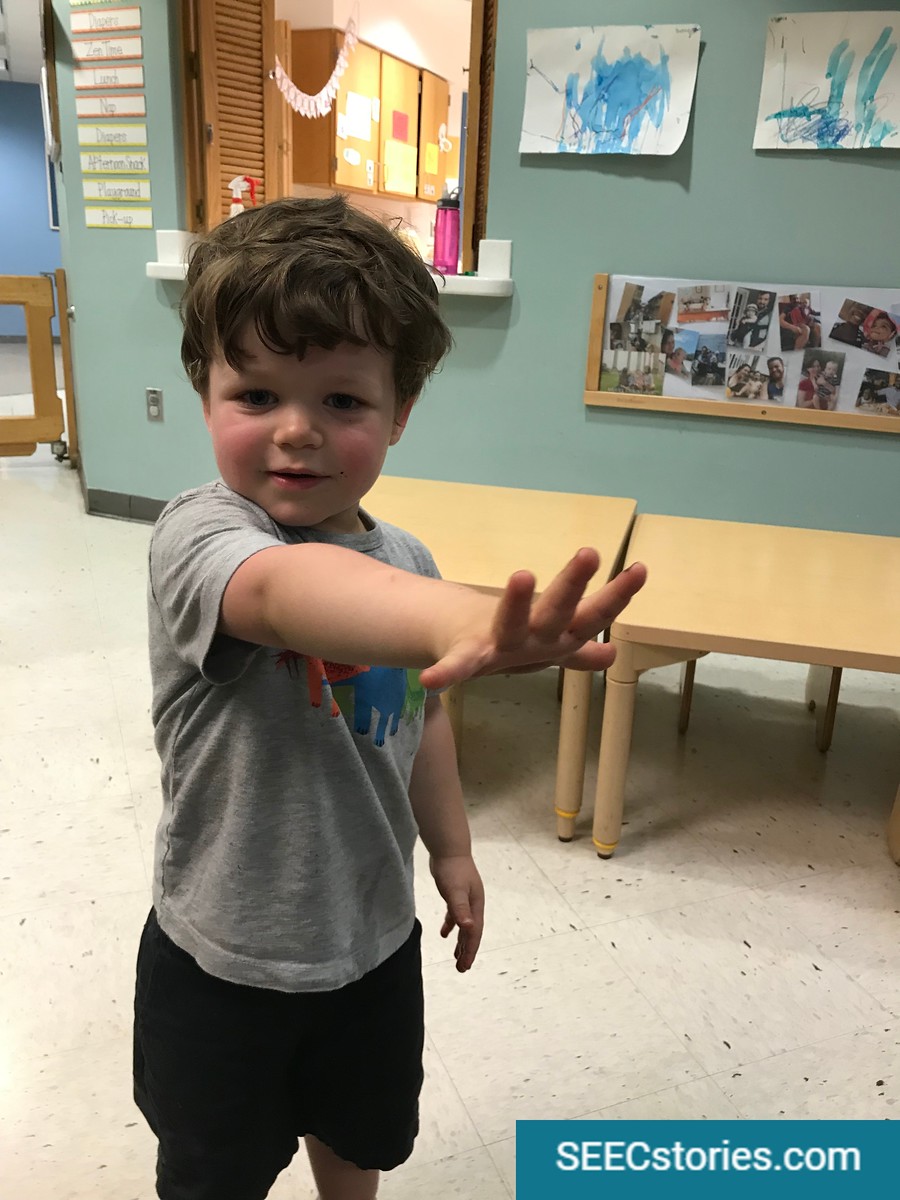
Early childhood educators around the world will use the phrase “Give me five.” We might ask them to hold up five fingers or to literally say “five.”  For younger children, an educator might simply hold up their hand while they get on the child’s level and try to make eye contact. This ensures that they pause what they are doing and take in the fact that their current activity is about to conclude. After “five” we may also give them “two: and when time has ended we may ring a gentle bell or sing a song. Either way, this helps alert them that their activity will be ending soon, and we will be moving on to the next part of our day.

Timers

Since time is not a concrete concept to young children, visual timers are a great way to help a child see the passing of time. Sand timers come in all different lengths and are a favorite in the SEEC classrooms. These show the children when time is up and helps to keep adults and children honest about deadlines. If children can see the change coming, they can more easily transition to the next activity.

Routine

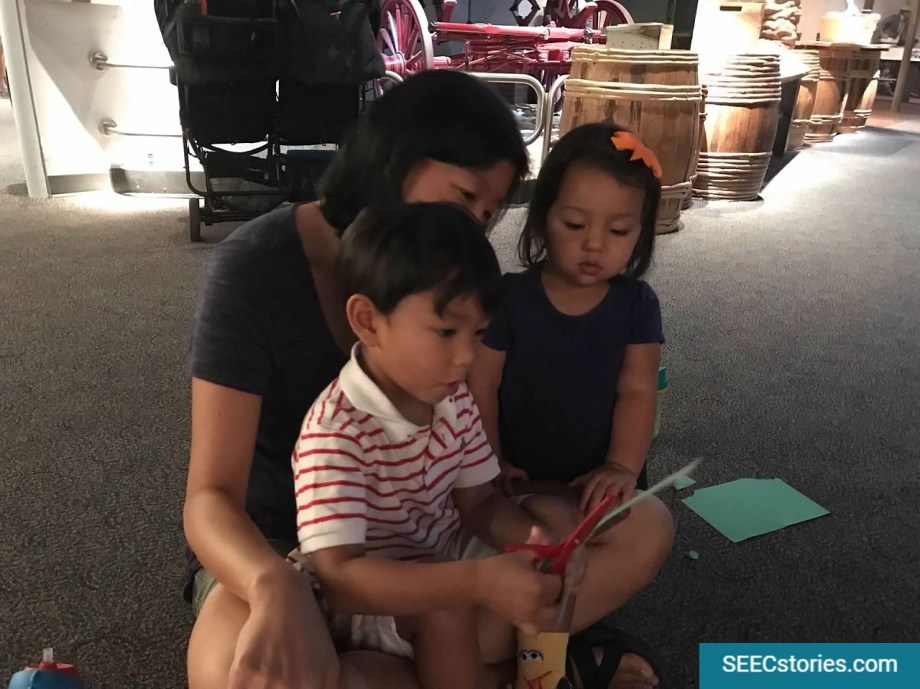
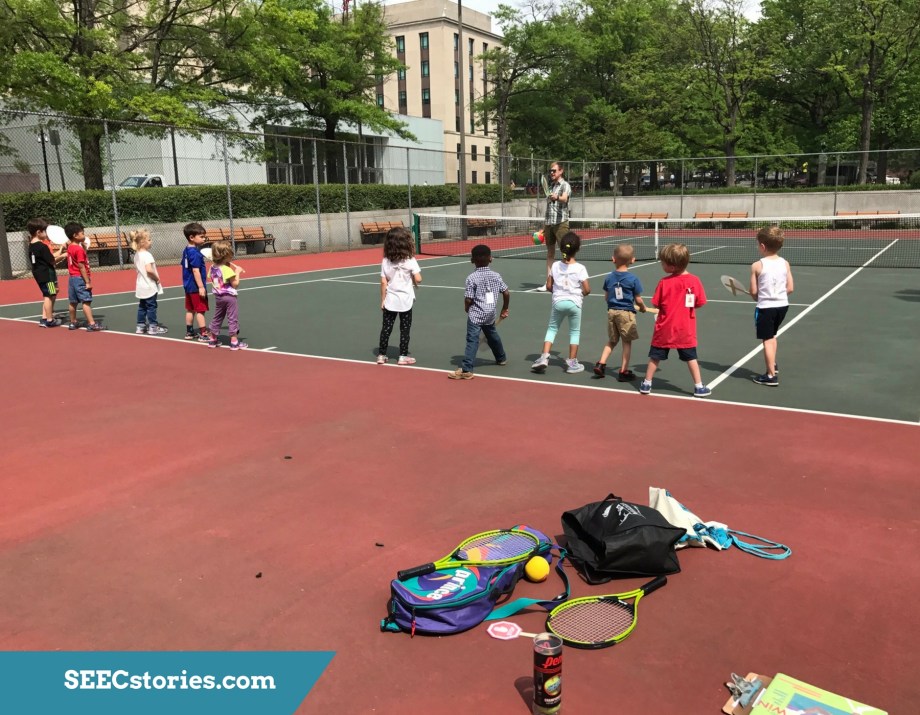
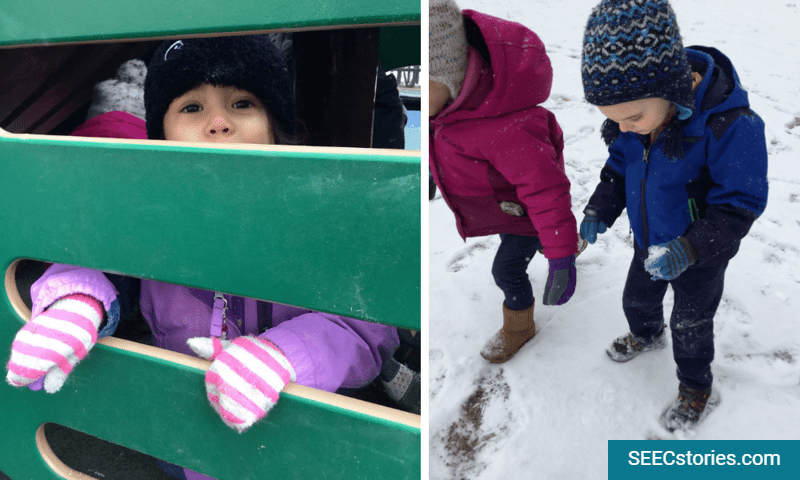
Having a routine is essential for a child. If they can usually count on things happening in a specific order, they are less likely to be upset.  A routine can be especially important for drop-offs. We find that the most successful drop-offs occur when the child has been prepared and knows the routine. This routine could include the adult helping the child put items in their cubby and then reading one book or drawing one picture together before leaving. Staying longer or changing the routine actually makes the transition harder. Sticking with the plan allows your child to recover from the separation quicker and over time will make transitions a breeze!

i-t3czXhf-X2.jpg

Save It

If a child is still playing, building, or creating when it is time to move on to the next activity, offer to save what they are working on. Part of the anxiety of transitioning occurs when children think their masterpiece will be destroyed. When possible offer to save their creation – you may even want to create a special place projects that are still “under construction.”


i-DrfvV9w-X2

Don’t Start What We Can’t Finish

Sometimes, there is just not time to squeeze something extra into an already packed schedule. Leaving something fun just as a child gets started can cause them to feel frustrated and angry. That being said, not doing something they want to do can be equally as frustrating. If you have to say no, give the child a choice of two things they could do instead. With older children, you can think together about a time when you might be able to return to the activity. Maybe there will be more time tomorrow to paint – just make sure that you follow up.

Ease Into It

We try not to create drastic changes in energy levels between activities. For example, we don’t have playground time directly before nap, instead we have lunch, quiet story time, and then nap. This helps children slowly decrease their energy level and relax, making the transitions feel less severe. Its always good to avoid getting the kiddos wound up just before bed time.

Songs and Lighting

We often use songs and lights to help children through transitions. When it is time to stop playing, we will sing the clean-up song, and when it is time to eat we will sing “Open-Shut them.” As we transition from lunch to nap, we may dim the lights while the children finish their meal and turn on the nap time music.  This provides a physical reminder that a change of activities is coming and helps them mentally prepare to rest.

i-tpxkRZd-X2

Participate in the Transition

Having the children help clean up, set the table, etc. allows them to be an active member of the transition. Participating in the transition usually makes them more interested in the next move and thus, more willing to go along with it.


How do transitions go in your house? Have a great way to help your child change from activity to activity? Please share!


SEEC SHARES: Kicking Off the New Year

It being September, it seemed like a perfect time to examine how our faculty is transitioning into the new year. Like most classrooms, SEEC is busy getting to know their new students and families, and helping children get accustomed to new routines and expectations. I hope you enjoy reading about some of their unique approaches.

Getting to Know Each Other

3
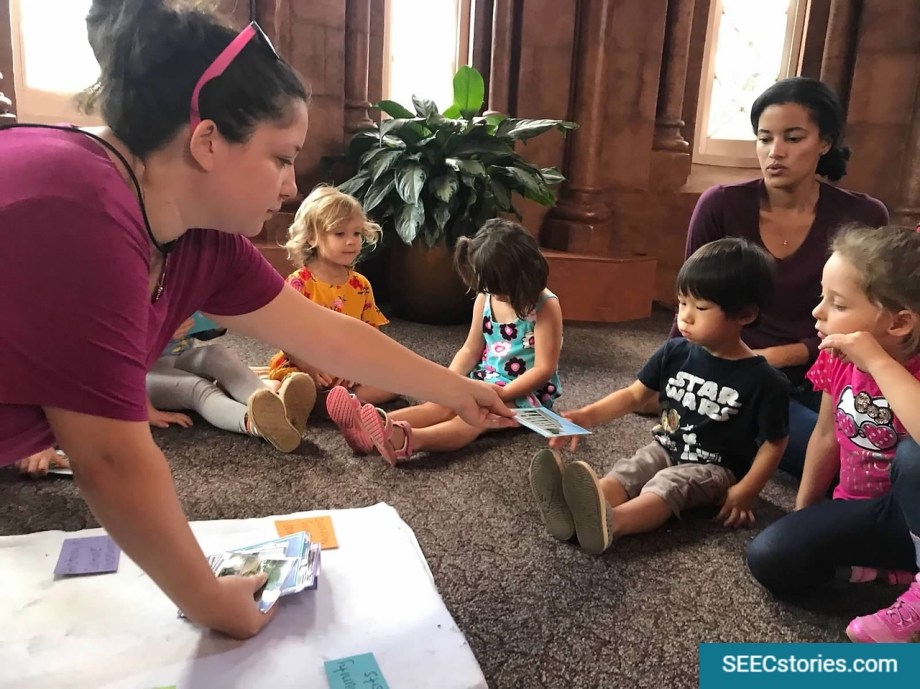
Our threes and fours devoted an entire day getting to know each other. They kicked things off when the PreK-4 class received a photo of a friend in the PreK-3 class and were asked to match the person to their photo. Once they found a match, the two classes practiced walking on trains. At SEEC, our classrooms walk, holding hands with a partner and positioning teachers in the front and back — like a train. They chose the National Gallery Sculpture Garden as an outdoor space to play team building games with a long, stretchy rope. After which, they read a book about friendship. The PreK-4 classes ended the day by giving their younger friends thank you cards.

Team Building and Classroom Culture

1 In keeping with our emergent curriculum, another PreK-4 class decided to work as a team and spent the morning discussing school year expectations. The educators were careful to record the children’s thoughts as well as their own. They plan to use this discussion as a permanent part of the classroom and the foundation for a successful school year. My personal favorite part of this lesson was that they solidified this idea of teamwork by visiting an exhibit at the American History Museum illustrating how to make a circuit. Students had to make a

1
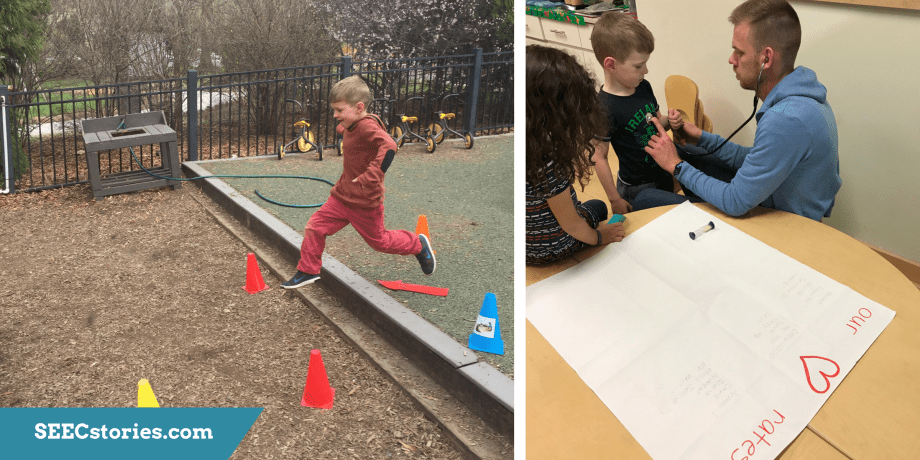
connection with their bodies between two metal poles to complete the circuit.

Getting to Know Ourselves

The toddler class began their second week of school by exploring their hands and feet. Not only was this an important way to learn about their own bodies, but it was a way to underscore their classroom routines. In this case, the teaching team emphasized hand-washing (a new independent activity for the toddlers) and walking on trains. It was also an opportunity for the class to practice using their “walking feet” in the museums and on the sidewalks.

Routines

2SEEC is lucky to have both an art and music educator and the first few weeks of school are always spent getting to know our newest students in the infants classrooms. This allows the children to acclimate to their daily routines and slowly get to know and build relationships with our enrichment staff.

Community

2

To get an overview of the Smithsonian community, kindergarten visited the Castle where there are small displays from most of the museums.

Our kindergarten class, which often includes students new to our school, spent some of their first days getting to know their community. While we are lucky to have such a large campus to explore at SEEC, I know that is not the case for every school. However, I love the idea of learning about one’s community both inside and outside of the school walls. Such an exploration opens up opportunities to explore natural surroundings, get to know people who work at the school, to visit nearby businesses, or to observe the roads and vehicles nearby.


I hope you have enjoyed reading about some of our approaches to launching a new school year. Hopefully your year is off to a good start too. As always, please feel free to share your thoughts and ideas here.

Originally posted September 2017.

Top 5 – Back to School Edition

Fresh pens, paper and backpacks at all the stores. Heavier traffic in the mornings and afternoons.  Cooler weather.  All tell-tale signs of another school year beginning.  We’ve compiled a Top 5 list of Back to School ideas, which will hopefully inspire you and get your school year off to a great start!

1. Nose wiping station.  The start of fall brings refreshing breezes, but also germs.  We love this idea for a Nose Wiping Station that we found on Montessori Mama and How We Montessori.  Pick a corner of the classroom and set up a shelf with tissues that the children will be able to reach.  Hang a mirror above the shelf so children can see themselves as they wipe their nose to make sure they clean it sufficiently.  Not only will this station keep germs from spreading, it will also encourage self-help and health skills. (Image from How We Montessori).

6a0147e1d4f40f970b015432d37f1f970c-800wi

2. Class collage. This SEEC 3-year-old class made a class collage at the beginning of the year to honor individuality while also creating a classroom culture. Using collages are a great way to talk about multiple, unique parts that make up a whole. The class visited and observed “Dam” by Robert Rauschenberg at the Hirshhorn Museum and Sculpture Garden, and made their own class collage, complete with photos of their faces.


3. Documentation.  Documenting can seem daunting when you’ve got so many other things going on at the beginning of the year, but these ideas could make it easier, while making learning more visible in the classroom. The image on the left is from the TransformationEd blog and features their Rabbit Road, which depicts their learning process during their inquiry on Rabbits. Displaying the journey on a linear road is a concrete way that children can see their work over time as they explore a topic.  The image on the right is from the Science Notebook, Teaching, and Technology blog, which depicts another documentation idea – choose a space in the classroom (that children can see) to display blank sheets representing each month of your school year.  At the conclusion of each month (or throughout) add images or work that share what the class has been doing.  Keep them up all year long, even as you switch out other displays and documentation, to help children see their work and progress over the whole school year.


4. Organizational hacks.  In our opinion, there are few greater feelings than starting a new year with an organized classroom.  This yahoo list has 15 organizational hacks from around the web that will help you feel fresh and ready. (Image on left from Motherhood On a Dime, image on right from Organized Cassroom)


5. Exploring Questions.  Fostering a sense of wonder and curiousity is something we take very seriously here at SEEC.  One of our four-year-old classes spent a considerable amount of time exploring questions last September and October to set them up for an inquisitive year.  To read more about their unit, click here.


For more Back to School ideas, visit our Pinterest board here.  Happy Back to School everyone!

Painting With Tea: Connections

14

Did you enjoy painting with tea? Take this activity one step further by reading a story and heading out into the community with your child. It will allow them to make connections and to understand tea in a broader context. Here are few suggestions to get you started, including those used during the original lesson.

Museum Visit:

If you’re in the D.C. area these exhibits would provide great ways to create an in-depth look at the process of making and drinking tea:

Detail of Julia's Kitchen

Julia’s Kitchen @ The National Museum of American History- This is a great place to explore someone else’s kitchen and make comparisons to your own. Ask your child how they think Julia would make her tea? Take turns pointing to the different tools (including the tea pot and kettle) she would use in her kitchen to make it. You can even sing “I’m a little teapot!”

Tea Set by John Satterfield @ Smithsonian American Art Museum- This tea set looks different and very modern. Talk about how it would feel to drink tea from the cup. Mime pouring tea for a tea party and taking pretend sips. Compare this set to cups and tea sets you might have at home.

Russian Tea by Irving Wiles @ Smithsonian America Art Museum- Start by asking your child what they see. Talk about the social aspect of drinking tea. Explain how it was used to gather people together. Discuss what these ladies might be talking about and create a pretend dialogue for the subjects of the painting.

Teal Bowl with Stand @ Freer Sackler Galleries- This is a great way to talk about geography and tea culture in other parts of the world. Bring along a map to show your child where the tea cup is from. Talk about how it is the same or different from a tea cup at home. Ask them how it would feel to hold this cup.

Community Visit:

No museum nearby or just don’t have the time? Here are a few visits you can do in any neighborhood!

Home goods store- Check out the different vessels for holding tea including cups and pots. Discuss how they are the same or different, and which you would choose to hold your tea.

Coffee Shop- Talk to the barista about how they brew tea and what types of tea they carry. Ask about differences between the teas available in the shop. You could also ask which are the most popular and then share a non-caffeinated variety with your child.

Grocery Store- The tea aisle at the grocery store is a wonderful place to discuss the varieties of tea. There are so many choices! Discuss with your child the different types of tea and how they are packaged (loose leaf, bags, triangle bags etc.). Talk about the different flavors and decide on a couple to take home and taste. To take it one step further, and take some time when you get home to research how that particular variety is made.   You might even cut open the bags to see what is inside.

Books:

Grab one of these great books from your local library!

Azuki Loves Green Tea by Rebekah Mullaney

Tea with Milk by Allen Say

Listen to the Wind: The Story of Dr. Greg and 3 Cups of Tea by Greg Mortenson

Coming to Tea by Sarah Garland


Have other ideas on how to connect tea painting to other activities and literature? Please share!

Painting With Tea

We Tried It Every Way, So You Don’t Have To:

Painting with Tea

4

“Which of these will work best?” “Can I use this instead?” “How much of this would be ideal?”  These are just a few examples of the questions we ask ourselves as we prepare activities for our family programs. Project ideas are everywhere, but more often than not, they don’t show all the details. SEEC’s faculty knows that what you see isn’t always what you get. In this blog, we’ll provide a peek behind the curtain and show you an example of how a SEEC educator goes about creating a project and ensuring that it provides the best opportunity for the child to be creative and feel successful. In other words, we’ve tried it a million different ways, so you don’t have to.

The Original Activity

This week it’s all about tea! Our featured activity comes from our Toddler Trailblazers family program, Tea TimePainting with tea is an activity provided during the playful choices  portion of the program as families arrive. Children were provided with watercolor paper, shallow bowls with tea bags and tea, paint brushes, smocks, and wipes.  Both brushes and tea bags were provided in case a child felt more comfortable using a familiar tool rather than the tea.  A variety of tea types were set out including black, green and herbal teas (hibiscus, passion fruit, cherry, and blueberry). The teas were pre-brewed to allow the water time to cool before the bags were handled by the children.

We don’t give any additional instruction because we want to emphasize the importance of process-based art.  We want to encourage the children to create without a pre-determined outcome and enjoy the process of creation without the need to achieve a specific finished product. With this project, children may create something figural/representational or abstract. Whatever the child’s choice, the experience will result in joyful painting and a final product full of vibrant hues of watercolor.

Trial and Error

Here are some of the questions we asked ourselves when preparing this project:

  • Which types of tea work best?
  • How long should they be brewed?
  • What tools work well to paint with tea?
  • What should we paint on?
  • How do I contain the mess?
  • What’s the best way to dry the finish work?

I tried out some of these approaches myself and then I recruited some young friends (ages fives and two) to help me test it out! Here’s what I found.

Types of Tea (option 1)

4

Tea Brewing (option 1)

1

Painting Tools

Painting Base

Less Mess

Drying

2

After all that trial and error, here is what we decided would help most achieve the successful outcomes with this project!

Painting with Tea Final Conclusions (1)

We hope this was helpful and encourages you to try out this activity! Send us pictures of your creations and let us know how it went! Be sure to check back next week for ways to take this activity one step further by making connections to literature, museums, and community visits!


Sports Round Up

Recently we brought you a Teacher Feature showcasing a lesson on rowing and crew from of our 4-year-old classes.  We’re back with a round up of their sports unit led by teachers Jessie Miller and Will Kuehnle.   The web below depicts their entire unit, and the photos that follow highlight some of their lessons.

Web.jpg

The Why of Sports
It was important to Will and Jessie, that their sports unit not solely consist of playing games, but also integrated an array of subjects such as science and art.  During their week on the “who and why of sports”, the Honey Bears learned more about the science of their bodies and how sports and exercise affect their health. 1

How does physical exercise get our hearts pumping?  The children took their resting heart rates in the classroom, and then participated in an obstacle course on the playground.  Right after the course they measured their heart rate again, comparing it to their resting heart rate to see the difference.

SEECstories.com (44).png

They also talked about sports medicine, and the importance of taking care of our bodies when they are injured.  The children were so interested in sports medicine, that Will and Jessie incorporated more lessons related to medicine throughout the unit, for example, they talked about tendinitis during their week on tennis.

Golf

SEECstories.com (40)

To introduce the children to golf, the class visited Hendrick Avercamp’s A Scene on the Ice at the National Gallery of Art.  The painting shows people playing on the ice, including two boys playing “colf”, a mix between golf and hockey.  After observing the painting, Jessie showed the children the tools of golf including a golf club, ball, and “hole” (made using blocks from the classroom).

1

Later that week the children met with a parent who plays golf.  He answered the children’s questions about golf, and showed how he likes to swing the golf clubs.  The children took turns swinging the golf club at ping pong balls (they wanted to be safe with all the people around).

1.jpg

Back in the classroom the children collaborated on a golf course using blocks, markers, and paper.

2

They also practiced their persistence by playing a golf-like game by blowing their golf balls (pompoms) along the course with a straw.

Tennis

SEECstories.com (41)

The class visited the National Museum of African American History and Culture to learn about three exceptional tennis players: Althea Gibson, Serena Williams, and Venus Williams. 4

The National Air and Space Museum has Sally Ride’s racket on view, and the class visited it to learn about Sally Ride, and think about how gravity affects the game of tennis.

25

To end their week on tennis, the Honey Bears went to a local tennis court to try their hand at the sport.  After observing and talking about the parts of the court and equipment, they got to hit tennis balls with a racket, and then play a game of “beach ball tennis” using rackets made of paper plates and paint stirrers.

3

Back in the classroom, they continued to play tennis with balloons and their now decorated rackets.

Rowing/Crew

3

What better way to understand the idea of buoyancy than heading down to the docks and seeing boats on the water?  The class went to the marina by the Tidal Basin to do just that.

2

They also went into a boating store and talked with an expert about boats.  Boat safety was also discussed and they got to try on life jackets.

SEECstories.com (42)SEECstories.com (43)

Later that week, the class ventured to the National Museum of the American Indian to see an Ojibwe Birch Bark Canoe to learn about the parts of a boat.  After that, they headed to imagiNATIONS Activity Center and practiced their balance in boats.


We hope you enjoyed getting a bigger picture of our Honey Bear class’ unit on sports!  Visit our sports Pinterest board for more ideas.

Teacher Feature: Infants Explore Tea

For this week’s Teacher Feature we will highlight how our infant class investigated tea. Educators Brandi Gordon, J. Kelly, and Rebecca Morgan Parr took their class to the Smithsonian’s Enid A. Haupt Garden where they saw a tea plant in the Moongate. Afterwards they went back to our center where they made and drank tea. Below you will find images from the lesson and a reflection from the educators.

Cover Photo_Pointing_Cropped

Preparation:

i-qd7Fnf6-L

Prior to this lesson, the class had been learning about food and different things that people eat and drink. Inspired by the drinks that their parents, caregivers, and teachers had been consuming, they recently began exploring hot drinks including tea and coffee.

This tea lesson felt like a natural topic to explore after our class finished learning about fruits, vegetables, and other foods that grow from plants. We followed the interests of the children in our Duckling class who were interested in their teachers’ drinks. They children wanted to drink, touch, and taste our tea and coffee. In general, letting small children drink or handle hot beverages is not acceptable. We did not want to leave their interests ignored, so we decided to teach about them instead. We wanted to explore why some beverages feel hot and felt it was an excellent opportunity to reinforce language and safety ideas.

i-j7Hgvsk-L

To learn more about tea, the class visited the Smithsonian’s Enid A. Haupt Garden where they were able to look at a tea plant.

For our objectives, we began by expanding upon the past units’ objectives. We had been teaching our Ducklings that many plants become the food that we eat, so visiting the tea plant was another way to do that. We also wanted more opportunities to explore our community, visit local shops, and see different parts of our school like the staff room, where we boiled the water to make tea. Another objective was to introduce our class to the idea of temperature. Lastly, we wanted to expose them to many kinds of tea as well as show them various beverages that exist in the world.

As educators, we had our own set of objectives for ourselves. We wanted to follow our class’s interest even if it was an unconventional topic. We wanted to weave the ideas of safety into a lesson. And we wanted to allow the children to embrace having sensory experiences. It was nice to remind ourselves that getting messy is ok and can be fun!

Lesson Implementation:

i-TcCLKtt-L

While looking at the tea plant, the educator Rebecca explained that people pick leaves from this plant to make tea.

Before the visit and on the way to the Moongate, we talked to the Ducklings about how we were going to see a tea plant. At the Moongate, we took the students out of the buggies and helped them into the circular marble seating next to the tea plant. We compared the real tea plant to the pretend tea plant and looked closely at the leaves.

i-TVxz9zs-L

Since plucking the tea leaves off the real tea plant would damage the plant, the educators brought their own pretend tea plant which was made by taping images of the tea plant to a cardboard box. To help the children experience plucking, they velcroed tea leaves to the box which the children were encouraged to pull off and put in a teapot.

The great thing about the pretend tea plant was that the children had the opportunity to pull off the leaves without hurting a live plant. After the Ducklings pulled the leaves off the box, we encouraged them to place them into tea bags which in turn they placed into our toy teapots. Then we poured pretend tea into their cups to drink. Many of the children loved pretending to drink out of the cups. As they pretended to make and drink the tea, we sang I’m a Little Tea Pot.

Some of children were more interested in playing with the water from the rain. They smacked their hands down on the marble seating to splash. We talked to the Ducklings about how we ingest plants for eating in many ways and that plants also go into tea. They had seen flowers throughout our gardening unit so the idea that some flowers can go in tea seemed to excite them.

i-Fd9DDCJ-L

The class returned to the center, to watch Kelly brew tea. Kelly talked about the different plants that can be used to make tea and poured hot water over tea leaves so the children could watch the steeping process.

We took our students into the kitchen area of the staff break room, where they began the beginnings of a circle time by sitting on the floor with their teachers. Kelly showed the class the electric kettle, tea bags, and the tea strainer. We gave out some tea bags to allow the students to explore. Some of the Ducklings started to rip the tea bags. We decided to encourage their exploration of the loose-leaf tea and asked questions like “What does that feel like?”


i-WLcNqSZ-L

Children were encouraged to explore tea using their senses. They smelled tea, touched tea (and even pulled apart tea bags), and eventually tasted the tea.

We allowed free exploration. Some of the children enjoyed ripping the tea bags, some of them preferred chewing a strand of lavender, others placed dried rose petals into our tea strainer. We let the children stand up and sit down as they wished but made sure that they stayed within the confines of the small kitchen area so we could see everyone.

We tried to encourage our students to explore many kinds of sensory options. We also know that they are at an age when most things still go in their mouths for exploration and provide important details about the world around them. Tea is something they can learn about through all the senses–sight, sound, smell, touch and taste. They could see the tea, hear the water boil and steam, they could touch the dry and rehydrated tea leaves, smell the tea as it is brewing and finally taste it.

Reflection:

i-d6svSh4-L

To conclude the lesson, the class had the opportunity to drink tea and as they drank, they engaged in conversation. Some children chose to clink cups as if they were cheering before drinking.Enter a caption

We followed up by this lesson by having the students “paint” with tea bags on a big sheet of paper. We continued to make different varieties of teas and visited the United States Botanical Garden to see different herbs that are used in tea (like mint.) Later in the afternoon, after everyone had woken up from their nap, we gave all of them a cup with the tea we made so they could try it as well as practice using open-face cups.

For other teachers trying this lesson, we recommend making sure whatever tea you use is decaffeinated and that the teas taste good to a child’s palate. Try to make sure you give enough time for the students to explore the objects and try to see how you can explore all the senses. Be flexible and open to mess– this is a great opportunity to allow each child to be an investigator, a scientist, a creative, and as always, their most curious self.


Easy At-Home Learning: Architecture

Why Architecture

As a parent, I am always on the look out for fun and easy learning opportunities. While I was scrolling through my Facebook feed, I noticed this great blog on shadows and I began to think more about architecture. We encounter architecture everyday– it is all around us. Whether we live in the city, suburbs or country – architecture is an essential component of our environment. And if you haven’t read any previous posts, SEEC staff has been busy thinking about the importance of environment and its impact on learning. Young children connect to architecture and at an early age, begin to notice its features. Don’t believe me….Well, just take a walk with a group of SEEC students across the Mall and ask them where their parents works. Inevitably, they will identify the museum by the building’s architecture. “My mommy works in the round one (Hirshhorn Museum and Sculpture Garden).” or “Dad works in the one with a lot of glass (National Air and Space Museum).”


Seize the Moment

Maybe your child doesn’t spend their days in Washington, DC, but I bet they are noticing their own neighborhood. Ask them to think about their friend’s homes, can they identify a feature: color, shape, number of stories? What about their school? The first words out of my kid’s mouths when they set foot in their school cafeteria was, “There are a ton of windows.” Its true, one wall of their cafeteria is ceiling to floor windows that look out onto a wooded area. That feature made a strong impression and four years later, they continue to marvel at the fact these windows connect them to the outdoors. The point I am trying to make is simple: if your child notices these details seize the opportunity to take what they are interested in and run with it.

That is exactly what our teachers did in the set of photos below of our three-year old class last year. I specifically chose to highlight this lesson because I thought it would be easy to recreate at home and inspire your inner teacher. Keep in mind, I am not suggesting that after working a 10-hour day (whether it be in an office or at home) that you whip up a lesson plus museum visit (for on-the-spot ideas, see below), but it is something to keep in mind for a weekend. These ideas encourage your child’s imagination, include some simple math and gets them to think about design, engineering and even aesthetics.

Since SEEC is located near so many buildings that feature columns that seemed like an obvious element to discuss with the class.

Since SEEC is located near so many buildings that feature columns – they were the perfect element to discuss with the class. Using the tablet, helps them visualize the idea before the headed out for their museum visit.

An over-sized can was another convenient choice - something easily pulled from the kitchen.

An over-sized can was another convenient choice for the teachers who simply pulled it from the kitchen. Each child got a turn feeling the weight of the can. This is an important step so that they experience of the weight of the can.

The teacher places the can on her 2-column building with disappointing results.

The teacher places the can on her 2-column building, made simply of cardboard and blocks. Clearly, the results were disappointing.

It turns out that by adding two columns, the house will hold the can.

It turns out that by adding two more columns, the house will hold the can.

The kids get a chance to see the real thing at the National Archives.

The kids get a chance to see the real thing at the National Archives.

And inside the National Gallery of Art.

And inside the National Gallery of Art.


On-the-spot Ideas

Don’t have time or energy to plan – don’t worry. Here are a few simple, spontaneous ideas that will get your little one to notice the architecture in their neighborhood.

1. Ask them to count the number of windows/columns (or whatever feature interests them) and draw their shapes with their finger – identify the shapes.

2. Ask them what they like or dislike about a building or a particular part of it?

3. Ask them to draw what they see or use their imagination to draw a building.

5. Play with building blocks when you get home and design your own space.

5. Play “I spy” with a particular architectural feature while riding home and describe its physical characteristics.

Hoping these ideas inspire you to get out and learn with your little one!

Tips for Challenging Behaviors

We’ve all been there. Your child or student is exhibiting a challenging behavior, you’re frustrated, and you’re not sure what to do. While there is no sure-fire way to address any and all behaviors, we’ve reflected on some of our philosophies when it comes to consequences and dealing with undesired behaviors.

i-NcXvrv2-X2

Choices

Sometimes children act out because they want to feel a sense of control. As adults, we want to offer them the opportunity to assert their autonomy, but sometimes what they want to do is unsafe, unacceptable, or just not appropriate for the time and place. In order to respect the child’s voice and need to feel independent, while also ensuring the behavior is safe and appropriate, we rely on offering choices to the child. A few notes and tips when offering children a choice:

  • Offer a choice between two things. Too many choices can be overwhelming to a child. Often times it can be helpful to hold out a hand as you offer each choice, and allow your child to verbally tell you which they want to do or point to a hand. This is a helpful visual for less verbal children.
  • Make sure that the choice is a real choice. People often will say to young children, “You have a choice: eat the broccoli or you can’t have dessert” believing that they are offering their children a choice. But statements like these are really about consequences not choices. The consequence of not eating the broccoli is no dessert. Talking about and explaining consequences to children is not a bad thing. In fact, we explain more about the power of consequences below. But masquerading a consequence as a choice can actually be harmful. A true choice honors the child’s ability to choose between two (seemingly equal) things. One way to make the above example a choice would be to say “You have a choice between carrots and broccoli. It’s your choice. You choose.”
  • Only offer realistic choices. If you offer a choice, be prepared for your child to choose either of the options. If you are not comfortable with one of the options, simply don’t offer that as a choice. It can be extremely frustrating for a child to be told that they have the opportunity to choose something only to be told that their choose is no longer an option.
  • When there isn’t a choice. Sometimes you cannot offer a child a choice due to safety reasons, for example, “You must hold my hand while we are in the parking lot.” In this case, it is perfectly fine not to offer a choice, but explaining why to the child is respectful and helpful.

i-mXfhH2W-L.png

Natural Consequences

At SEEC, we try to give natural consequences as much as possible for children’s behavior. This allows children to understand the cause and effects of their actions. For example, if a child refuses to wear their gloves in the winter, we warn them that their hands will get cold instead of struggling with them to put them on. When they get outside, they more often than not are bothered by the cold on their hands, and want their gloves. At this point we offer the child their gloves, and can remind them of this occasion if they refuse to wear their gloves again.

One of the great things about natural consequences is that the adults do not have to do anything for that consequence to happen. But unfortunately, that is not always the case and sometimes adults have to play a role. When this happens, it is important that the consequence is appropriate for the behavior. For example, it can be tempting to take away play time when a child isn’t listening or playing when they should be doing something else. However, this is not a natural consequence, it tends to not be meaningful as they suffer the consequence minutes or hours after the undesired behavior, and children NEED the play time. In fact, removing play time can often increase the challenging behaviors of children.

It is also equally important that the adult is willing and able to follow through with the consequence. If you say, “You need to behave or we’re leaving the store”, be sure that you are willing and able to leave the store if your child doesn’t behave in the way you want them to. It is also important that you explain to your child exactly what behaviors are appropriate versus not appropriate. Try saying, “you can calm down, hold my hand, and we’ll keep shopping, or we can leave” gives the child a positive idea of how they need to act and what the consequence will be if they do not.

i-V9DgD49-X3

Time Outs & Redirection

Growing up, I remember receiving time outs and being told that I was supposed to reflect on what I had done to earn the punishment. Instead of reflecting, I remember sitting and stewing about what had happened, and just said what I needed to say to get out of time out. In short, it was not productive for me, or to the learning process of why my behavior was inappropriate.

At times, we will redirect a child and have them leave a heated situation and take a moment to sit down in order to calm their bodies and emotions. We feel that this is helpful in terms of deescalating situations, and assisting children with their developing self-control, however we don’t set time constraints on these sessions, and often tell the child that when they feel like they are ready, to rejoin the group or come talk to the adult.  We often call this “taking a break” instead of a time out.

i-3b6CtSJ-X3

Communication 

We recognize that we won’t always be there when a child has a conflict with a peer, nor do we want to always have to step in and solve their problems. Instead, we try to give children agency to solve their problems, and thus we do not step in right away (unless their is a potential safety issue).

We give children language to express themselves, often we call it SEEC Speak. This language encourages and empowers children to communicate their feelings through language instead of physically. This looks different depending on the age group. For example, the toddlers are encouraged to say, “Mine!” or “Space!” in a big, strong voice if another child is trying to take something away from them or invading their personal bubble.

We also think about the language that we as adults use with young children when we are asking them to change their challenging behavior to more appropriate behavior. For example, if a child keeps standing up at lunch time, instead of saying, “Sit down” repeatedly, using more developmental language such as, “Bend your knees and put your bottom in the chair” might help children better understand what you’re asking and follow through.

Playing with Electricity


During one of our educator seminars, Play: Engaging Children in Object Rich Environments, participants observed a museum or community visit with our classes, who were all exploring electricity.  But how do you make electricity playful?  And how can educators make the same topic developmentally appropriate for infants, all the way up through five-year-olds?  Below are examples from our classes, ranging in age, across downtown DC, all engaging in playful learning about electricity.

Infants

Our youngest class, the Cottontails, love water play so the class chose to explore watermills . Before their visit, their teachers gave them laminated prints of paintings and images of watermills to look at, while describing their shapes and how they move.  Next they visited the Haupt Garden to play with watermill toys in a fountain to see for themselves how water, when poured onto the watermill, makes the wheel turn.  Through their play the children practiced fine motor skills, witnessed cause and effect, and heard new vocabulary.


The older infant class, the Ducklings, went to National Gallery of Art to see MultiVerse by Leo Villareal.  On their way to the museum their teachers talked about lights, and the Ducklings began pointing to lights along the way in hallways and elevators.  Once at the piece, a tunnel with a moving walkway covered in flashing lights, the children were given glow sticks and flashlights to explore on their own.  They used their fine motor skills to turn the lights on and off, waved them around to see their effect, and watched the flashing lights as they practiced new vocabulary.


Toddlers

One of our toddler classes, the Toucans, has been studying the Olympics, so they worked this lesson into their unit by learning about crowd energy.  They talked about why people cheer, and how encouragement and support can make someone feel.  They ventured to the Hirshhorn Museum and cheered on the fountain, which gradually gets higher.  While cheering for the fountain the Toucans practiced their social-emotional skills and also developed literacy skills through the use of songs and chants (“Take Me Out to the Ballgame” and “We Will Rock You”).


The older toddler class, the Dragonflies, focused on light versus dark, and how light gets its energy from different sources.  To illustrate this, the class experimented turning a lamp on and off when it was unplugged versus plugged in.  After their experiment they too went to MultiVerse by Leo Villareal at National Gallery of Art to see the small circular lights go on and off while they played with flashlights and glow sticks. They used their fine motor skills to control their lights and sang, “This Little Light of Mine”, which reinforced the concept while also practicing new vocabulary.


Twos

One of our two’s classroom, the Penguins, also focused on the “on and off” functions of objects that use electricity.  In the classroom they looked at light bulbs, and turned the lights on and off.  The class played musical chairs, which meant paying extra attention to when the radio was on versus off, while also engaging in gross motor play and practicing social-emotional skills.  To extend their learning they went to Lighting a Revolution at the National Museum of American History where they looked at a timeline of light bulbs and made observations about how they have changed in size and shape over the years.


Threes

The three-year-old class, the Wallabies, had been learning about trees, so they merged this with electricity and learned about the impact of lightning on trees.  The group went to the Hirshhorn Sculpture Garden to see Needle Tower by Kenneth Snelson .  The class discussed how storms and lightning can be very damaging to trees and buildings, but they can be protected by lightning rods, like the tall metal sculpture. They built a tower using connector toys, practicing their fine motor and problem solving skills.  Lastly, they played “Rain, Rain, Lightning” (just like “Duck, Duck, Goose”) to reinforce that lighting can be unpredictable, while also working on their turn-taking and gross motor skills.


Fours

The four-year-olds learned about renewable energy, specifically wind energy.  They went to the US Botanic Garden to see wind turbines, but found that the turbines had recently been removed.  When the teachers explained to the class that the turbines had been removed they made connections to their past study of animals and conservation, theorizing that they had most likely been taken down due to their potential harm to birds.

After learning about the parts of a wind turbine, the class split up into groups and used their bodies to create their own wind turbines with each child acting out a key role of either the wind, blade, generator, tower, or electron.  Through their play the children were actively engaged in scientific thinking about the different parts of a wind turbine, how they work together, and their effect. Working in groups to bring their wind turbine to life also gave the students a chance to practice teamwork.


Reflections

Through their observations the Play seminar participants reflected that the play they witnessed not only engaged young children in the concept of electricity, but also strengthened developmental and learning skills.  One participant was struck by the amount of learning the infants were engaged in through their water play, including their careful concentration on pouring water and making the watermills spin.  Participants also  noticed how the play and content of the lessons carried over into the walks back from their visit, for example, pointing out lights in elevators or talking about lightening.

This day of playful electricity lessons also proved useful for our team. The experience of exploring the same topic on the same day helped us to reflect on the way we use play in the classroom, as well as how topics can be explored in a meaningful and developmentally appropriate way across ages.  We found we were inspired by each other’s unique and creative ideas about how to use the museums and community for playful, object-based, electricity lessons.  We also discussed the standard challenges of taking our students into the communities and museums, such as objects being removed right before our visit, and how we can be flexible to still achieve a successful and engaging lesson in spite of these logistical challenges. We’re already thinking about another all school project to reflect on our practice further, so be sure to keep an eye out for a future blog.