Community Visits During the Government Shutdown

The closure of the federal government, beginning October 1st, 2025, impacted much of Washington, D.C. and SEEC was not immune to the ripple effects.  SEEC educators began preparing for the possibility of a federal government shutdown by re-evaluating how we utilized our community spaces. Taking our classes into our community on a regular basis is an integral part of our object-based and inquiry-based learning philosophy.  What do our days look like when one of the key pillars of our community, the Smithsonian museums our classes call home, is closed for an indeterminate amount of time? 

While the Smithsonian museums are a major resource and source of inspiration for our educators, SEEC teachers are also well versed in using other parts of our community to inform their lessons. At SEEC, we believe that learning can happen everywhere, not just in a classroom or a museum gallery. Educators routinely host lessons on the National Mall, utilize local businesses, and tap into creative explorations of places they’ve been before.  

From explorations of architecture to farm animals to fairytales, SEEC educators rose to the challenge of using our community spaces during a government shutdown. 

Toddlers Explore The Built Environment 

Our youngest toddler class, the Toucans, took the government shutdown as an opportunity to switch topics and begin a multi-week investigation of the built environment. These little learners, ranging from 12-18 months old, started their architecture unit exploring various building materials in their classroom.  

After looking at wood, brick, and stone, the class went on a walk to MLK Library and made a stop at St. Patrick’s Catholic Church to discuss the materials they could see and take turns touching the rougher stone of the building facade and the carved stone of the archway. The toddler teachers realized that building materials were all around them and that each city block offered a new and exciting learning opportunity for the class.  

The Toucans continued their study of buildings and architecture by visiting the construction site at the Hirshhorn Sculpture Garden. The students were so excited to see some of the tools and construction vehicles they had been reading about in their classroom. Through a lot of pointing and excited sounds, the teachers could tell the students were making connections between objects they were seeing on their community visits and the toy versions they had been playing with.

 Caption: Toucan Toddler class explores the stone walls of St. Patrick’s Catholic Cathedral and the carved stone of the columns.

Twos Bring the Farm to the National Mall 

Prior to the government shutdown, one of our two-year-old classes, the Penguins, began a unit on farm animals. What started as an exploration of horses soon transformed into a deep dive into life on a farm. When the federal government shut down, the Penguins took their classroom outside and enjoyed a nice long walk over to the National Park Services Stables. They compared the barns they had in their classroom to what they could see at the stables. As the shutdown progressed, they continued their investigation of farm animals by discussing pigs and cows. 

During their week on cows, the class learned where milk comes from and how milk is turned into butter. The Penguins took their learning back outside to practice ‘milking’ a cow using a plastic glove, water and a bucket. Each student had the opportunity to squeeze the makeshift udder and watch as the ‘milk’ came out and collected in the bucket below. They culminated their week on cows by creating their own butter. Using heavy cream and small, tightly sealed, containers, the Penguins were able to shake the cream until it turned into soft butter. They could see the change happening before their own eyes! This progression of farm animals to food allowed the class to transition into a lesson other foods are found on farms.  

Caption: Penguin Twos Class takes turns squeezing milk out of a plastic glove ‘udder’ during their week on cows (left). Students look at horses at the National Park Service Stables (right).

Fours Imagine Fairytale Creatures in DC 

SEEC’s four-year-old class, the Honey Bears, expressed interest in storytelling right before the government shutdown began. While they couldn’t visit the National Gallery of Art to look at Rogier van der Weyden’s Saint George and the Dragon, they could pretend to be giants towering about the city on the rooftop of MLK Library. The outdoor rooftop garden was the perfect place to use their imagination and see the world through a giant’s eyes. Four stories up, the Honey Bears read Jack and the Bean Stalk and discussed how different the city looked so high up.  

Later that same week, the Honey Bears went over to the water feature outside of the National Museum of the American Indian (NMAI) to talk about what they need to trap a mermaid. The water feature became their mermaid lagoon and using their nets, the Honey Bears searched for mermaids and sunken treasure. These outdoor visits enabled the students to really use their imaginations and practice their dramatic play skills.  

Caption: Honey Bear Fours class prepares their net to catch a mermaid (left). Students investigate the mermaid’s treasure outside NMAI (right).

While the government shutdown, and the subsequent closure of many museums, offered challenges for SEEC educators, they were able to make the pivots they did because of the foundational understanding that our community is more than just museums. For teachers at SEEC, the classroom extends beyond the museum galleries and out into the world around us. Our classrooms can be the local library, outdoor fountain, stable, and the exterior of a church. It is less about where children learn, and more about how they learn. 

Teachers were able to seamlessly continue the learning happening in their classrooms because they are confident in their ability to teach using real life objects and experiences. While pictures and books are a vital part of early learning, SEEC believes that children learn best through exposure to tangible objects and concepts. This hands-on approach allows students to make connections for themselves and helps bridge the gap between the familiar and the unfamiliar. It is possible to explain to a toddler how cream turns into butter but allowing them to shake a jar until the butter separates from the milk offers a deeper understanding of the process. The hands-on experience moves the learning from conceptual to tangible.  

These hands-on experiences and community visits won’t disappear with the re-opening of the federal government. Classes will still take trips to MLK library, explore the architecture of the buildings around SEEC, and visit horse stables. Those kinds of visits will be in conjunction with visits to museum galleries, just like SEEC has done since our founding. We are so excited to bring our classes into all parts of our community and to continue to share how the learning extends beyond the classroom.  

Teacher Feature: Penguins and Alma Thomas   

What was the topic of exploration?  

Our Twos class recently spent some time talking about colors. On this day, the focus was on the vibrant color red and its name. To make the learning experience even more engaging, this Twos class drew inspiration from Alma Thomas’ stunning artwork, Red Azaleas Singing and Dancing Rock and Roll Music, at the Smithsonian American Art Museum @americanart.  

One of our Twos educators began this lesson with the story Ablaze With Color by Jeanne Walker Harvey to capture the attention of the children and introduce them to Alma Thomas. 

What were the learning objectives? (What did you want the children to take away from the lesson?)  

This visit was an opportunity for our young learners to begin recognizing and appreciating colors in a real-world context. The bright and lively hues of Thomas’ painting captivated their attention and sparked their curiosity, making the concept of color recognition both fun and memorable. 

The educator passed out pieces of red tape to each child for the ‘Doing” portion of their visit at the Smithsonian American Art Museum. The background features Alma Thomas’ Red Azaleas Singing and Dancing Rock and Roll Music 

What was most successful about the lesson?  

How did the lesson reach your objectives to expand the topic?  

The most successful aspect of the lesson was the Twos educator reading “Ablaze with Color” by Jeanne Walker Harvey, a captivating story about Alma Thomas’ journey as an artist and her love for vibrant colors and the collaborative art created by the children. This beautiful story naturally facilitated the children’s exploration and appreciation of colors, sparking a conversation about the small red pieces in Thomas’ paintings. The lesson reached its objectives by expanding the topic through this engaging story, which encouraged the children to delve deeper into the world of colors and art. 

What was successful in terms of preparation and logistics? 

The children were inspired by the story and discussion, which led to a wonderful opportunity for them to create a collaborative piece of art in the gallery. By emulating Alma Thomas’ unique style, they used small pieces of colored tape on contact paper to craft their own vibrant masterpiece. This hands-on activity not only deepened their understanding of colors but also allowed them to express their creativity in a fun and engaging way. 

The educator gave each child the opportunity to place the pieces of tape onto a larger piece of contact paper for a collaborative art piece inspired by Red Azaleas Singing and Dancing Rock and Roll Music 

What could have been done differently to better achieve the learning objectives and expand the topic? 

To enhance their connection with Alma Thomas’s work, bring along multiple small prints of her pieces (you can find examples of her colorful abstract art in books or online). Having a print for each child allows them to hold and closely observe the details while viewing a larger piece, fostering a more personal engagement with the artwork. 

You could also bring along color words paired with their corresponding colors to encourage early literacy. For example, having “red” written on a red card or “blue” on a blue card can help young learners associate written words with visual cues. It’s a simple and fun way to integrate literacy skills into an art-themed adventure! 

Additionally, introduce the tools Alma Thomas used to create her masterpieces—such as a canvas, paintbrush, or any other materials. This hands-on approach offers insight into how artists work and inspires creativity. 

What was challenging regarding logistics?  

The Smithsonian American Art Museum (SAAM) opens its doors at 11:30 AM, which is not ideal timing for our young learners. We’re so grateful to have the option to request tours before the museum officially opens, making visits more accessible for our group. If visiting at 11:30 doesn’t work for your schedule, you can also see Alma Thomas’s vibrant Watusi (Hard Edge) on display at the Hirshhorn Museum—another fantastic option to explore her incredible artistry! 

What recommendations would you have for another teacher trying out this lesson? 

If you’re inspired to explore the work of Alma Thomas like our Twos class, here’s an idea to create a meaningful and engaging experience. Start by defining the space for each child and ensuring a respectful distance from the artwork. A small blanket or portable morning meeting circles can help provide a clear boundary between the class and the art, creating a cozy yet organized setting. 

To extend this experience into an art-making activity, colorful tape is a great way to replicate Thomas’s unique style. If colorful tape isn’t accessible, don’t worry! You can use vibrant pieces of construction paper in combination with contact paper to mimic her bold, textured patterns. 

This setup not only helps children appreciate art but also encourages exploration and creativity—just like Alma Thomas’s work inspires all of us. 

Teacher Feature: Toddlers Explore Tea is a Time 

A teacher holds a young child up to look at several Japanese tea bowls.

This Teacher Feature was meant to be published around the time SEEC closed due to Covid 19 in March of 2020.  As the weather gets cooler and many of us are back to teaching in person, it finally feels appropriate to share this lesson. 

 For this week’s Teacher Feature we will highlight a toddler class. Educators Stephanie Lopez, Abigail Marden, and Julia Smith were exploring different concepts around tea. For this lesson, the class learned about how “tea is a time” when they went to the National Museum of Asian Art’s Freer Gallery to see tea bowls while being introduced to ideas around the Japanese tea ceremony. Below you will find a reflection from toddler educator Julia Smith. 

Preparation: 

Toddlers sit in a circle in their classroom and sing a song with a teacher.

Julia began the morning by inviting her class to join her in a circle where she talked to them about the ideas that they had explored earlier in the week. She reminded the class that “tea is plant” by showing them a mint plant and that “tea is a drink” by encouraging them to pretend that they were drinking tea. 

What inspired you to teach this lesson?

This lesson was inspired by our class’s  interest in what their teachers like to drink. Many teachers in our center enjoy tea and coffee. Our toddlers often requested to look inside the mugs and to smell our drinks. Additionally, I  have a personal love of tea that made me want to teach this lesson. Having recently traveled to Japan, I wanted to learn more about the traditional tea ceremonies.

A teacher shows toddlers a video of a Japanese tea ceremony.

Julia showed the class a video of a Japanese tea ceremony. She turned the volume off and narrated what was happening in the video. Julia was able to react to the children’s interest and focus the viewing experience to their wonders. 

What were your objectives? 

I find it easier to teach lessons to this age group when I can break down my ideas about a topic into very simple concepts.  I wanted the children to know where tea comes from (“tea is a plant”), how tea is made (“tea is a drink”), and why people drink tea (“tea is a time”). This idea came up when I discovered it was very confusing to learn that the word “tea” refers to several different things including the name of a plant, the name of the drink, and the activity of drinking.

To explore how “tea is a time”, I wanted to talk about how drinking tea is so often a calming experience (at least for me!) This was a great opportunity for my class to work on self regulation techniques.  We often try to sprinkle elements of self regulation and mindfulness into our lessons. Even very young children can learn to listen to their bodies and try to take deep breaths. 

Lesson Implementation: 

Toddlers look at the tools need to make matcha tea.

As the class made matcha, Julia was careful to note that they were not performing a Japanese tea ceremony but rather exploring the tools and making tea together. She showed the class the tea bowl, the whisk or “chasen” and encouraged them to use their senses to explore the green, fragrant, matcha. 

Describe the experience of making the tea in the classroom. 

Before teaching this lesson, I carefully considered a couple of things. I wanted to introduce the children to a way of making tea that is not as common in our culture (although matcha is becoming increasingly popular!) I wanted to be careful to emphasize that this was not a tea ceremony because a tea ceremony can only be performed by someone extensively trained with a large amount of cultural knowledge. Instead of going into extensive details about what makes the tea ceremony unique, I decided that it was more  important for the toddlers to be given time to observe and to be exposed to the idea that there are many ways to make tea. I tried to use the language of “same and different” to connect something potentially unfamiliar (making tea with a power and a bamboo whisk) to something more familiar (we made tea with tea bags the day before). I would say something like: “This way of making tea is the same – it makes a warm tasty drink.  This way of making tea is different – it uses different tools.”

A teacher compares a plastic tea cup to tea bowls in the Freer-Sackler

When the class arrived at the gallery, Julia encouraged the children to look carefully at the tea bowls and held up a toy teacup that the children had been playing with in the classroom to help the children make connections. 

What were the children’s reactions to seeing the tea bowls? Did they make any connections? 

We situated ourselves in the gallery so that the tea bowls were the main objects the children could see. They pointed them out when I asked if they could find the tea bowls. I then held up a play tea cup the children had been using in their play all week. This helped them create connections between the tea bowls on display and the knowledge they already had constructed through their play in our classroom. After I made that comparison, I handed the toy cups out to the children.  They pretended to drink out of their plastic cups while looking at the tea bowls. Their pretend play allowed them to make further connections about the various types of tea. 

Unfortunately, the bowls on display were up a bit high for them to see well when we were sitting on the ground. Although the viewing angle wasn’t as good, with this age group, it is much better to have them seated on the ground for the museum circle. It keeps them grounded in that location and allows them to engage in museum appropriate play. If they were standing, they are likely to be immediately distracted and want to explore everything they see in the entire space.

Toddlers pretend to drink from plastic tea cups in the Freer Sackler

To allow the children some time to explore on their own, Julia, Stephanie, and Abby gave each child their own teacup to hold. The children immediately began pretending to drink from their cups and started knocking their cups together and saying, “cheers”. 

How did you encourage your class to explore their own ideas while in the gallery? Why is this important for toddler learning?  

I am so glad that we brought the toy cups into the gallery. Having objects or something for the children to hold in the galleries is a really great way to keep their interest. It also lets them begin to play in the museum space. Children this age need to act something out or interact with it physically in order to build understanding. I should note that when you allow children to play, they sometimes will partake in activities that need redirection. In this instance, my class started banging their cups on the ground in a quiet and echo-y gallery so we encouraged them to instead take pretend slurps and saying cheers

A teacher reads a book to a group of toddlers in the Freer Sackler

Julia reminded her class that “tea is a time” and explained that sometimes people drink tea to socialize or to find a sense of calm deep inside of themselves. To further explain this sense of calm, she read “Charlotte and the Quiet Place” by Deborah Sosin. 

How did you explain the topic “tea is a time” to your toddlers? 

In doing my research for this lesson, I learned  how very often “tea times” around the world are used as a break from work and a chance to socialize. There is the classic British tea time but also many, many, other cultural traditions around tea as a time to relax. Japanese tea ceremonies focus on using the process of preparing tea as a time of calm and meditation. With children this age, recognizing and dealing with big feelings is a huge part of their social emotional development. Finding ways to help toddlers recognize when they are overwhelmed and giving them strategies (even as simple as teaching them how to take big breaths) are really valuable. 

I love the book Charlotte and the Quiet Place by Deborah Sosin  (Author) and Sara Woolley (Illustrator) because it is very simple, a young girl is overwhelmed by a noisy world. She finds a quiet place in that park and realizes taking deep breaths helps her feel better. It helps introduce children to the idea of being overwhelmed (e.g. things are too loud) and that there are ways to not feel that way. Talking about tea time as a calming time was both authentic to the many cultures that consume tea and also a great opportunity to help talk to children about their big feelings. 

Reflection:

A teacher holds up a child so they can see a display of Japanese tea bowls in the Freer Sackler Museum

Before leaving, children took some deep breaths while holding their teacups so they could find their own quiet place. Then they were lifted up so they could better see the tea bowls. 

What recommendations do you have for another teacher trying out this lesson? 

If you are going to teach about other cultures it helps to ground it in something the children are genuinely interested in. I tried to avoid taking a tourist approach to Japanese culture by always connecting the knowledge to the children’s lives and grounding the lessons in their demonstrated interest in tea. 

I had trouble finding books about tea that were age appropriate and connected well to my lesson so I wrote my own! It’s always an option to make the resource you are looking for. When visiting museums that are not typically geared toward children, it helps to visit the space first to see the layout of the gallery. In this instance, I was able to determine where I would want the children to sit so that they could freely explore with their toy tea cups.

Teacher Feature: Toddler Classroom Explores Winter

It’s Teacher Feature Thursday!

This week we are featuring Melinda Bernsdorf, Meredith Osborne, and Megan Gallagher in the Toucan toddler classroom.  Inspired by their change of clothing and season, the teachers decided to focus on winter. I was able to join their class for a lesson led by Melinda. She decided to focus on showing the children the different ways animals stay warm in nature. Below you will find a reflection from Melinda, Meredith, and Megan and images from Melinda’s lesson.
Graphic reading Winter, Toddler Exploration and showing toddler classroom at Natural History Museum.

What were your topics of exploration? Why did you choose them? Where did they come from?
This lesson was the beginning of a week in which we were exploring how to keep warm during winter. We had recently finished a unit on senses and wanted to expand the skills we were building to focus on more specific questions. Besides being seasonal, talking about how to dress during winter fits the daily needs of our students. As the weather turns colder, we spend more time in the classroom getting ready to head outside. We have noticed that this can lead to some frustrating transitions, and saw an opportunity to explore connections between our physical needs and those needs of something well-loved by our class this year, animals.

Why and how did you choose the visit?
The location for the visit was easy to pick. The National Museum of Natural History has a fantastic collection of animals in the Kenneth E. Behring Family Hall of Mammals, including a section focusing on animals of North America that live in the Far North, where it gets very cold. This exhibit space explores different adaptations that northern animals have made in order to comfortably live in these places, such as layers of blubber, thick undercoats, hibernation, burrowing underground, or camouflage to hide from predators.

As a class, we have visited this area of the museum frequently as we really love  animals. The students feel comfortable in this space and recognize their favorite animals. This enables us to move beyond the immediate reaction of surface interest, and go more in depth on a specific subject regarding these animals. Additionally, there is a quiet space directly in front of the animals we wanted to discuss that is well suited for a class of our size to sit and have a lesson. It is a bit out of the way of the main traffic of the museum and is shaped like a little nook, which always helps lessen the surrounding distractions.

What were your learning objectives? (What did you want your children to take away from the lesson?)
We wanted to open the conversation with our students about winter clothing. We also wanted to deepen their understanding about adaptations in animals, the ways in which animals are different from each other, and the ways in which animals are similar to people and have similar needs. The idea that fur and blubber are like jackets that animals always wear is a fairly abstract concept that we wanted to make more concrete with as many connections as possible. We also wanted our students to have fun, exciting sensory experiences that engaged their thinking surrounding our discussions. We treated this like a science experiment, helping the students to ask meaningful questions, gather information, and draw conclusions in a natural, unstructured way.

What was most successful about your lesson?
This lesson turned out to have some great moments that we were able to expand on throughout our week on winter clothing. We introduced a new song that got our students excited about winter clothing. We took a song that our student knew well and allowed them to move their bodies (Head Shoulders, Knees and Toes) and wrote new lyrics to fit our lesson. We sang “Hats, mittens, scarves and boots, Scarves and Boots! Hats, mittens, scarves and boots, scarves and boots. Sometimes we even wear snowsuits! Hats, mittens, scarves and boots, Scarves and Boots!” Our students also really enjoyed exploring the ice. At one point, some of the students started bringing some soft animal toys to the ice, letting them also feel the cold. This was a great organic opportunity to talk about the fur and fleece that lambs or bears have and ask thoughtful questions that call for analysis of the information we discussed.

How did the lesson reach your objectives to expand the topic?
We were able to talk about all the things we wanted to discuss in a fluid and natural way. The students were engaged and excited about lots of different aspects of the lesson. It set a good foundation for conversations we continued to have with the students and gave them lots of experiences that connected to our topic, giving students chances to process the information in many different ways.
What was successful in terms of your preparation and logistics?
When visiting museums with toddler students, we try to have very realistic expectations of their abilities and needs. We bring along objects and learning aids that reinforce our message, but that also serve the function of filling a toddlers needs to touch and explore. Each student had a laminated picture of winter clothing or a Far North animal which they were able to hold, feel or stick in their mouth throughout the lesson. Because they were laminated, they were easily wiped down and used throughout the week as we revisited this topic. I also brought adult sized scarves, hats, and mittens made of animals fibers the students could put on to illustrate the idea that fur and fleece keeps warm air close to animal bodies, just as jackets and scarves keep warm air close to people’s’ bodies. One scarf, made out of buffalo fleece was especially cozy!
The students had multiple chances to touch and feel animal fur and fleece. We were able to bring some along to the museum where we could explore these objects while looking at the animals they might have come from. Again, in the classroom they got to explore these objects along with the sensory exploration of ice and cold. It was great that we were able to bring enough of these objects that every student was able to explore them at their own pace and comfort level.
The ice experiment went as smoothly as it did because of preparation. The water was frozen inside of plastic baggies, which allowed the students to see the ice and feel the cold, but kept our objects and students from getting covered in cold water. Each adaptation had its own space so that students could move from object to object, feeling comfortable with the exploration. Some of our students weren’t sure about touching the animal fur, but enjoyed feeling the ice through the fleece or with mittens on. Others loved the feel of the “blubber” bag, made of butter, but didn’t want to put their hand in the gloves.

What could you have done differently to better achieve your objectives and expand the topic?
While we think this lesson went really well for an introduction to a topic, there is always the opportunity to try things another way. In choosing to wrap the ice with the pieces of fur fleece and “blubber,” we were able to let the students have a freer exploration without the necessity of taking turns, but it may have made more of an impact if we had wrapped their hands instead. The contrast of their hands directly touching the ice versus their hands covered in fur not being able to feel the cold may have been more concrete.

What was challenging regarding logistics?
Although it was early December here in Washington D.C., a time we would usually be wearing coats and hats outside every day, this December it was still really warm and we barely put on sweaters to go outside the entire week! It was a much more difficult concept to approach when our students didn’t really have a frame of reference for what it felt like to be cold outside. Because of their age, this is the first winter in which they have any agency over being warm or cold while outside due to the way they dress themselves.

What recommendations would you have for another teacher trying out this lesson?

While the museum aspect of this lesson was exciting and gave the students a great perspective on the size of the animals and the way they might look in their habitats, this lesson can certainly be accomplished in a more traditional classroom setting. Pictures of animals, books displaying animal winter activities, and larger pieces of fur (or even faux fur if necessary) can be used in the classroom to explore this topic. The ice experiment could be a great activity in a group of winter centers as well. We had out winter dress-up and a small tent covered in blankets to act as a hibernation cave, and these helped to control the flow of traffic in the room, so as to naturally limit the number of students that wanted to be at the ice experiment table.

Here are a few images from their unit on winter:

Toddlers standing underneath photograph of Arctic landscape.
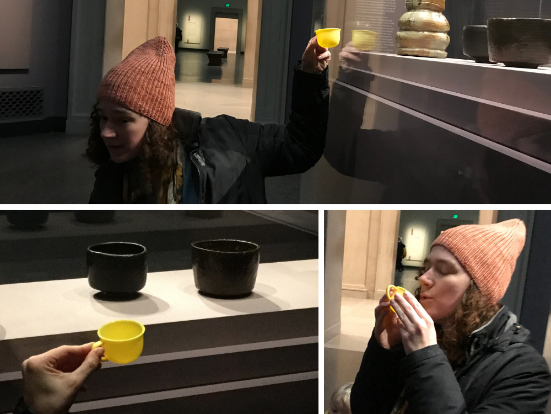
The class headed straight to the National Museum of Natural History to start exploring their topic! They first stopped in the Icelandic photo exhibition to find some cold environments. These two are pretending to shiver from being in the ice landscape behind them.

Toddlers listening to teacher talk about animals with fur in Natural History Museum.
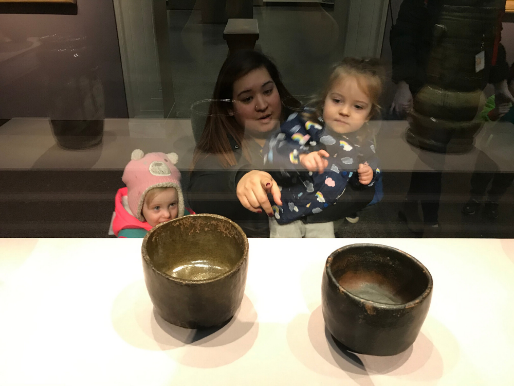
Their next stop was animals of North America in the Mammal Hall.
Toddlers looking at photo of person wearing hats and gloves.
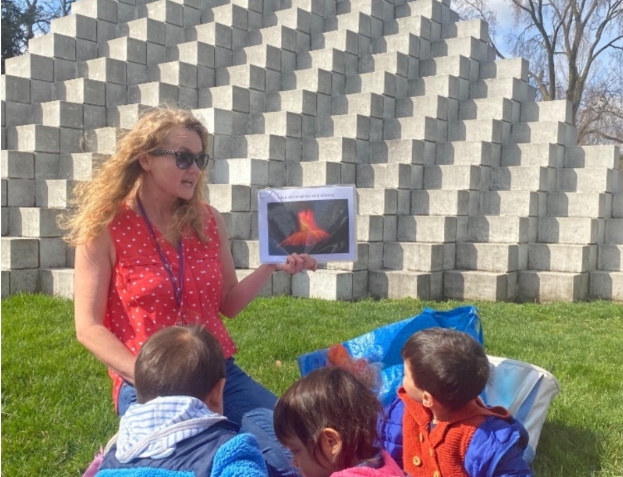
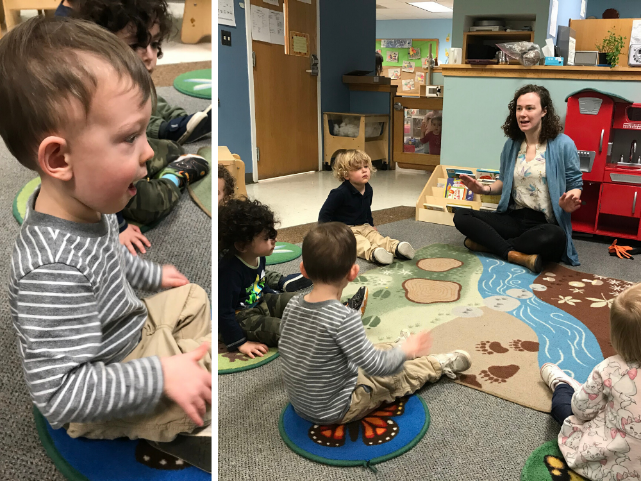
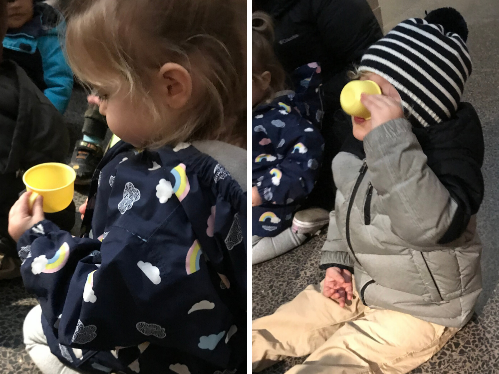
Melinda brought along photos of winter clothing and animals for the children to hold in the gallery,Toddlers and teacher looking at animal fur.She also brought along animal fur that corresponded to the animals in the exhibits. She explained that animals have different ways to keep themselves warm and safe in the winter.

Teacher wearing hat and gloves and showing to her students.
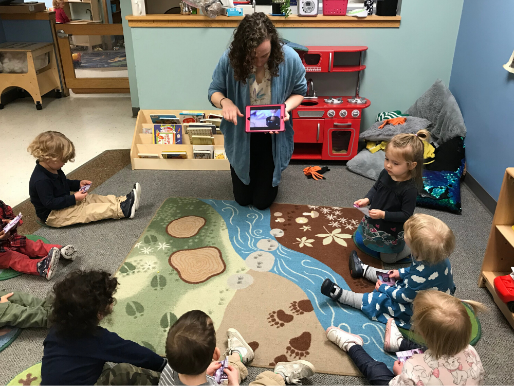
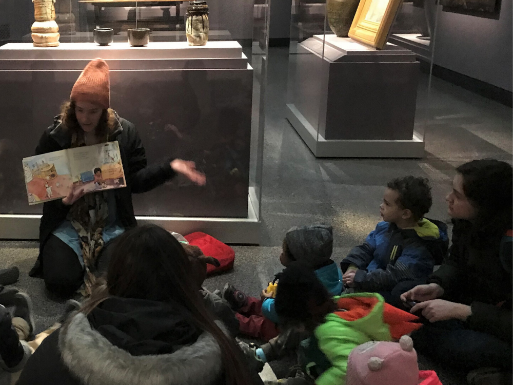
Melinda then explained that people don’t have fur to keep them warm so we have to get dressed for the winter instead. She got dressed in winter attire and proceeded to sing a winter clothing version of “head, shoulders, knees, and toes” (lyrics above). 
Child wearing a fur hat.
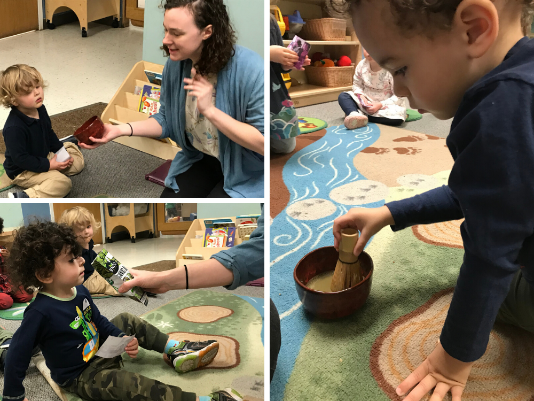
The children then took turns trying on different winter clothing items. Melinda included some clothing that mimicked fur or were made from the wool/fur of animals so that the children could feel how warm these animals are kept by their skin. 
Toddlers touching ice.Toddlers holding bags of butter to replicate feel of blubber.When they got back to the classroom, Melinda had several bowls on the table with large blocks of ice. She then covered each block with a different material: butter bags to mimic blubber, wool, and fur. This gave the children the opportunity to feel the cold and how these materials can protect them from it. One child also tried wearing a wool glove to touch the cold butter. Toddler touching ice with stuffed animal.One little girl brought a stuffed wolf to the table because she had matched the fur in the bowl to the animal.
Toddler and teacher holding block of ice together.This lesson inspired lots of curiosity and provided many different interactions between the children and teachers!

Melinda, Meredith, and Megan finished up their unit on winter and started exploring transportation. Check out our Facebook, Twitter, Instagram, and Pinterest for more ideas from their unit on winter! See you in two weeks with our next Teacher Feature!

The Summer Blues: How Museums and Libraries Support Summer Learning

Summer Camp 2013Summer conjures up images of running around barefoot, catching fireflies, and endless hours at the pool. In reality though, it can be an insanely stressful time for families. Sometime in February (at least in the DC metro area), parents start enrolling their children in summer camp. In the nation’s capital there is no shortage of camps, but that is assuming you can pay between $300-600/week tuition. It doesn’t end there either. Many camps charge extra for before and after care, tacking on an extra $50-100. Now, multiply that times the number of children you have and you wind up with a pretty hefty price tag.

Many parents turn to alternative options: in-home daycare, families, neighbors or child-homeworkthey adjust their own work schedule. Your checkbook is likely to appreciate the break, but parents and educators worry about their children forgetting what they learned during the school year. While your child might have brought home a packet of worksheets or a mandatory reading list, neither are particularly engaging. The dilemma remains: How can we support children to learn in fun ways that support and maintain school year gains and not break the bank?

The Institute of Museum and Library Services recently published a paper entitled Growing Young Minds: How Museums and Libraries Create Lifelong Learners. With the national discussion on early childhood education at the fore, this paper examines the important role that museums and libraries play in supporting learning within the community. It makes particular mention of how museums and libraries can serve to lesson what many refer to as the “summer slide.” Utilizing libraries and museums makes a lot of sense for budget-minded families who are looking for ways to engage their children. Firstly, many of these institutions often offer free/reduced admission and programming for families. Secondly, their offerings are diverse in subject and increasingly, hands-on in nature. These institutions are more often taking into account what and how your children are learning in school and are offering programs that extend current studies or prepare them to be successful learners. Moreover, the museum and library environment lends itself to a family experience. Generally, child and caretaker can go together where they both can observe, experience, and discuss an exhibit or program together. Having a shared experience brings families together for one-on-one time and can inspire more learning at home or in the community.

What if you can’t make it to the museum, you ask? Go on-line! Museum and library resources are becoming increasingly child-friendly and parents can be assured that their children are having a safe and educational experience. Take a look at some of the tips below and get rid of those summer blues!

Parent Tips:

Spend time looking at what your local museums offer and have your child choose a few exhibits that interest them. Choice is the key word here – the more interested a child is in something, the more likely they are to want to learn.

Don’t forget about Smithsonian Story Times and Play Spaces:

Check out the Smithsonian Science Education Center’s new engineering game, Tami’s Tower 

Link the library and museum visit by checking out books pertaining to an exhibit or object of interest.

Find a good parent blogger (We love KidFriendlyDC and Beltway Bambinos) and follow them for ideas of what to do and special deals!

Visit the National Gallery of Art’s website for interactive on-line games.


Object of the Month: Rocks Gallery at the National Museum of Natural History

img_2453Our inaugural Object of the Month is actually not so much an object, but a gallery. The Rocks Gallery in the National Museum of Natural History is tucked at the back of the Janet Annenber Hooker Hall of Geology, Gems, and Minerals. Recently renovated, this gallery is great because it is often a little quieter than the adjacent galleries, objects are at varying heights, there is space to move, and most importantly, you can touch the objects.

Twos and Under

6a71b096-fffc-432e-85be-f1af5f353a50

This gallery is an ideal space for infants and toddlers – it provides them with the chance to explore different textures and build vocabulary. With all of the touchable rocks, you can walk around the gallery feeling things that are hard, bumpy, and smooth. Don’t limit yourself to what is in the gallery though, consider bringing a stuffed animal or a favorite blanket to juxtapose them with the hard rocks. Each time you touch a rock, consider singing a song or rhyme that uses the vocabulary to describe it. While in the gallery, stop and read a touch-and-feel book. Extend the visit outdoors by collecting rocks and saving them in a clear container so their collection is a visible reminder of their experience. Return to the gallery again and again noticing different physical characteristics of the rocks like color and size.

img_2451

Preschoolers

At the back of the gallery is a window that looks out towards the Capitol.  On the ledge of the window stands a selection of rocks that were used in making important buildings around Washington, D.C. You can touch all of these materials, so a great place to begin is by inviting preschoolers to observe by looking closely and touching. Ask them questions about what they notice or how the rocks are the same or different. You might even want to write their answers down and make a chart of their observations. If it is just you and your child – do the same by adding your own observations or that of a sibling.

After exploring the materials, you could reading The Three Little Pigs and think about how different materials make for stronger buildings. Bring in some straw, wood, and bricks and compare it to the rock in the galleries. Another approach would be to match the materials with the DC buildings by sharing photos or discuss explore how rocks are taken from the ground in places called quarries.  After leaving museums you could look for rocks embedded in the ground, pick up a collection of rocks to create your own home, or visit some of the buildings referenced in the exhibit.

This is just a small taste of what a parent or educator can do with this gallery. Have other ideas, please share them with us and the rest of our community.

A Playful Experiment

Originally posted May 2014:

This past week I had the chance to attend one of SEEC’s seminars: Play: Engaging Learners in Object Rich Environments. During the two-day workshop, we explored the meaning of play and how to use it when teaching with objects. We began the seminar by defining play as a group. Some of the key words were: fun, tools, free thought, child directed, social, emotional, intellectual. To help us articulate the discussion, we also read Museum Superheroes: The Role of Play in Yong Children’s Lives by Pamela Krakowski, which distinguishes play as:

active engagement, intrinsic motivation, attention to process rather than the ends, nonliteral (symbolic behavior) and freedom from external rules.1

I reflected on these concepts and how they related to my own teaching. I wondered how I could incorporate more play into my practice, especially when I was in the museums. I decided to try out some new play strategies on a recent visit to the National Gallery of Art with a group of preschoolers.

E11183

Asher Brown Durand The Stranded Ship 1844 oil on canvas National Gallery of Art Gift of Ann and Mark Kington/The Kington Foundation through Millennium Funds 2003.71.1

My first playful endeavor was completely spontaneous. I began the discussion by asking the children to describe this painting by Asher Brown Durand. One  girl pointed toward the artwork and said:

The sun is always moving through the sky.

I took this opportunity to ask the rest of the class whether they had ever noticed the sun moving through the sky too. They immediately offered their own examples. At that moment, I decided we should play the Earth. I asked everyone to stand up and slowly turn their bodies. I grabbed a parent and had her stand in the center pretending to be the sun.  As we moved, I explained how it was actually the Earth’s rotation that made it look the sun was moving in the sky. This was a completely unexpected and child-initiated moment, which was great. I think it was the playful element though that really made the experience memorable. If I hadn’t asked the children to get up and pretend to be the Earth, they would have been less likely to understand and remember the concept of rotation. By having them participate in the experience the concept was made real, tangible.

Part of the seminar was inspired by our colleagues at Discovery Theater. This session was, as one would expect, more theater driven and honestly, really challenged me. As the class continued to describe the Durand painting, I added secondary questions to enliven the discussion. For example, when the ocean was observed, I asked them to show me with their bodies how the ocean was moving and then I asked them to make the sound of the waves.  The kids were happy to illustrate both for me so when it came time to talk about the clouds and wind, we added sound effects and movements again. These exercises captured the essence of the painting, encouraged different learning styles and made everything more fun.

photo 2 (3)
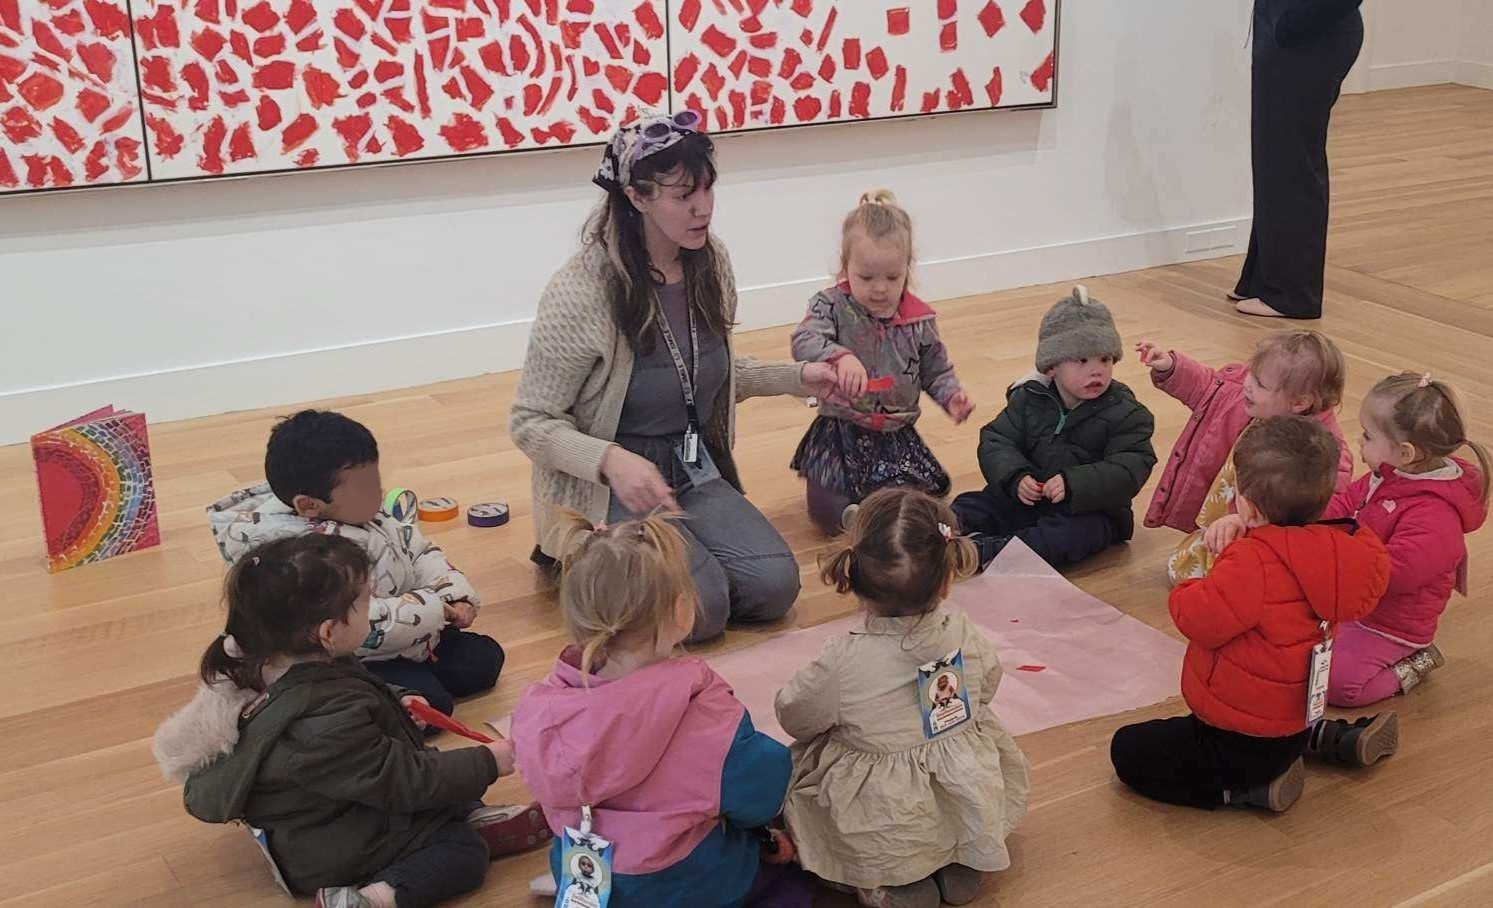
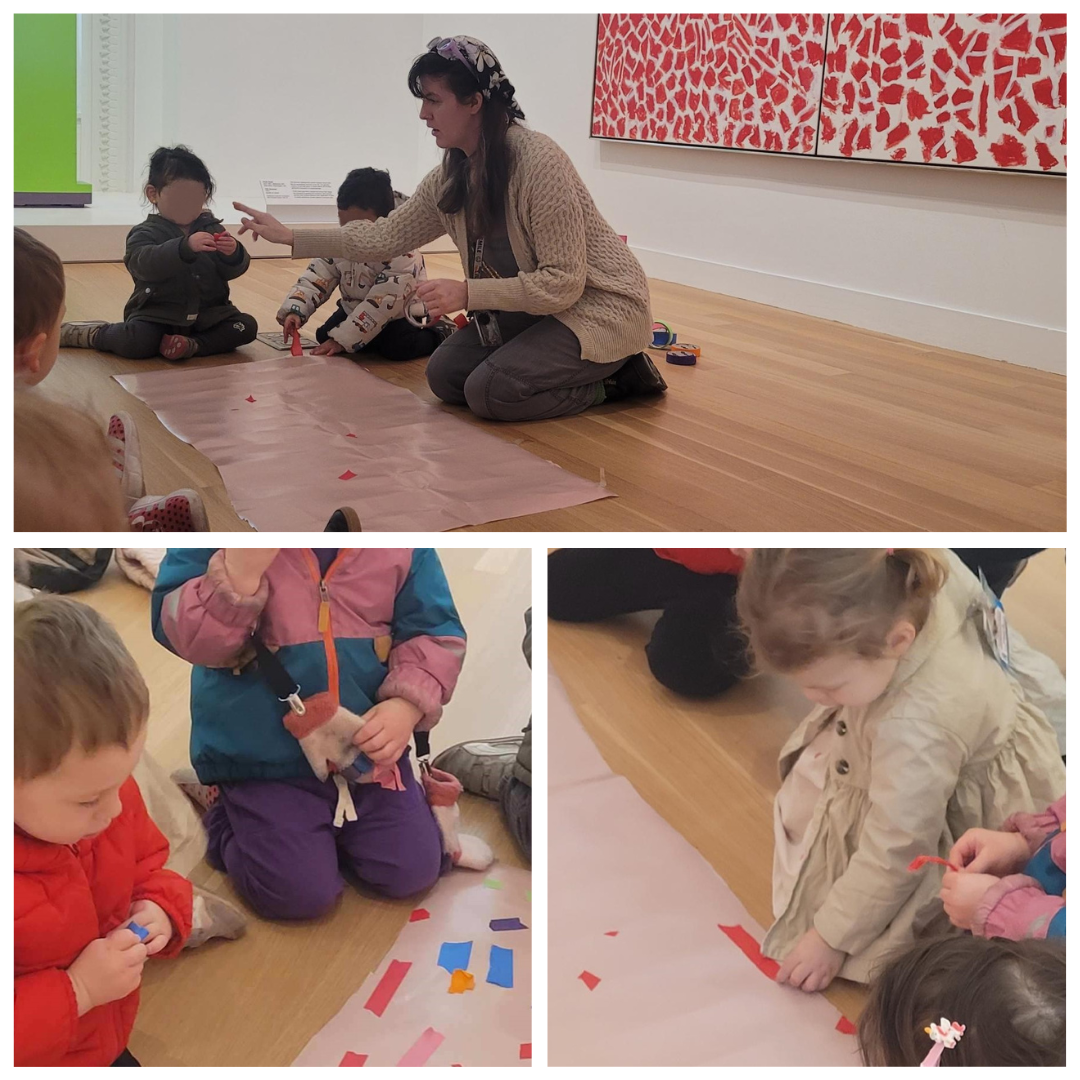
As the last part of the object lesson, I laid out several objects and asked them to work together to recreate the painting. They needed no instruction, but went right to work, collaborating until the composition was complete. Was it exactly like the painting, no, but they had used these tools to create their OWN composition. They were quite proud and were completely engaged in the activity. I saw them looking back at the painting, rearranging objects and making their own decisions.

All in all, the visit felt playful and meaningful. I am continuing to think about how to make my lessons more playful and how play can be a tool for learning within the museum environment.  If you have any ideas, please share!!!!

1. Journal of Museum Education, Volume 37, number 1, Spring 2012, pp. 49-58.

It’s been quite a year!: Teacher Feature Highlights

Written by Alex Francis (Liaison and Curriculum Development Specialist @ SEEC):

What a year it has been here at SEEC!  It has been a privilege to bring you Teacher Feature each week and offer a peek into the magical experiences our teachers provide their students. As our school year comes to a close I wanted to take the opportunity to share some of my favorite moments caught on camera during Teacher Feature. Being able to regularly join the classes has only confirmed how AMAZING these teachers are at creating age appropriate and exciting learning opportunities for their students! Here is visual proof of some of the things I believe they are especially great at doing! If you want to read more about the lessons be sure to look back at our archived Teacher Features and  to stay tuned in to the blog in the Fall for the triumphant return of Teacher Feature.

Teacher Feature 2014-2015 Greatest Hits:

1. Use of Authentic Objects in Museum and Classroom Experiences.


2.Lesson Introductions


3. Sensory Experiences


4. Classroom Lesson Extensions


5. Use of Technology


6. Community Visits


7. Museum Visits


Thank you teachers for a great year! We can’t wait to see what’s in store next!

Teacher Feature: Toddlers Explore Oceans

It’s Teacher Feature Thursday!

This week we are featuring Laura Bonilla. Her toddler classroom was learning about oceans and Laura decided to create a sensory bin full of bubbles and ocean animals. Below you will find a reflection from Laura and images from her lesson.

Print


What were your topics of exploration?

We were learning about the ocean as a habitat.

What were your learning objectives? (What did you want your children to take away from the lesson?)

I wanted to provide an ocean inspired sensory experience.

What was most successful about your lesson?

The kids loved the experience and the bubbles nicely replicated sea foam. I was also amazed at how long the bubbles lasted.

What could you have done differently? What recommendations would you have for another teacher trying out this lesson?

I recommend teachers use a powerful mixer to create a large pile of bubbles. I would have also included more objects for the children to use in the sensory table.

Here are a few images from their unit on oceans:

DSCN3705This class had been learning about oceans all month and used this lesson as a way to review the topic. Laura began by reading Smiley Shark by Ruth Galloway. They had read the book before and the children were able to help identify the different sea life depicted.
DSCN3715Then it was time for sensory fun. Laura had the children help create the bubble mixture. She started by adding dish soap. The children used their gross and fine motor skills to help Laura.
DSCN3718Next Laura added corn starch. The corn starch acted as a binder for the bubbles making them last longer.
DSCN3719Lastly, Laura used a hand mixer to create the frothy bubbles. The children were mesmerized and couldn’t wait to get wet.
DSCN3741Then the kids were off! Some of the children liked the discovery sensation when they found a sea creature under the bubbles and other focused on washing the animals in the frothy water. Laura spent time narrating their play and sharing information about the different sea creatures in the bin.


This class had a wonderful time learning about the ocean! Be sure to check back for our Teacher Feature review next week!

Teacher Feature: Toddler Classroom Explores Safari

It’s Teacher Feature Thursday!

This week we are featuring Meg McDonald. Her toddler classroom was learning about safari’s and decided to go on one in the museum. Below you will find a reflection from Meg and images from her lesson.

Safari_Cover

What were your topics of exploration?

We had been studying jungle animals and this week we focused on going on a safari. We began by discussing the items we might need to have a successful safari. We decided on binoculars, safari hats and vests. Throughout the week we spent time creating these items so everyone could have them for our safari. The day of the lesson each child was decked out in the vest, hat, and binoculars and given a wooden puzzle piece of a jungle animal.  It provided the children with something tangible to hold while we read Rumble in the Jungle by Giles Andeae and took our safari through the exhibit.

What were your learning objectives? (What did you want your children to take away from the lesson?)

I wanted the children to gain some understanding of the natural habitat of some of their favorite animals and how we can observe them during a safari. Many books and movies mis-represent the habitats of these animals and I wanted to provide them with authentic information and exploration. I also wanted to provide them with authentic and exploration. I also wanted them to have practice with matching through the puzzle pieces and photographs.

What was most successful about your lesson?

I feel that the most important measure of success is if the children enjoyed what they were experiencing and in this case they definitely did. They got very excited when they found their specific animals and as well as all the animals that we had been learning about previously. They also really liked the photographs and even asked to go back and see them again.

What could you have done differently? What recommendations would you have for another teacher trying out this lesson?

Instead of giving them the wooden animals I would have given them a small photo that had a more realistic representation of the animal. I think that would have made a more concrete connection to the photo exhibit.

Here are a few images from their safari:DSCN3497DSCN3506Earlier in the week the group discussed the type of gear they might need for a safari and worked on making their own for the museum safari. The group got all dressed up and then headed straight to the Into Africa  exhibit at National Museum of Natural History. DSCN3545Meg had the group gather at the front of the exhibit. She passed out different animals found in Africa and invited the children to let her know when they saw the same animal in her book: Rumble in the Jungle by Giles Andeae.
DSCN3526DSCN3554They stayed very focused and attentive through the book, carefully watching for their animal to reveal itself. Some of the children worked together to help identify the animals of the different group. 
DSCN3569DSCN3570 DSCN3578Then it was time to head out on their safari. The binocular encourage lots of careful looking and sparked many conversations about the different animals.

This class had a wonderful time learning about safaris! Be sure to check back for our Teacher Feature next week!