Teacher Feature: Toddler Class Explores Setting the Table

This week’s teacher feature highlights one of our toddler classes who explored the idea of helping others by setting the table. The teachers, Lauren Bundy, Morgan Parr, and Julia Smith, had been brainstorming ways to discuss topics such as “family”, “love”, “community”, and “traditions” to help their toddlers prepare for the upcoming holidays. It occurred to them that their class could practice setting the table as way to show that they cared for each other. To experience coming together, the toddlers visited FOOD: Transforming the American Table 1950–2000 at the National Museum of American History.

Cover Photo

Preparation:

SEECstories.com (1)

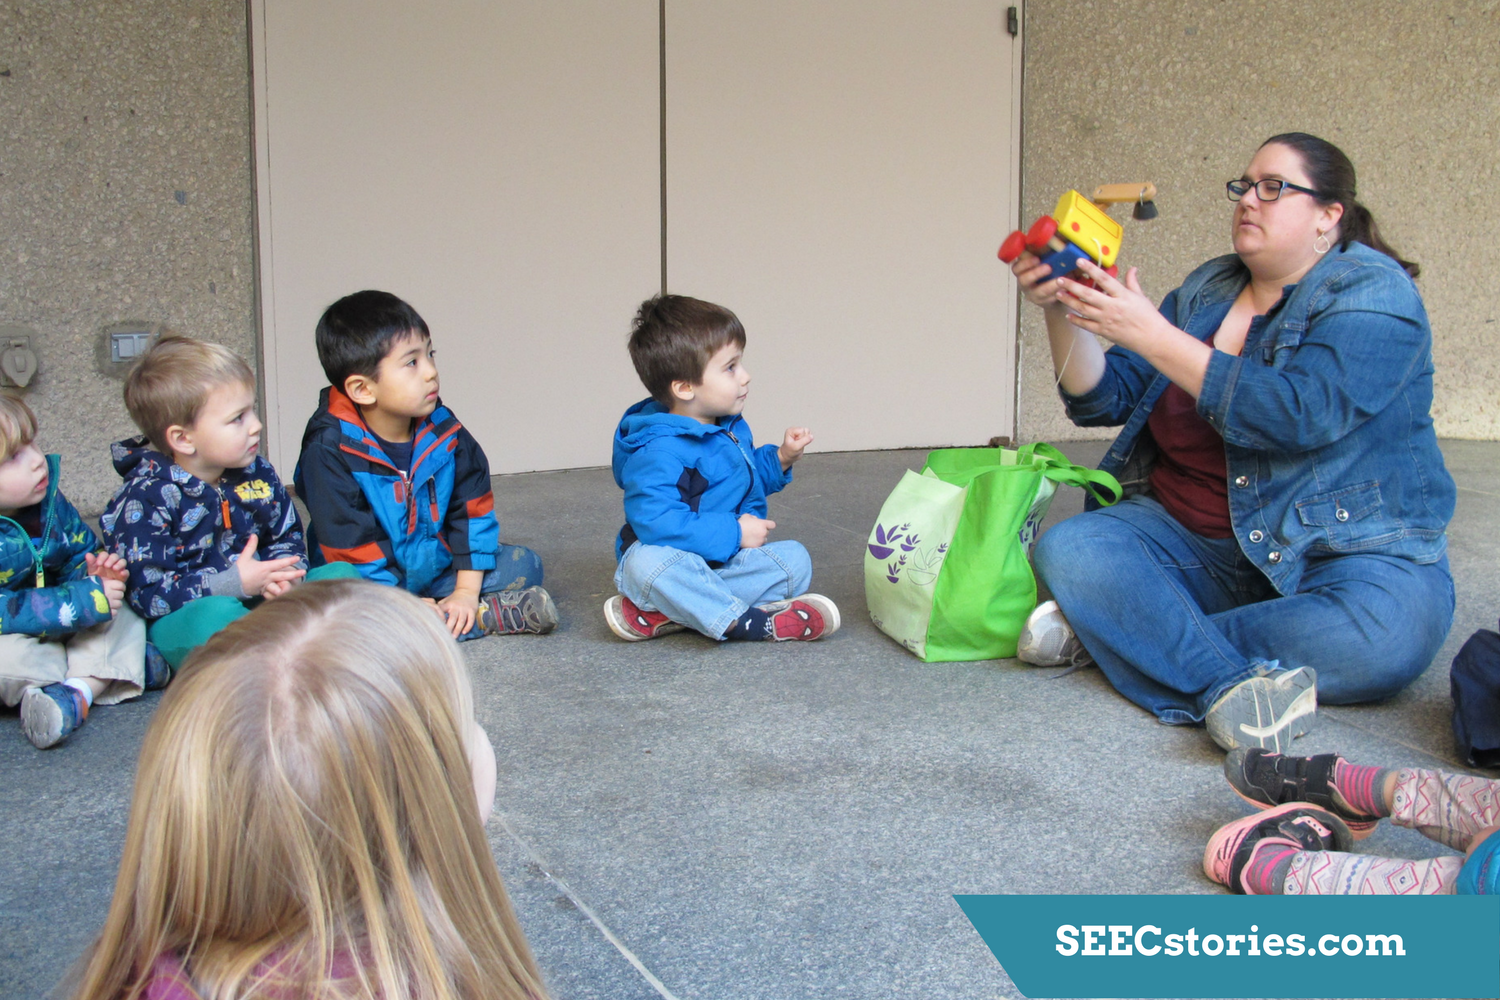
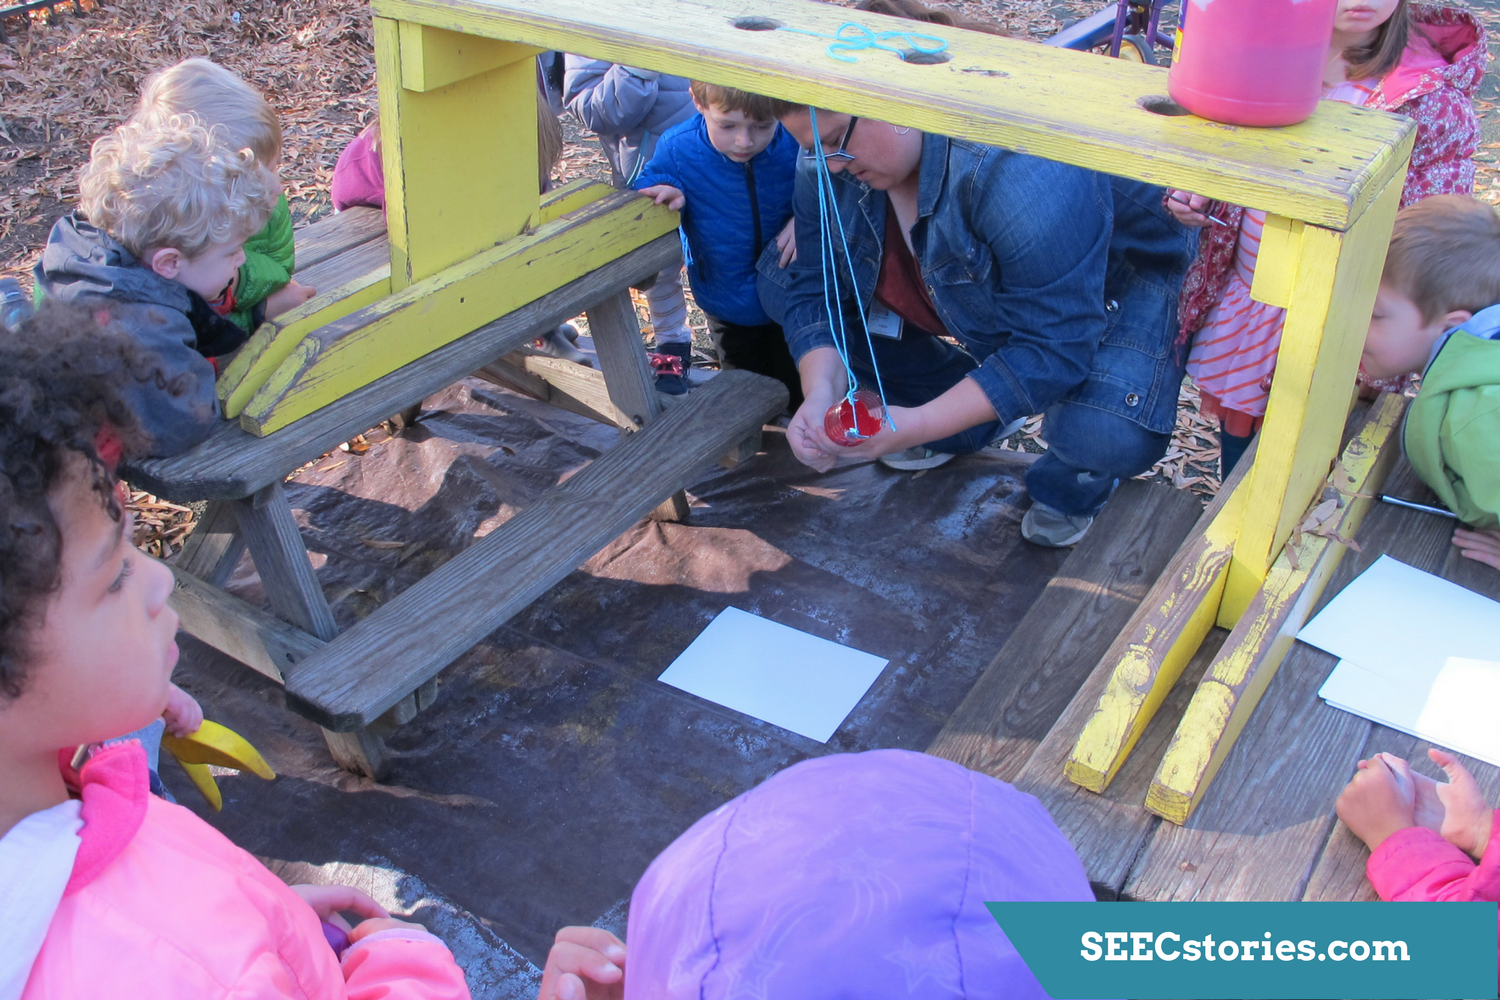
Lauren began the day by having a class circle where she showed the contents of her picnic basket. Lauren handed out the plates and requested that each child hand their plate to their neighbor. She gave clear and concise instructions and was clearly excited when each child successfully passed on their plate.

The topic of our lesson was “What brings us together?” which we explored by talking about setting and eating at the table. To prepare for the lesson, I thought about the lesson in terms of how we would incorporate the topic in our day. I thought about a circle time activity, a museum visit, and finally bringing it all together by actually carrying out the activity at meal time. Working with toddlers, I have found it to be best if we work on a lesson in small bits throughout the day, rather than at one sitting.

SEECstories.com (2)

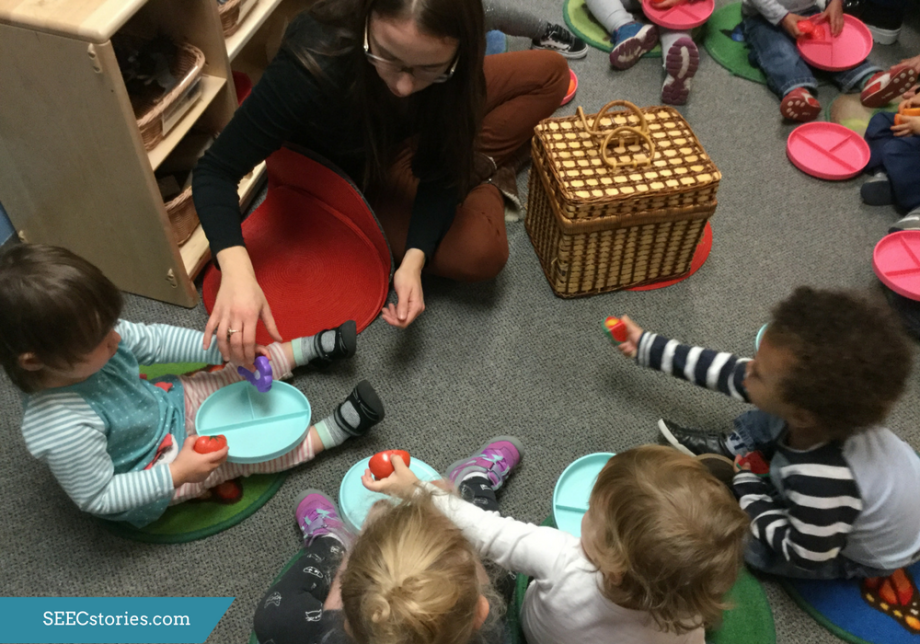
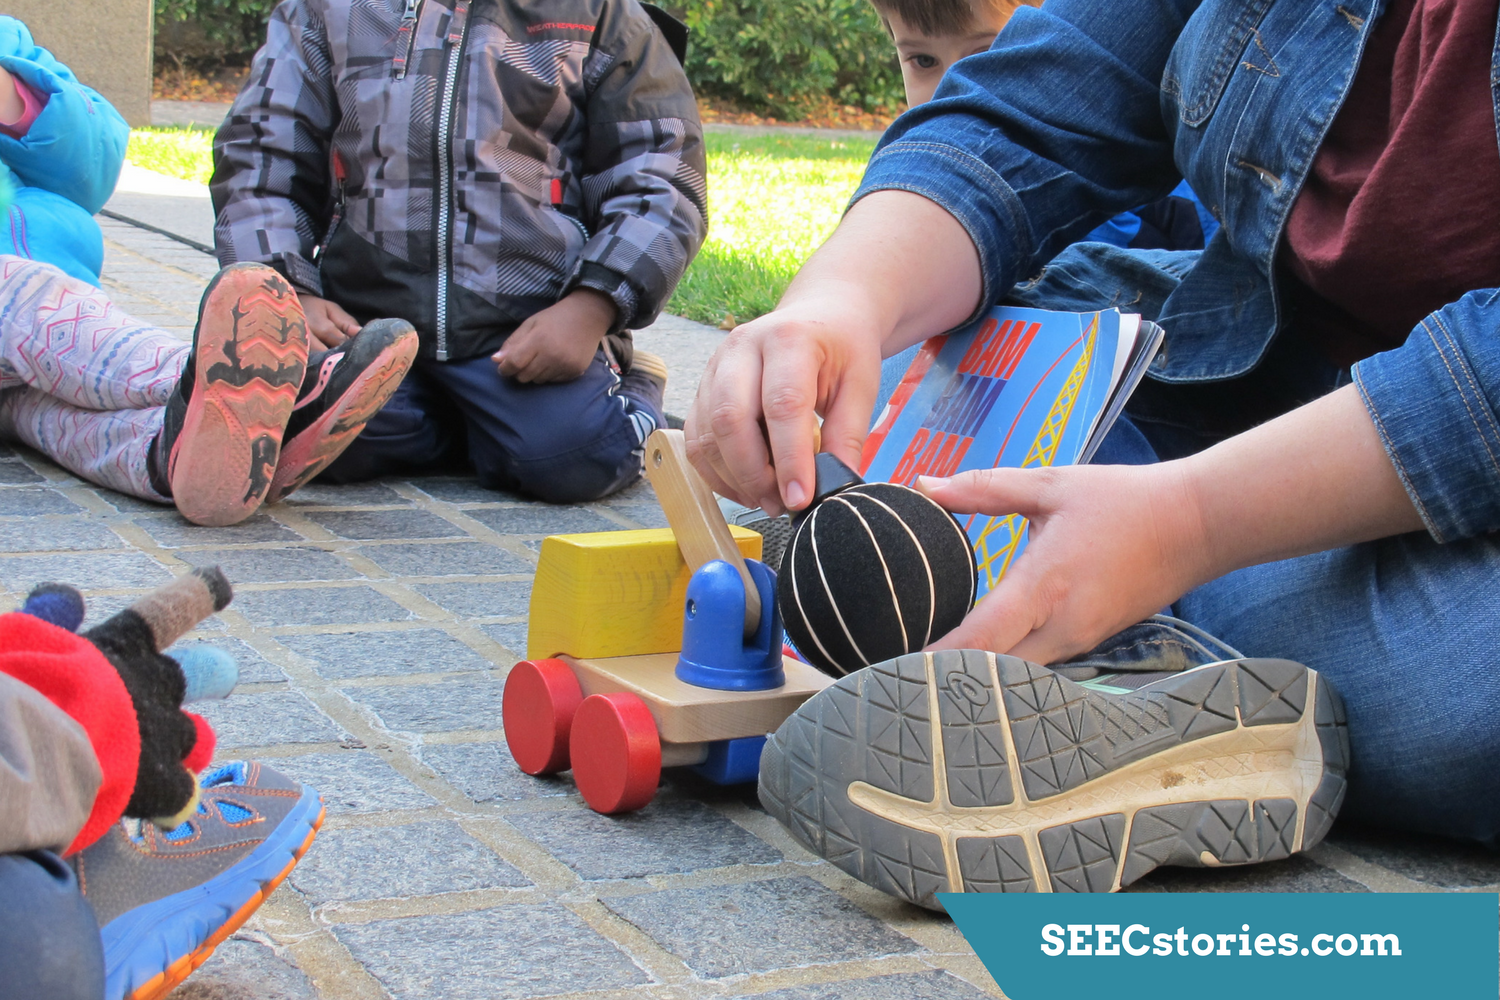
After passing out the plates, Lauren pulled toy food from the picnic basket. Passing on the toy food proved more challenging for the toddlers, but Lauren was undeterred. She made sure that every child had at least one piece of play food before encouraging them to pass on their food. She also allowed time for the children to play with and explore the food at their own pace.

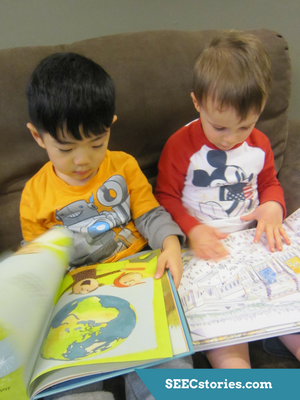
We were inspired to choose this topic because our Dragonflies love food. And they love seeing pictures of their families. We thought about the holidays and Thanksgiving and we decided to explore the idea of “What brings families together?” We hoped that our class would come away from this lesson with the idea that sharing and taking care of others can be fun. This is something that we work on throughout the year, because a big part of coming to school is learning how to get along in a group setting. We also had some more concrete objectives, which included where to put a placemat, learning to serve food, and understanding the importance of using plates while eating.

SEECstories.com (3)

The class finished their circle by singing several songs. Many of the children chose to follow Lauren’s lead and tapped their legs as they sang. Rather than collecting the toy food and plates before starting the songs, the children were encouraged to play and interact with the toys as they sang, which helped them to make connections since the song directly related to the topic at hand.

Songs are how we end every circle time. It’s a cue for them to get ready for the next part of our day and helps them retain something from the lesson.

We sing songs at every circle and always end circle with a song. These songs help the children retain information from the lesson and also act as a cue that we are going to get ready for the next part of the day. To end this circle, we sang a new song that specifically dealt with the topic. The song was called “Thank you for the food we eat” and we sang it to the tune of “London Bridge is Falling Down”.

This song was fun to sing and helped the Dragonflies learn that saying thank you can be enjoyable. We also liked that the song could be interpreted to show thankfulness for the food itself and also to thank the person whose hands helped prepare the meal.

SEECstories.com (6)

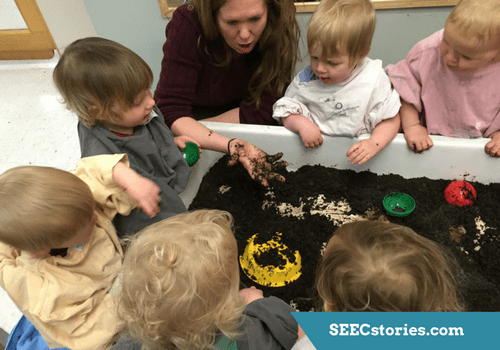
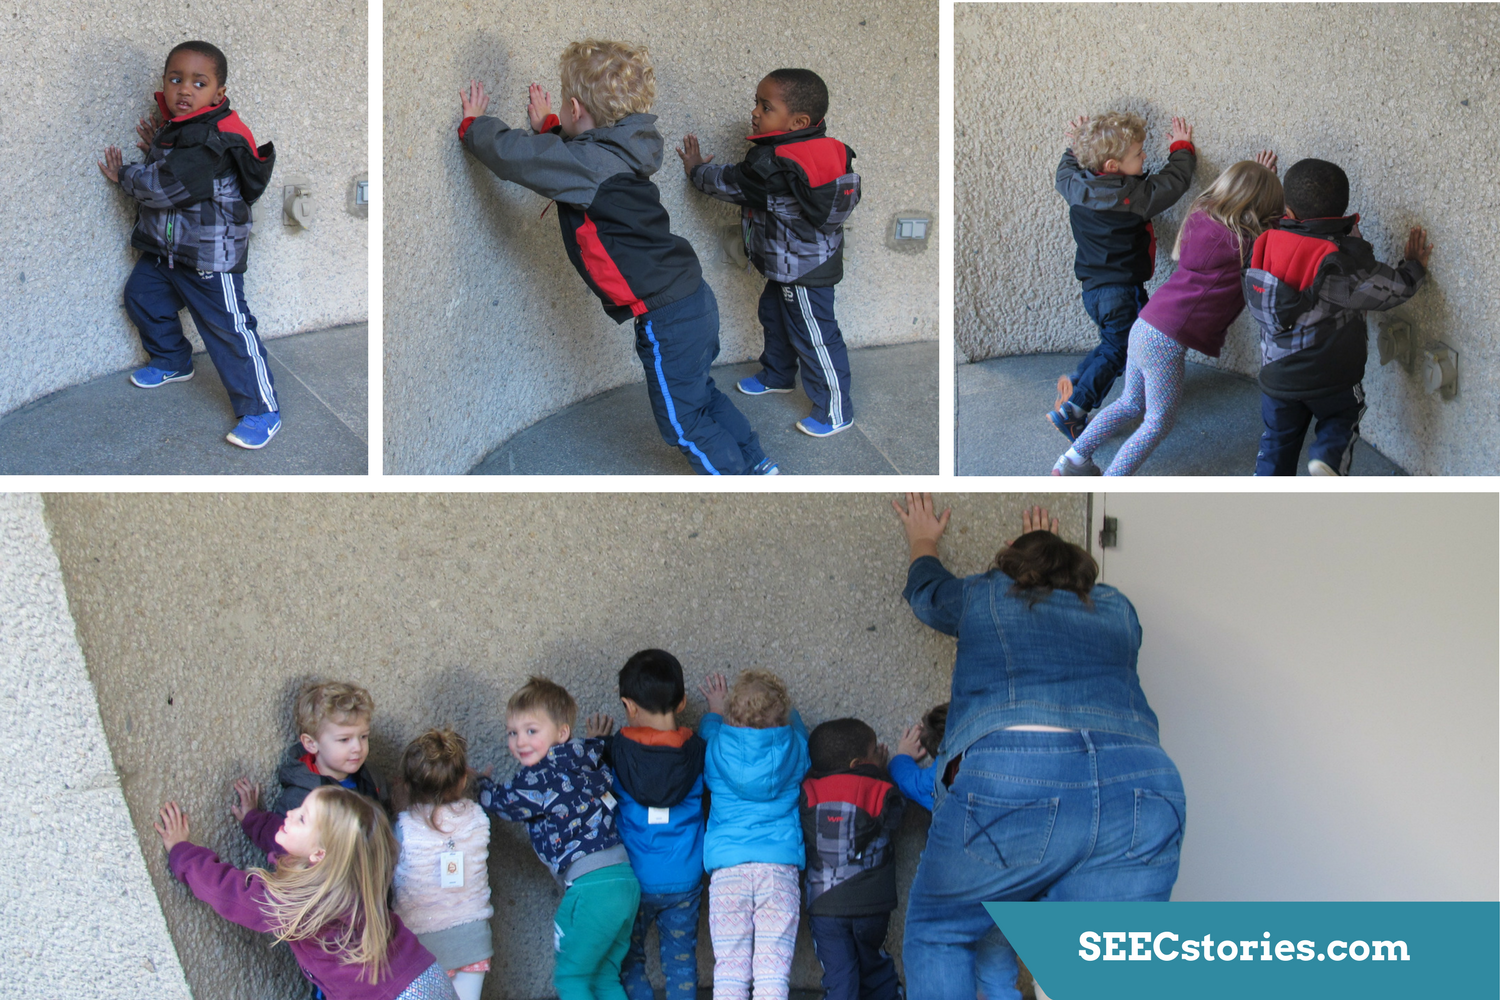
After circle, as is their normal routine, the class began to prepare for snack by washing their hands and finding their seats. To build off their normal routine, the toddlers were given the opportunity to help set the snack table. One child passed out the cups while another handed out spoons.

Having the toddlers set the table was challenging in some ways. The toddlers are working on developing their fine and gross motor skills so just physically placing the placemat was a challenge. Teaching toddlers requires a lot of scaffolding. Meaning that we work with them to help them complete task that is just beyond their reach of completing themselves.  Inviting a toddler to challenge themselves keeps their interests engaged even if you have to help them.  And letting the child engage in the challenge, helps foster a sense of independence.

For this activity, we first explained how to set the table. Then we showed them an example. Before having them set the table, we asked them to verbal describe the steps that they would take to set the table. Then finally we let them try it for themselves while providing assistance when needed.

SEECstories.com (7)

Once the table was set, the toddlers had the chance to practice some self-care skills, which allowed them to be more autonomous. They carefully scooped out cut apples onto their plate and with the help of a teacher poured milk from a pitcher into their cups.

Pouring the milk into the cup was an example of skill that our toddlers were not quite ready to do completely by themselves. We wanted them to practice this skill because the only way to learn is to practice! It can be hard to watch a child do something that you know is going to result in a mess. But we realized that cleaning up is usually not as bad as we think and even cleaning up can be a learning opportunity.

Lesson Implementation:

SEECstories.com (16)

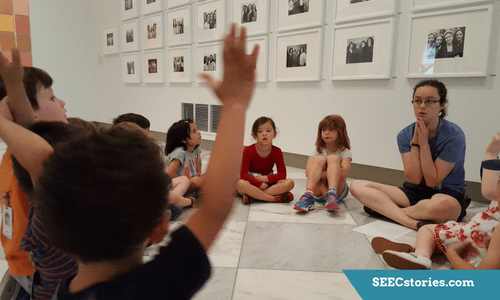
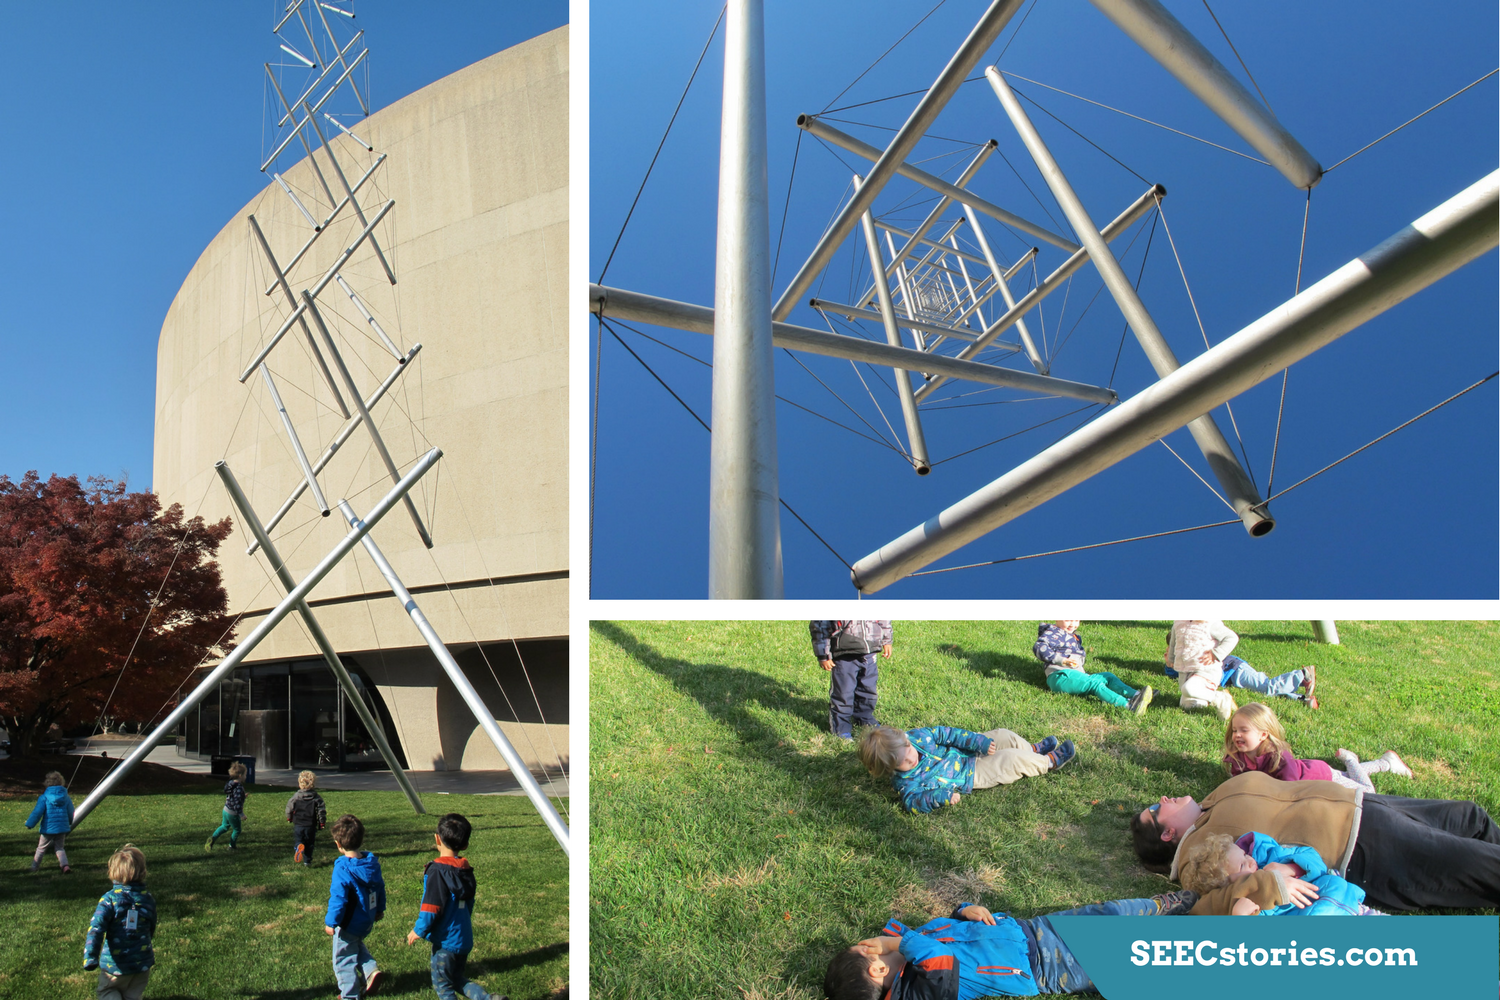
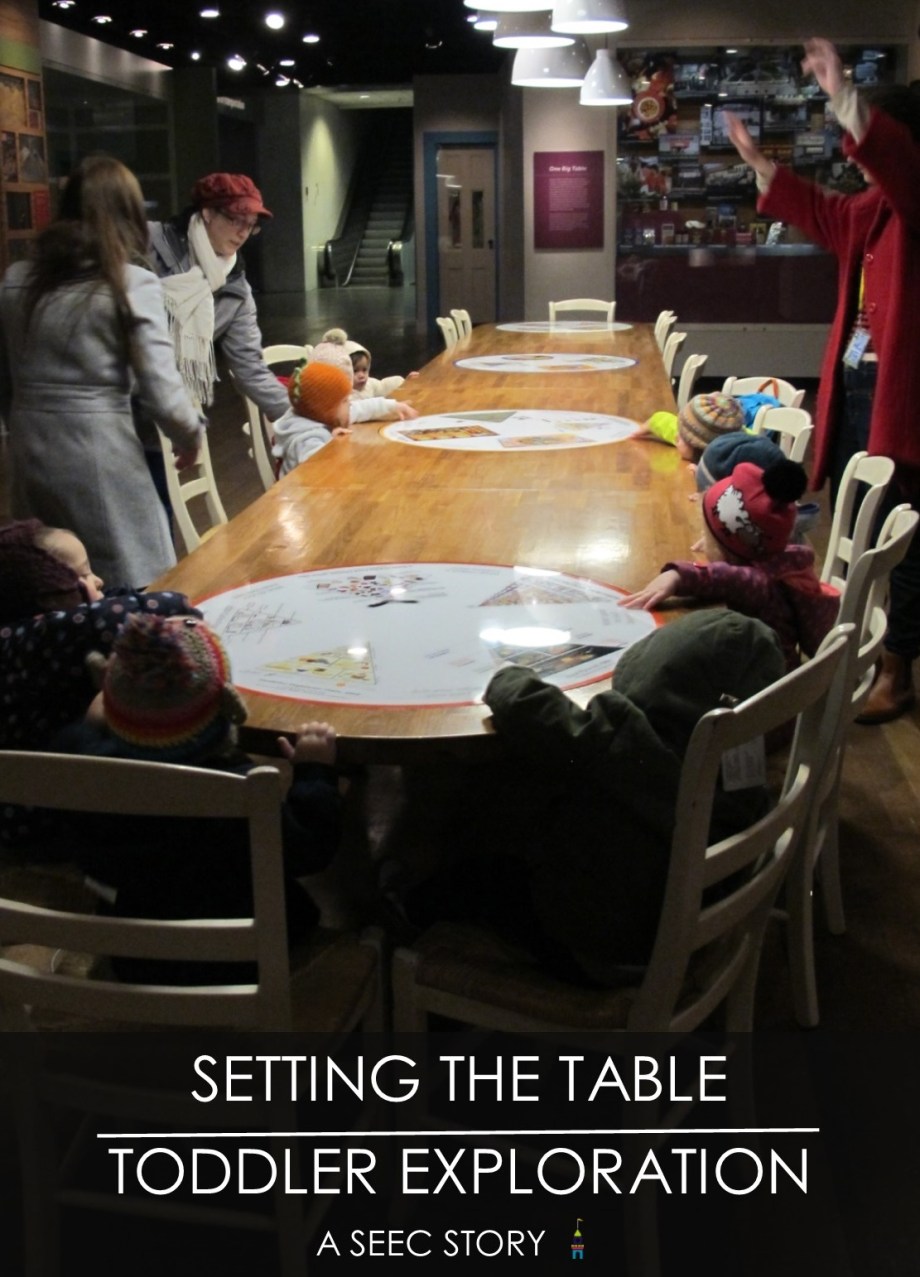
The class walked over to the National Museum of American History to sit at the large table in the FOOD exhibition. The table in FOOD was different from the classroom tables. It was very large with many white chairs surrounding it. The first challenge for the class was figuring out how to climb onto the chairs. Once up, the class was able to gaze across the table and see their classmates and teachers.

We chose to visit the National Museum of American History’s FOOD: Transforming the American Table 1950–2000 exhibit because it has a communal table where we could experience coming together. While visiting the FOOD exhibit, we gave our class the opportunity to practice setting the very large table. Our class loved visiting the exhibit and it gave them the chance to experience setting a table outside of our classroom and in the larger community.

SEECstories.com (8)

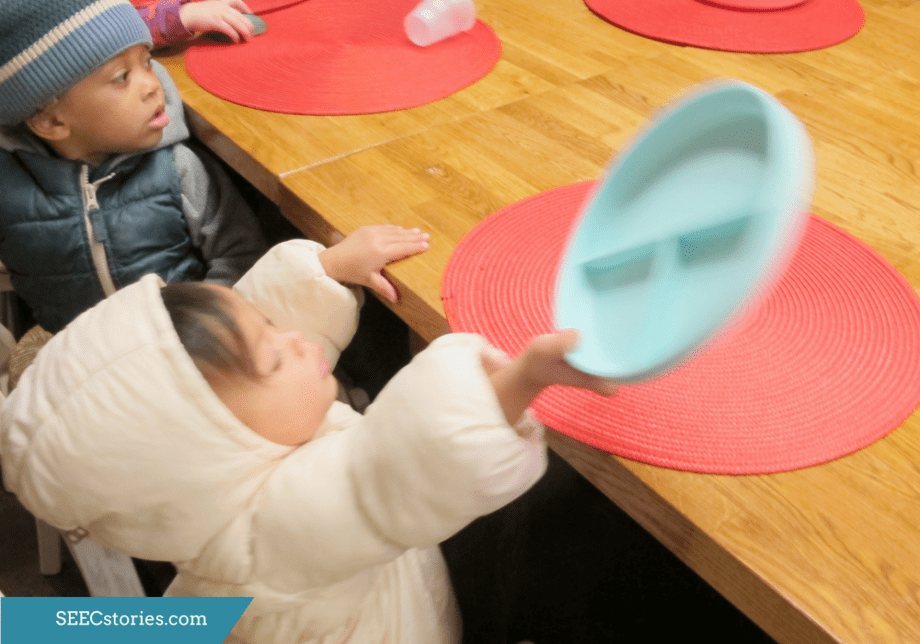
Upon getting to the large table, which is in the middle of the exhibition, the class once again practiced setting the table. Doing the task in a new setting was exciting for the toddlers. They had to learn how to navigate the new space and to use their already practiced skills on the large table.

It is always helpful to make connections outside the classroom. For this lesson, we repeated the experience of setting the table, but this time it was in a new setting. We purposefully chose to repeat the activity, because each time we repeat something we talk about it in a slightly different way, which allows our class to build more connections. While in the FOOD exhibit, the large table became the focus of our toddler’s attention. We were able to compare this large table to other tables that the class had seen elsewhere.

SEECstories.com (11)

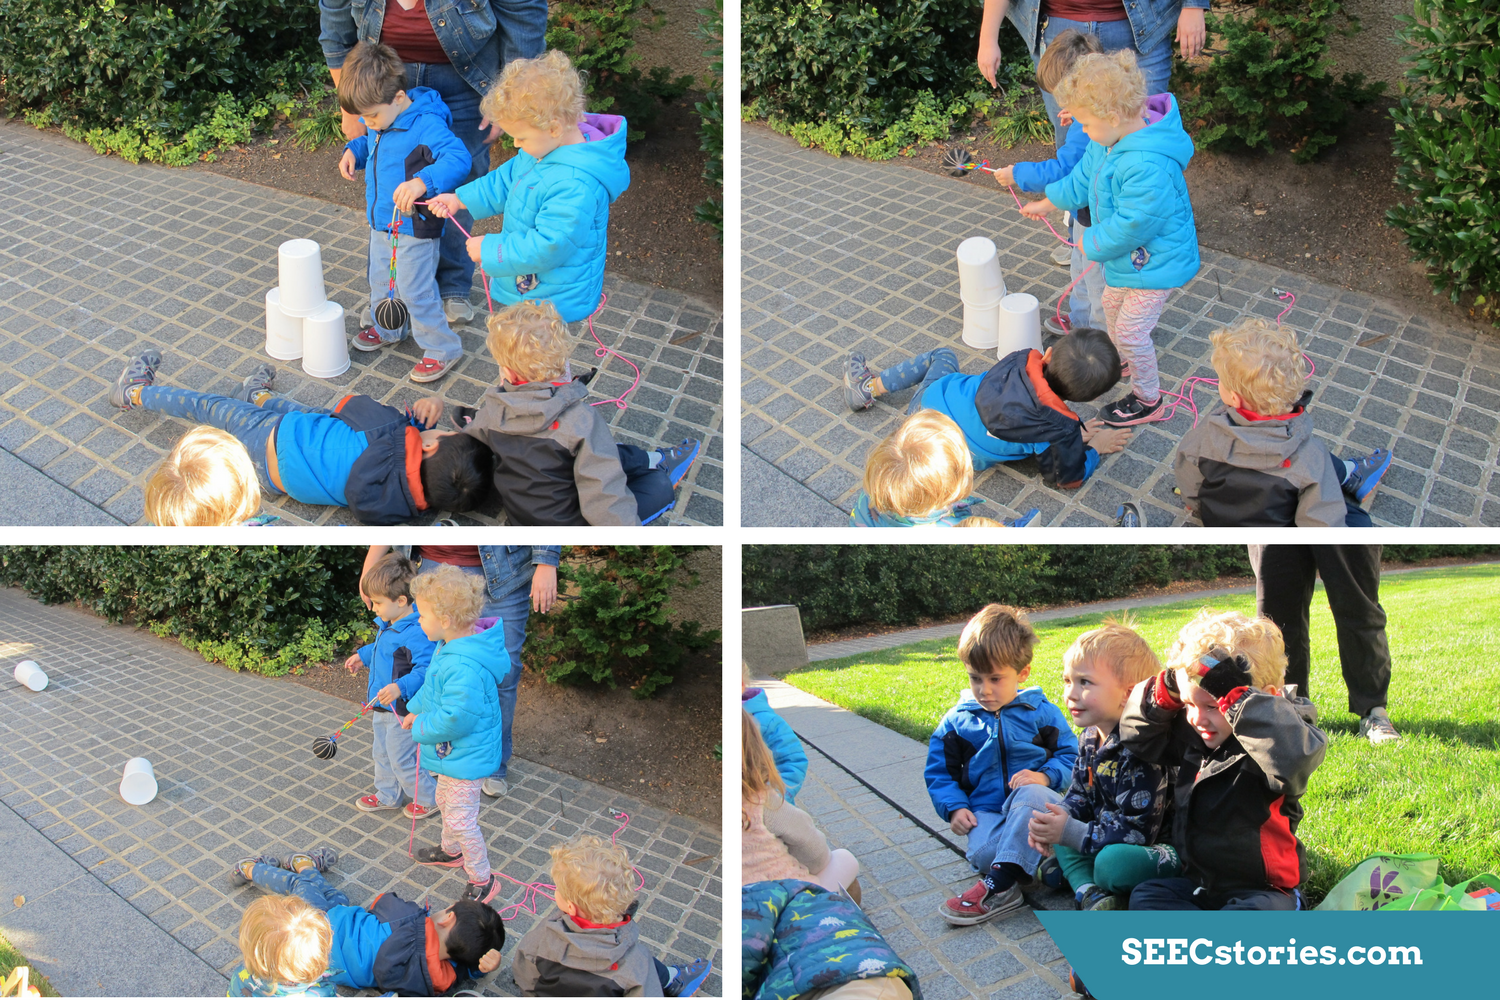
The class then began doing what many people do when they sit at the table; they began conversing with each other. While some children talked and pointed, others listened and observed, and still others took the opportunity to play and explore. The group was able to enjoy their time together while sitting at the table.

We then sat around the table and talked. In some ways this was very similar to our snack and lunch times. We frequently sit with the kids and talk to them about their food, some element of the lesson, or just little things. However, we did focus our conservation on the large table and the experience of coming together around it.

Even though we chose to visit this table because of its large communal size, we were surprised by the size of the table compared to our toddlers. In our classroom, everything including the tables and chairs are child sized. Compared to the tables that we had just eaten snack on, this table was enormous. This extra element made it more exciting and also made it more interesting to compare and contrast. Both the toddler sized tables in our classroom and this large communal table in the exhibit were tables and yet they were drastically different from each other. We were able to enjoy our time sitting at both tables even though they were different from each other.

SEECstories.com (15)

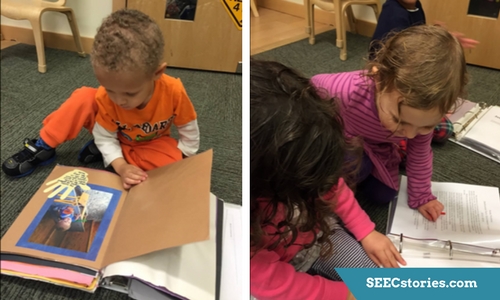
Then the class walked by Julia Child’s Kitchen and stopped to look at her table. While carefully looking, Lauren, Morgan, and Julia led their toddlers in a discussion comparing Julia Child’s table to other tables that the class had seen. They asked, “At your home, is the table in the kitchen like Julia’s or in another room?” This helped the class discuss similarities between their homes while celebrating the differences. It allowed them to gain a better understanding of their class community.

When we stopped to look at Julia Child’s Kitchen, the toddlers noticed the things that were familiar to them like the table and chairs and plates. They also noticed many of the kitchen tools, tableware, and appliances. This was a fun experience because it was yet another table in a different context! Sometimes tables are in the kitchen!

Reflection:

SEECstories.com (13)

Before leaving the exhibit, the class paused to watch some videos of Julia Child preparing different recipes including rinsing salad greens. As they watched, Lauren, Morgan, and Julia were able to more thoroughly introduce their class to Julia Child and began discussing the ideas of preparing meals for others.

Reflecting back on this lesson, we could have done some things to simplify and avoid distractions. For example, rather than trying to set the whole table, we could have focused on putting the cups out. Once the children mastered that task, we could have added passing out a different item like plates. We also found that the plastic food was quite noisy when it dropped to the ground at the FOOD exhibit. It might have been better to bring stuffed or felt food with us to the museum.

SEECstories.com (17)

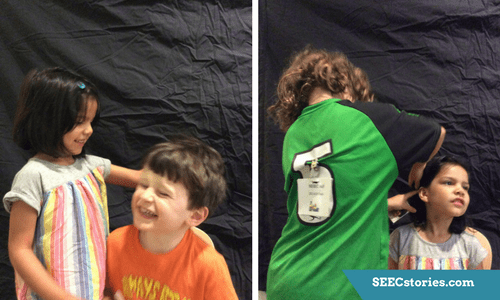
When the class had completed the lesson, each child had the opportunity to help another child. Many helped to set the various tables and others helped to pass out food. The children experienced the challenge of passing on something that they valued and would have liked to keep for themselves, but with the support of their teachers, Lauren, Morgan, and Julia, all were able to be successful at the various tasks.

Since we finished this lesson, our toddlers have been setting their own table during snack times. We now choose one child to help us pass out each item (cups, plates, and utensils). Since they have responded so well to this, we have continued to practice pouring. Now at snack time, we give each child a small pitcher with milk or water to pour into their own cup. We also have them scoop out a small amount of fruit for themselves with a spoon. They love being able to have the independence of getting their own sustenance. Most of them are able to pour and scoop their own drink and food without any mess at all; even with those who have a little spill, it’s minimal. And this gives us an opportunity to allow them to use a washcloth to clean up.

10 Ways to Make your House as Cool as a Children’s Museum

10 Ways to Make your House as Cool as a Children’s Museum!

When a child enters a Children’s Museum, they immediately understand that the space is for them! How? Objects are presented low to the ground, the exhibits are large and colorful, and there are hardly any barriers to prevent them from getting “hands-on.” A children’s museum’s first priority is the learning encounters of the visitor, not on the preservation and protection of the objects. While this means that children’s museums have few, if any, “museum quality” objects, they do present endless hands-on learning opportunities for young visitors.

www.SEECstories.com.png

Explore! with the National Portrait Gallery – A gallery space dedicated to children.

The common mission in exhibition design for a children’s museum is to create child-centric informal learning spaces. While the themes and subjects may differ, they tend to be large-scale interactive displays that allow children to conduct imaginative play.

You may be saying, “This all sounds great, but I don’t have a children’s museum nearby!” No problem! Here are a few simple ideas adapted from actual children’s museums that can be integrated easily into your home. Remember to embrace the children’s museum philosophy of bigger is better. Large scale spaces for your child to act out their play scenarios are ultimately what makes these museums so magical. You will soon be 10 steps closer to making your home as cool as a children’s museum!

www.SEECstories.com (1)

  1. Large-Scale Light Board

Many children’s museums include a space for light play. Remember the small light up peg board of your childhood? Many children’s museums have super-sized it. While you might not have an exhibition crew to build one for you, you can easily DIY this project! Place a large wine rack in front of your largest window. Next transform water bottles into colorful pegs by putting a few drops of food coloring into the bottle. Then watch as your child spends hours creating patterns and designs while also working on their spatial relations and fine motor skills! No large window? Can’t find a large wine rack? No problem. You can also create your own light table by placing some rope lights in a large storage bin (pro tip: Use a battery-operated strand of lights so you don’t have to plug in the bin. This makes it easy to store and move around to different areas of your house.) While this doesn’t have quite the same “wow factor” it will still be great fun and it can be used with a variety of objects. They will have a great time experimenting with how the light can move through or around various objects.

  1. Water Table

The “splash zone” is always a big draw at a children’s museum. As it should be! Playing with water not only inside, but in a museum? Unheard of! Children’s museums also spice up the water play by creating large scale waterways and adding pumps, fountains, and challenges to the water basin. While building a roaring river in your house is probably out of the budget, try using a large under-the-bed storage tub as your water table. Make sure it is at your child’s standing height. This will prolong their play since they won’t be uncomfortably crouching over the tub and it also invites them to move around the table as they play. You, your child, and the space around you will get wet, so place the tub in an appropriate area. Water tables can be filled with standard boats and buckets but try including things to challenge their play and encourage problem solving. For example, provide toy people and blocks and suggest that the people need to make it across the water without getting wet. Another challenge is to ask your child to create a water path for a boat so that it goes directly from one side of the table to the other. The best part about this table is that the options are endless and can be switched easily to suite your child’s interests!

  1. Grocery Store in Your Kitchen

There is something magical about the grocery store space in a children’s museum. It is often the most popular exhibit in the museum. This is because children love acting out adult scenarios and large-scale spaces in these museums make it feel even more real, rather than just pretend. Recreate this in your own kitchen by keeping clean and sturdy food containers on low shelves for your child to “shop for.” Enhance play by purchasing a small grocery cart or basket and including a checkout lane with a small cash register. Want to get your child involved during dinner prep? Have them “shop” in your kitchen for the ingredients you will need for the recipe. This will also help them understand the value of these items and in turn may make them a bit less wasteful at dinner.

www.SEECstories.com (2).png

  1. Tent/Camping Inside

By changing how a space looks you can inspire a whole different type of play for your child. Children’s museums achieve this is many different ways. For example, they might make a forest or even build a car repair shop. For a more budget-friendly option, bring your camping tent inside. Set up a faux fire with logs, battery candles, and tissue paper. Only use lanterns to light the room and turn on nature sounds. For added fun let your child sleep in a sleeping bag and adhere glow in the dark stars to your ceiling for star gazing. Your children will love having a new space and context for their imaginary play!

www.SEECstories.com (3)

  1. Tracks and Roads

Many museums include large train track tables that allow a child to continue building without limits. Why not spend the day doing the same and install train tracks or roads with your child throughout your house? Don’t have enough actual tracks? Draw them! Your child will have a great time problem solving how to get over, under, and through furniture!

www.SEECstories.com (5).png

  1. Obstacle Course

Big play is an essential in children’s museums. These often include complicated and expensive play structures that would be impossible to integrate in your home. Instead, create an indoor obstacle course. At SEEC, we often will have obstacle courses than span several classrooms and require the children to practice controlled gross motor movements. Try including tunnels to crawl through, a beam or piece of wood to balance on, hoops to hop in, and a big pillow pile at the end for a safe tumbling space!

  1. Jumbo Blocks: Supersize them!

Large foam blocks are awesome but expensive! They allow your child to actually turn their imaginative structures into 3D life sized forms. As an alternative, upcycle boxes from your recent online orders or stop by a local store to ask for unwanted boxes. Tape down any flaps and let your child’s imagination go wild!

  1. Pipes, Funnels, and Tubes! Oh My!

You can often find large systems of tubes and pipes for your child to build and connect in these museums. These serve as a nice change to traditional block building materials. A quick trip to the hardware store will let you recreate a version of this in your home! Challenge your child by asking them to try and get a small ball from one end of their structure to the other or turn the tubes into musical instruments by providing your child with a stick or small mallet (like the blue man group). Experiment with different lengths to see how the sound changes.

  1. Fan fun!

In some children’s museums, you will find an exhibit exploring the power of air. There are several ways to do this at home. Use a leaf blower to explore which things are light enough to blow away and which things are too heavy. You could also do the same experiment with a large fan. This is a great way to expose your child early to the scientific method. Ask them to ask a question: will X float? Make a prediction aka hypothesis: X will not float and then try their experiment. You could even ask your child to revise their experiment: will X float with less air?

www.SEECstories.com (4).png

  1. Mini Museum

Create your own mini museum at the house out of a collection you already own. Does your child love super hero toys? Why not display them in a prominent place in your home and invite your child to work with you to make small labels! They will love seeing their objects honored in a special display and are sure to love giving “tours” to all the visitors in your home.


Changes: Facing the Strange at the Smithsonian American Art Museum

This week’s blog is written by Phoebe Cos.  Phoebe is a support educator at the Smithsonian Early Enrichment Center. She spends most of her time working with the three and four-year-old classes at the National Museum of American History campus.


“Cha-cha-cha-cha-changes. Turn and face the strange.” – David Bowie

Changes. Life is full of them starting from the day one comes into the world. With life experience that they carry with them, young children encounter change on a whirlwind level with a swirl of mixed feelings that can be hard to unpack. Eating solid food for the first time, entering a new classroom, losing teeth, meeting a new sibling, all have conflicting joys and concerns that accompany them. Although it sometimes feels uncomfortable, having direct conversations about change in children’s lives can help young minds “turn and face the strange,” in the words of David Bowie. The strangeness of change is bound to be much less scary if you have been presented with the space to talk about your fears and given the tools to face uncertainties.

2

My first experience crafting a lesson specifically on life changes was last May while working with one of the pre-kindergarten classes at SEEC. It was the end of the school year and many of the children in the class were leaving the school they had attended since they were infants. Mixed emotions filled the classrooms. In an attempt to unpack and reflect on the change that was about to take place as our students moved onto kindergarten, I took the class to the Smithsonian American Art Museum. The children were familiar with the Smithsonian American Art Museum, as it is one of the many museums we visit often in our daily museum visits around the National Mall. At SEEC, we use objects to discuss and learn as we explore galleries and cultural spaces around Washington, DC. An object, image, song or texture can be a great way to engage children in a complex conversation, as both adults and the children encounter the space with a shared point of entry.

In this case, I chose the collection of photographs entitled The Brown Sisters by Nicholas Nixon, which documents the images of the photographer’s wife and her three sisters over forty years. We began the lesson talking about portraits and why people get their portraits taken. Then, in a single file line we slowly looked at the pictures. “What do you see?” I asked, broadly opening up the floor, unsure myself at what they might have picked up on. Many hands go up.

1

“I see a bunch of girls over there,” one four-year-old said pointing to the early photos on the left.

“There are old ladies over there,” another child said pointing to the right side.

“How do you know they are old?” I asked.

“Because they have gray hair,” the child answered. “That means they are going to die soon.” This led to an outbreak of conversations and a few tears from children who worried that their loved ones were going to die because of their hair color. My colleague and I assured them that while hair color can determine age, it doesn’t determine death. We named multiple people in our school community with gray hair that were healthy adults.

After this period of analysis, I told the class the women in all of the pictures were the same; that they were four sisters. “How are the pictures of them different?” I asked.

“They look like they are at the beach. Though they look like they are in the country in that picture” a five-year-old observed. We talked about why they might be in different places.

“They look further away in that photograph,” a four-year-old observed. “Maybe she’s mad at her sister.” With each observation, children used their cognitive reasoning to build connections on how these women’s lives changed overtime.

What tools did this exercise provide for the children as they were grappling with their changing identity as they moved from being preschoolers to kindergarteners? By reflecting on the sisters’ changes, the children were ready to look analytically at their own past and the physical changes they had gone through over the last year, or for those at SEEC, from infancy. I passed out the youngest photograph of each child that I could find in their portfolio, a binder full of projects and developmental write-ups that follow each child throughout their time at SEEC (for more on these portfolios, look below). These photographs provided a tangible layer to their experience. Next, I placed a mirror next to each child. Then, I asked everyone to hold up both the picture and the mirror and compare what they saw. “My cheeks are less puffy. They have kind of flattened out,” one four-year-old observed.

“My hair is more blonder here,” another four-year-old boy stated, pointing to a picture of his two-year-old self, surprised that his own hair color had changed. “And [my baby brother] now wears those shoes. My feet won’t fit them.” Children were picking up on their own signs of aging. It was at this point that I told the children that although they might not feel ready or old enough for kindergarten, they had all changed in many ways over the past year. My colleague and I assured them that we had seen them grow over the school year and that their bodies and minds were ready for all the things to come in a new school. Sometimes to face change, you need to see and hear that you are ready for the change to come.

3

Later in the day, a dramatic play “photo studio” was set up where children had the option of trying to replicate these photos of their younger selves. Children used their analytical and language skills to position each other to match the photograph, while remarking on changes to their classmates’ physical appearances, like shorter hair or lost teeth. By discussing these changes through play, children were able to share their fears and excitement in a social setting with their peers.

Over the course of the next year, we will delve deeper into specific life changes and how to discuss them with children. From transitioning out of diapers and into underwear, to talking about death, to moving to a new house, we look forward to sharing our ideas and stories with you, and hearing about your successes and challenges in explaining and discovering this constantly changing world with young children.


Portfolio Close Up:

CORNER TAB.jpg

When a child enters SEEC, their teachers create a portfolio that follows their journey throughout their time at the school. The portfolio consists of a binder that contains artwork, photographs and anecdotes by teachers that document the development of the child over time. The children love to look through their portfolios with peers, sharing about past experiences, and self-reflecting on their young lives. Portfolios serve as a tangible representation of how a child has grown and changed over the years.


What Do We Want From Our Teachers?

SEEC’s Executive Director, Meredith McMahon’s latest Director blog:


In the last few months there’s been quite a bit of discussion about early childhood teachers, what kind of training is necessary, how to support them once they enter the classroom, how to compensate them in a way that keeps them working in early childhood classrooms and not higher paying public or private schools.  Here in DC a debate continues about what level of credentialing the Office of the State Superintendent of Education should require for lead teachers.  The National Association for the Education of Young Children (NAEYC) currently has an initiative, Power to the Profession, meant to seek unity around qualifications, competencies, and qualifications. These many considerations point to that greater question, who do we want our early childhood educators to be?  How can an early childhood educator know what we want when we, as a field, don’t yet know or agree?

1

At SEEC we have a pretty strong sense of what we want in our educators. We embrace the notion of the well-educated teacher, and we look for that in all of our educators, not just our preschool and kindergarten teachers. When some might question the need for an infant or toddler teacher to have formal education course work we see it as essential. Without a strong understanding of child development how can you purposefully plan rich experiences that maximize the incredible brain development that we know is happening in these first years? At SEEC these teachers choose toys, objects, and books that push our youngest learners to reach just a little beyond where they are, always guided with love, support, and rich language. Would they create the same learning opportunities if they did not have that clear understanding of what’s happening developmentally? Combined with their natural talent and joy for working with the youngest children, our infant teachers design classroom and community experiences that truly enrich the days of these little ones. And the same thing is happening across all of our classrooms and programs.

3

At SEEC we know it’s not just about the formal learning our teachers have experienced themselves that has such a positive impact on the classroom, it’s also the creativity and flexibility they bring to their work that combines to create incredible learning opportunities for the children at SEEC. We look for those educators who embrace the idea of children as capable learners who are ready for concepts often dismissed as too complex for young children. We ask our faculty to push themselves as educators, drawing on the current interests of their students, rather than relying on tried and true lessons from years past. And we ask them to regularly put new ideas into context for the children, using community resources, which we’re so fortunate to have in the form of our many museums and gardens. What we ask of them is not easy – they become quasi-experts in new topics regularly [think lemurs, ancient civilizations, farm to table] and they do so willingly.

2

SEEC educators embody the idea of life-long learning that we hope to instill in our children by continuing to push themselves to constantly hone their teaching practice. Our faculty embrace the idea of professional growth, seeking out constructive feedback and ways to push themselves. They soak up creative ideas for their classrooms at every opportunity, and they support each other as a community of educators, sharing resources and classroom strategies. We purposefully look for educators with a growth mindset, who believe they’re always learning and have the capacity to better their teaching. That mindset as part of our culture, gives us such strength, and I find myself constantly in awe of their dedication to themselves, SEEC, and the ECE field.

So at SEEC we have a clear vision of who we want as educators and why, but we, too, struggle with the same concerns early childhood schools everywhere face. We ask our educators to take on a role with such great consequences without adequately compensating them for the vital role they play and the immense value they bring to our community. We know the importance of these earliest years, and we also know the impact that high quality learning experiences can have on future learning and life itself. Yet we still struggle to compensate our early childhood educators for the incredibly important work that they do. A recent New York Times story pointed to the many challenges of teachers in the early childhood field and highlighted the issues we already know we need to solve, and much of it hit very close to home.  At SEEC we continue to work towards salaries that are comparable to public or private schools, commensurate with the education & experience we expect our educators to have, but we still have work to do.  We look to elevate the importance of our faculty’s work whenever we have a platform to do so. We offer them autonomy over their own classrooms, from the curriculum right down to the paint color, knowing that they are well-trained and capable of crafting exceptional experiences for the children in their classrooms. We look for opportunities for our faculty to share their own work with other educators, stretching beyond the bounds of their own classrooms. Beyond SEEC we’ll continue to look for ways to lend our voice to this important discussion, knowing that our work, and our focus – the youngest children – is too important not to.

Top 10 Sensory Bins (Kid Tested, Teacher Approved)

These containers full of tactile materials serve as a wonderful way to explore, refine fine motor skills, and contain mess! They are an especially great indoor activity during these cold winter months. There are specifically manufactured “sensory bins”, but you can easily use a storage tub of any size to achieve the same goal. When you Google or search on Pinterest for “sensory bin” you will encounter an overwhelming number of options. How does one possibly choose? We are here to help! Our teachers have tested quite a few and the options listed below are some of our favorites. Many of these ideas can be modified for older or younger children.

  1. Polar Sensory Bin

Embrace the cold! There is something extra magical about bringing snow inside! Your children will watch with wonder as this solid becomes a liquid. Provide snow gloves to prolong the play. No snow? You could also fill the bin with water and add floating icebergs which can be easily created by freezing water in small containers. If available, you could also add small polar animals. Want to take it one step further? Conduct a quick experiment on the benefits of blubber as an insulator by placing a large amount of vegetable shortening, lard, or butter in a bag and molding it around your child’s hand (Pro-tip: use a second bag or rubber glove to protect your child’s hand from grease before molding it with “blubber.” This will reduce the mess!).

SEECstories.com (53).png

2. Gelatin Bin

The tactile experience of gelatin is very satisfying! It is also safe to taste so it provides excellent sensory material for infants. While it will always be sticky, you can purchase the unscented/unflavored variety so there is less of an appeal to eat it. You can hide all kinds of items for your child to discover in this goopy material.

3. Fire Extinguisher Bin

Have a future firefighter in the house? Create flames with construction paper and then either laminate or place them in water tight bags. Then provide your child with a squirt bottle full of water to “put out” the flames. Enhance the experience by allowing your child to dress up as a fireman or woman.

2

4. Bubble Bin

There are few things better than bubbles! By using some dish or hand soap create a car or toy wash. This is a fun way to involve your child in chores. Be sure to closely monitor this activity since many soaps are not child safe.

5. Gardening Bin

Gardening can easily be brought indoors with a sensory bin. Fill the container with organic soil and bring inside some of your child-safe tools (small dull trowel, watering can, pots, buckets, etc.). You could also include plastic vegetables or flowers for your child to plant or harvest! Ready to get messy? Add some water to your bin and watch together as the dirt quickly turns to mud!

1

6. Colored Spaghetti Bin

Spaghetti is an especially great sensory material for toddlers who want to put everything in their mouths. Jazz it up by boiling it in colored water! With younger children you can even allow them to sit and stand in the material. To extend the play with older children provide them with safety scissors to practice cutting.

7. Archaeology/Paleontology Bin

Children of all ages love digging up treasures! Fill the tub with child safe sand and hide dinosaurs, plastic bones, or even mummies. Use the same tools as real excavators such as toothbrushes, paint brushes, sifters, buckets, and trowels to uncover the hidden items.

3

8. Leaf Bin

Just raked your yard? Fill your sensory bin with leaves! You can also include acorns (for older children), pine cones, and even small sticks. Enhance play by providing your child with tongs and a magnifying glass.

9. Bioluminescence Bin

Bioluminescence is the light created and emitted by a living organism. This big scientific word can easily be explored in your sensory bin. Fill the tub with water and black washable paint (Pro-tip: do not use food coloring! It will dye your child’s hands) until the water becomes murky and opaque. Then throw in some glow sticks and allow your child to go “fishing” for bioluminescent organisms. Include some non-glowing “fish” to extend the fun.

2

10. Sensory Panels

We are breaking the rules a little with this “bin” since,  in fact, it is not a bin at all. Create sensory panels by removing the glass or plastic from a variety of frames and fill them with tactile materials. You can use anything that you think your child would be interested in (safely) touching (our favorite is a piece of a high pile bath mat). These framed sensory materials are great because they can be placed on the floor for infants to explore during tummy time or hung for toddlers to touch while stretching their legs! The hanging aspect also allows for easy storage and can even provide a fun decoration for your child’s room.

Empowering Young Conservationists


If you’ve ever driven or walked down Constitution Avenue in Washington DC, you probably have seen the larger than life Albert Einstein sculpture lounging on a bench.  But have you ever been in the building behind Einstein?  That building is home to the National Academy of Sciences, a non-profit organization of the country’s leading scientists.  Not only is it a place for the members to gather, but through the Cultural Programs of the National Academy of Sciences, the site also hosts rotating art exhibits that explore the intersection of culture and science that are open to the public.

DTUFT_TheArcticMelt_TheArcticMeltGreenlandSea

Greenland Sea by Diane Tuft

Diane Tuft’s The Arctic Melt: Images of a Disappearing Landscape is one such exhibit that is currently on display at the National Academy of Sciences.  A recent Washington Post article describes her Arctic landscape photographs as vivid in color, yet also notes that, “these glimpses of an unfrozen North, some of them shot from an airplane or a helicopter, are also ominous. Discharged from glaciers, icebergs and ice sheets, that picturesque water is headed this way.”

Tuft’s Arctic Landscape exhibit will be the focal point of an upcoming family day that SEEC is leading at the National Academy of Sciences on February 10th. We are excited about facilitating this topic despite the fact that some might say the concept of global warming is too complex, depressing, and scary to explore with young children. After all, they are topics that can be difficult for adults to fully comprehend.  So why create a family day around this exhibit and topic? While we do not expect to put a stop to global warming in just one day, we believe that exploring the Arctic landscape, climate change, and conservation with young children will foster a sense of environmentalism among the next generation.

DTUFT_TheArcticMelt_Meltwater

Melt Water by Diane Tuft

During the family day, children will be able to explore the landscape of the Arctic through literacy, art, dramatic play, sensory experiences, and experimentation.  By interacting with the Arctic environment, children will foster an understanding and love for the Arctic environment and those creatures living in it.  Research has shown that the more time a child spends in nature or exploring a natural landscape, the more empathetic they are towards that habitat and its inhabitants.  Developing this empathy for the natural world and its creatures leads to a strong interest in conservation that lasts through adulthood.

The family day will also feature an experiment that illustrates the consequences of climate change in the Arctic.  Through the demonstration children will begin to form an understanding of climate change, and how it effects are world.  While we want to educate children on climate change, we will also be focusing on conservation, so that children leave the family day feeling empowered to help make a positive change in the world. As Jane Goodall said, “You cannot get through a single day without having an impact on the world around you. What you do makes a difference, and you have to decide what kind of difference you want to make.” We aim for children to feel a sense of control that they too impact the world, and can make that impact positive.  After exploring the Arctic habitat and learning about climate change, we will have an activity that encourages families to think together about what steps they can take, large or small, to positively impact our world.

Empower your young conservationists by coming to the National Academy of Sciences on February 10th!  Get more information and register here!

Teacher Feature: Three-Year-Old Class Explores Wrecking Balls

This week’s Teacher Feature highlights a three-year-old class’ exploration of wrecking balls at the Hirshhorn Museum and Sculpture Garden.  The teachers, Amy Schoolcraft and Connie Giles, noticed a strong interest among the children in construction, so decided to start with demolition.  This lesson included play, art, observation, connection to objects, literacy, and problem solving.  Below you will find images from the lesson, as well as reflections from the teachers. 

cover

We noticed that our class was often playing games such as building with blocks, digging mounds of dirt, and finding inventive ways to create structures on the playground. So when thinking about what our next topic of study should be, it was an easy decision to explore construction. We hope that through this unit our class will have a deeper understanding of construction and demolition, including the various jobs, tools, and equipment needed. We also hope this unit will provide great opportunities to learn about safety, teamwork, and problem solving.

1
On their way to the Hirshhorn Museum and Sculpture Garden, the class stopped several times to observe construction taking place around the National Mall.  Amy and Connie asked children guiding questions such as, “What is that?” and “Where do you think he’s going?” The children excitedly described the tall cherry picker and safety equipment they saw.

There is no better way to engage with a topic than to have first-hand experience with it. We were lucky to come across some big machines and workers on our way to our museum visit, and it was a great opportunity to get us thinking about construction vehicles. By taking the time to notice construction tools and machines on our walk, the kids were able to build context and gain a greater understanding of large machines as they observed how they move, who uses them, and for what kind of jobs big machines can be used.

2
When the class arrived at the museum, Amy reminded the children of “The Three Little Pigs” story, which they had read the week before, to see how the pigs constructed their houses.  She continued, “But this week, we’re going to learn about what the Big Bad Wolf was doing – demolition!”  The class decided to try to push over the museum, just like the Big Bad Wolf knocked over the pigs houses.  Although they tried with more and more classmates, none of their efforts were successful.  As they were trying, some children commented, “It’s concrete. It’s too hard”; “My arms aren’t strong enough”; and “This is hard!”

The kids really enjoyed using a familiar story, “The Three Little Pigs”, to learn about construction materials in a previous lesson. By connecting our demolition lesson to the Big Bad Wolf, we hoped to capitalize on their love of the story as we built upon their understanding of construction while also creating a mental image of what demolition is.

As an introduction to demolition, I wanted them to understand how strong buildings are and why a large machine is necessary to knock a building down. What better way to gain a more concrete (pardon the pun) understanding of these concepts than to use our muscles and experiment in knocking a building down ourselves? This activity was an opportunity to work together, problem solve, have a little fun, and give them a chance to get extra energy out in a purposeful way.

3
The class decided that knocking a building over with just their bodies was way too hard, and that in order to do it, strong tools are needed.  For example, as one child said, “Like a strong drill to knock it down!”  Amy explained that sometimes smaller tools work, but for big buildings, you need a very large tool, called a wrecking ball.  She brought out a toy construction truck as an example and said that the first thing they would need in order to build their wrecking ball is a boom – the long, strong part that allows a wrecking ball to swing.  The class decided to look around the museum for something they could use as a boom.

I wanted the class to be looking for a sculpture that looked like a wrecking crane’s boom. Boom was a new term for them and by exploring the parts of a toy, they were able to identify and label a boom in a very tangible way.

4
After some searching, the children spotted Kenneth Snelson’s Needle Tower and felt that it was long and strong enough to be the boom for their wrecking ball.

I chose this sculpture because of its resemblance to a wrecking ball boom. Its size and shape helped to build the perspective of how large a wrecking ball crane is.  Also its safe and open location gave us an opportunity to explore the sculpture from different perspectives.

5
After finding their boom, the class continued to build their pretend wrecking ball out of the truck, and noticed that they would need to attach a string or chain from the boom to the wrecking ball.

I wanted the kids to think critically about how the wrecking ball would work. By posing the problem of how to attach the wrecking ball to the boom, they began to generate ideas from using a string, to jump ropes, and eventually a chain.

6
After discussing the parts of the wrecking ball using the toy, the children set to work creating a wrecking ball with their bodies and objects.  First, a child laid down on the ground to be the foundation of the truck.  Another child was at the front of the foundation acting as the person in the truck cab, controlling the movements of the boom and wrecking ball.  Two children acted as the boom by holding the wrecking ball attached to a pulley and rope. The goal was to knock over the building (made of recycled yogurt containers), and the children had to figure out how to move the wrecking ball in order to achieve this.

As a way to apply what we learned about the parts of a wrecking ball crane, we took turns acting out the parts of a wrecking ball working together to knock down a “building”. However, it felt like the activity was getting a bit chaotic and they appeared to be missing the idea that the ball needed to hit the building instead of their hands or feet. In hind sight, shortening the chain, simplifying each kid’s role, and adding a demonstration would have been helpful.

7
To round out the lesson, Amy read Bam, Bam, Bam by Eve Merriam, which had simple words, and large images of a wrecking ball that connected to the lesson.  Then she used an iPad to show a video of a wrecking ball in action.  The children commented on how loud it was.  Amy pointed out how much dust and dirt rises during a demolition and how water is used to control it.

I chose this book because the rhythm and rhyme make it a fun and easy read but also because it had clear illustrations of the different parts of a wrecking ball and its job. The video we watched helped our class to see and hear a wrecking ball at work. It inspired a great discussion about some of the draw backs of using a wrecking ball, such as the noise and dust, which are two reasons why they are now rarely used on construction sites. In our classroom, we use technology to help bring a topic to life. Although I feel that teachers need to careful not to use technology as a substitute for hands-on experiences, it can be a great resource for exploring new ideas, initiating discussions, and building observations and insights about a topic.

8
Before heading back to school, the children ran around the sculpture getting a closer look.  They noticed the silver color and the cables holding it up.  They even lay underneath the sculpture observing the shapes from a new perspective.

I hadn’t planned to let the kids explore the artwork on their own. I typically walk around the sculpture with the kids to point things out and encourage observation. However, with such an open and safe space, it was a perfect opportunity to allow them to experience the artwork in their own way. Before I knew it, they were pointing out the shapes, materials, and experimenting by finding new ways to look at the sculpture. It all happened very organically and the kids had a great time in the process. Our kids are comfortable around artwork and are aware of the rules, such as no wandering away or touching the art, so I did not worry about reviewing the rules with them before setting them loose. While they did a pretty good job, it would have been a good idea to review the rules anyway.

10
Back on the playground, Amy set up an art activity where children had turns moving a “wrecking ball” and seeing how the paint hit the paper.
11
The children were able to swing the wrecking ball in different ways and saw the result of their efforts on the paper.

I was excited about this art activity. I hadn’t tried it before but I found it on Pinterest and thought it would be a great way to make some “wrecking ball” art and experiment with the way a wrecking ball moves. We used a plastic water bottle with a squeeze glue lid and filed it with paint. We attached the bottle to a table using string and had the kids swing the bottle over a paper to create a design. Unfortunately, this project did not work as well as it had on Pinterest. The paint was too thick and instead of leaving a stream of paint creating a design, dots of paint ended up scattered on the page instead. All in all, the kids had a lot of fun and were still able to experiment in swinging the “wrecking ball”. A colleague suggested that a variation to try in the future would be attaching a paintbrush to swing back and forth instead. I am looking forward to giving it a try.


After learning more about demolition, the class continued their exploration of construction by exploring building materials, safety equipment, planning, tools, and more!  For more ideas, see our construction Pinterest board!

Top 5 – DIY Gifts from Kids Edition Take Two

Are you scouring the internet for a gift that your child or students can create to give as a gift for family members?  It’s tough to find something that’s budget friendly, useful, and actually fun and meaningful for children to make.  That’s why we’ve rounded up seven (we just couldn’t keep it to five!) more ideas for exciting DIY gifts that your children will actually enjoy making.  And if these aren’t enough, check out our Top 5 from last year!

Cover

Hand Print Key Chains

How great are these hand print key chains from Grey House Harbor? Not only are they useful, stylish, and personal, they also look like a ton of fun to make! Mix science with art as you watch the shrinky dinks shrink in the oven.

Handprint-Keychain-4

Paper Plants

Not only are these paper plants from The House that Lars Built beautiful, they require no watering or light!  Grab some paper, markers, scissors, and a box or cup to make these colorful plants.  Children will let their imagination loose as they practice their fine motor skills.

paper-plants1

Suncatchers

Our preschoolers enjoyed making these wintery suncatchers and we’re sure their families will love them too!  To create these colorful creations, open up a sheet of laminating paper (our art educator, Caroyln Eby, suggests taping the paper on the table so it stays open), and decorate it with oil pastels, tissue paper, and glitter glue.  Spice it up further by adding dyed noodles and icicles made from crumpling foil.

1

Twig Pencil Holder

These twig pencil holders from the Royal Horticulture Society are easy to make and functional too! Take a nature walk together to gather the twigs while noticing the nature in your neighborhood.  You could even paint the twigs to add a pop of color to a family member’s desk.

Twiggy-pencil-holder_940x627

Calendar

If your child is anything like our students at SEEC, they love to make artwork year round.  Save some throughout the year or sit down for a drawing session to make these custom calendars from Martha Stewart. For a more budget friendly version, print out a year calendar from the internet.

991836e4952d2a3ff10fa655a694fcba

Rock Photo Holder

Create a rock photo holder from Buggy and Buddy that can hold a special photo.  Painting the rock can be enjoyed by any age and putting the beads on the wire builds fine motor skills!

photo-fb-768x768

Homemade Wrapping Paper

Don’t forget to wrap up all these gifts!  Include your child in the wrapping process by providing them large white paper to decorate.   If you’re child is an older infant or toddler, lay out paper and allow them to dance or move on the paper with paint.  If they’re older, provide a variety of ribbon and washi tape that they can use to wrap and practice fine motor skills.

2

If you have other ideas for fun DIY gifts that children can make for their families, please comment; we’d love to hear your ideas!  And check out our DIY Gifts from Kids Pinterest board for more ideas!

SEEC Shares: Tiny Sculptures

SEECstories.com (1)

At SEEC, one of our core teaching philosophies is using the museums to enhance our lessons and foster curiosity. Upon hearing about a school inside the Smithsonian, many people are excited and want to know more about our practices. Other people react differently, thinking “that’s great, but I will never be able to recreate that in my classroom or at home”. We actively disagree with this assumption and argue that teachers, caregivers, and parents can bring their children out into the community to engage in object based learning. we understand that for some these community visits are not always easy to implement. For this reason, we decided that we should offer ways for parents, caregivers, and teachers to create SEEC-like spaces and activities that do not involve leaving your classroom or house. Our new blog series “SEEC Shares” aims to be a place that anyone working with young children can visit and be inspired to take ideas to mold them to fit their own needs.

SEECstories.com (2)

This week’s “SEEC Shares” highlights a class that taught toddlers about sculptures. This particular class was one of our recent Toddler Trailblazers Family Workshops. On the weekends we open our doors to families who come into our classrooms for play-based exploration before heading out on a museum visit with the class. For this Tiny Sculptures lesson, we transformed the classroom to allow for a wide variety of sculpture-based play and then visited Untitled (1976) by Alexander Calder and then Circle I, Circle II, and Circle III by David Smith at the National Gallery of Art. Below you will see some of the many ways that we created experiences to allow the toddler class to explore and create their own sculptures. Hopefully you will find these ideas inspiring.

Classroom & Activities Setup

Straw Sculptures on a Light Table

SEECstories.com (1)

For this activity, we put a colander upside down on a light table. The light table helped highlight the holes through which the children could stick the pipe cleaners and straws. As an added feature to the sculpture, we found felt flowers that we had previously made using a die cutting machine and felt.

SEECstories.com (4)

Since this was a standing activity, children could freely enter and leave the activity without having to seat themselves in a chair. The freedom of standing can help children tap into their creative side. Additionally, putting the pipe cleaners and straws through the colander holes was challenging and provided children with the opportunity to work on their fine motor skills.

Playdough Creations

SEECstories.com (2)

For our playdough station, we used assorted colors of homemade playdough. Often when we first introduce playdough to young children, we do not give them any tools to use. This encourages the children to practice pinching and molding the clay with their fingers, which is crucial to development. For this project, we chose to give the children tools that sculptors would use when working with clay.

Wooden Blocks, Magna-Tiles, and Tegu

SEECstories.com (5)

We created a block station that was tucked away in a corner. Children were able to create their own block sculptures without fear of someone knocking it over. Mixing the different types of blocks, including wooden and magna-tiles, allowed the children to create in new and unexpected ways.

 Loose Parts

SEECstories.com (3)

At the center of the room was a large station that was composed of loose parts. Before the lesson we gathered blocks of different shapes and sizes. Since blocks that link with one and another are not technically loose parts, we were careful to make sure that none of the blocks in the loose part area connected with one another either through magnets or through linking mechanisms like legos. We also cut up pool noodles, found cardboard tubes of various sizes, and added scarves to our loose part collection.

SEECstories.com (6)

To make our loose part area interesting and to hopefully spark creativity, we added materials that we thought the children would never have had a chance to experience before. We filled nylon socks with rice to make a unique form of bean bags and put out a large, white, stretchy tube to manipulate and explore. We also tried to display the loose parts in a way that showed that we valued these pieces without defining what they were or how they should be used.

Found Object Art

SEECstories.com

To finish up the classroom part of the class, the toddlers were encouraged to create their own art using colored popsicle sticks, rocks and pebbles, and feathers. This activity allowed the toddlers and parents to reflect on what art is and what defines a sculpture. For this project, no directions were given. Children were able to be inspired purely by the materials and create truly process-based art.

We hope that you found this “SEEC Shares” inspirational and are equipped to create your own tiny sculptures activity. For more ideas check out our Pinterest Boards on Toddler and Twos Classroom, Activities from SEEC, Environments, and Learning as a Family.


20 Teacher Approved Gifts For The Holidays

Looking for holiday inspiration? Want to give a unique present and need help thinking outside the box? We’ve got you covered. Here are few gift ideas inspired by kid favorites in our classrooms. There are a variety of price points and some of these gifts can easily be picked up during your routine errands.

  1. Library Card

Most public libraries will allow you to open a card in your child’s name. Providing your child with their own card will create a sense of pride and ownership. Bonus: it will also help remind children to take good care of their books.

SEECstories.com (52)

  1. Train Ride

Have a transportation obsessed child? Why not take them on a short (or long) ride on a real train!

  1. Locks and Latches Board

These DIY boards are a great way for your child to get some fine motor practice, keep them occupied for hours, and allow them to safely play with latches and switches without risk of harm.

  1. Cooking Tools

Cooking tools that you would find in your own kitchen are often fast favorites for children. These items are particularly popular and safe for kids: spatulas, metal bowls, sifters, whisks, and pans. Keep these in a lower kitchen cabinet so that your child can easily pull them out to “help” you cook dinner!

  1. Linking Blocks

Blocks are wonderful! They allow for all types of gross motor, fine motor, and problem solving skills to develop. Our teachers especially love ones that connect, either by snapping together or sticking together with magnets.

  1. Slime/Playdough

This easy DIY item is always a favorite in any classroom. Children love the sensory experience and teachers love the endless possibilities of this fine motor activity.

3

  1. Tunnels

Fun for all ages, tunnels are a great indoor, gross motor play activity. Having trouble making transitions? Use a tunnel as a physical reminder that you are changing from one activity to the next.

  1. Scooter Boards

These flat boards with four wheels can be purchased at a toy store or even a hardware store (they are listed as furniture movers). They require both arm and leg coordination and can be a great inside option for movement.

  1. Drawing Implements

There is nothing quite like a new box of crayons, pencils, or markers to inspire creativity in a young (or old) child.

  1. Water Toys

Make bath time more fun with water “toys” that can be found at the local grocery or hardware store. Some of our favorites include large sponges, funnels, turkey basters and buckets.

  1. Exercise Trampolines

Looking for more big movement activities for indoor play? This is your answer! There are small trampolines made specifically for children that include a bar or you can also use an exercise trampoline. Exercise trampolines usually have covers over the springs but do need some extra adult supervision.

  1. Scarves

Scarves are a wonderful gift that can transform into so many different things for all ages. Have a child that loves to pull wipes or tissues out of the box? Transform an old wipe container by filling it with scarves. Want to spice up your changing table? Hang colorful scarves from the ceiling to keep your child mesmerized through the process. Jazz up a song by including movement with scarves.

SEECstories.com (23)

  1. Disposable Cameras

In a world of instant gratification this gift will teach your child patience and the art of film photography! It will also provide you with a look at the world through their eyes.

4

  1. Puppet Stages

There are few children who can resist a stage. Promote dramatic play by providing your child with a platform for their performances.

  1. Dress Up Clothes

Let your child’s imagination run wild with dress up clothes. We especially love including clothes from all different professions. When a child acts out scenarios in pretend play they are developing important social and problem solving skills.

  1. Books

Continue to foster your child’s love of reading by giving them new books. Even at a very young age a child is developing pre-reading skills and should be exposed regularly to text even before they are able to read it themselves.

1

  1. Tricycles

There is always a mad dash on the playground for tricycles and bicycles. Teachers love them because they require coordination and gross motor strength from the child.

  1. Steps

These could lead to nowhere and still be endless fun for a young, active child. Especially in their toddler years, they are always on the move! This is a great gift to help them safely explore and practice stairs.

  1. Magnifying Glasses

Encourage close looking with this gift! It will give children a new perspective on things they encounter in their everyday lives.

2

  1. Seeds

Have a picky eater? A great way to get your child excited about trying their vegetables is to get them started at the beginning of the process. Provide them with some seeds and a small space to garden and see the wonder in their eyes as their plants appear!

Did we forget something? Share your idea in the comments!