It’s Teacher Feature Thursday!
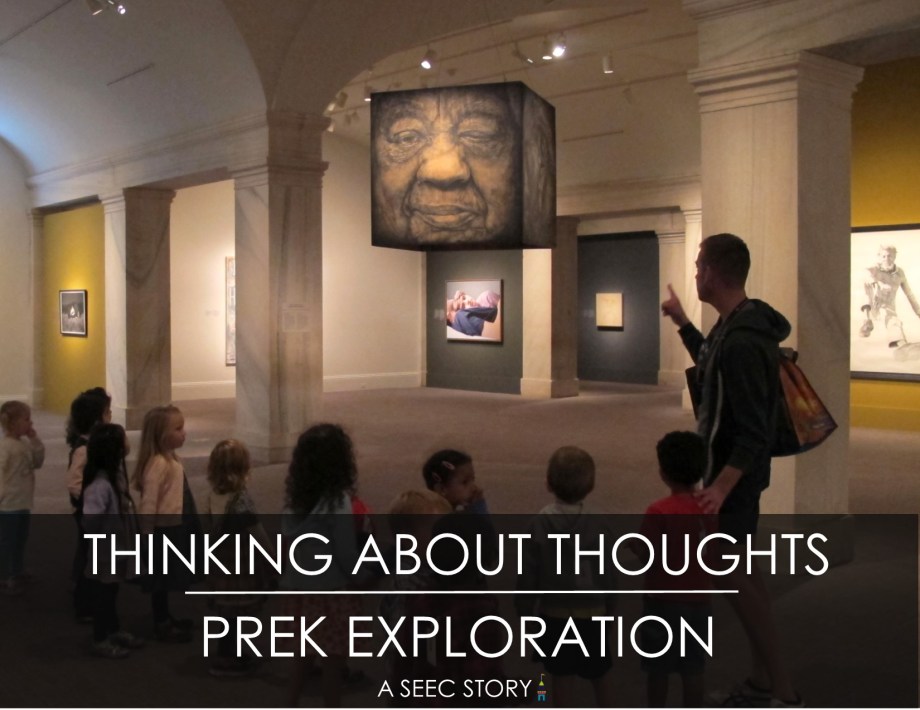
This week we are featuring Will Kuehnle and Jessie Miller of the four-year-old Honey Bear classroom. At SEEC we believe in fostering a sense of curiosity and thoughtfulness that will stay with children long after they leave our school. In this vein, Will and Jessie wanted to spend some time at the beginning of the school year explicitly exploring curiosity with their children to set the stage for an inquisitive year. I joined them for a visit to the National Portrait Gallery where they discussed their own thinking and how our thoughts can be linked to our curiosities. Below you will find a reflection from Will and Jessie and images from the lesson.
Lesson Reflection from Jessie and Will:
The Smithsonian Early Enrichment Center’s Honey Bear class is made up of a diverse group of four-year-olds. During our study of curiosity, the students focused on questions, thoughts, and things we were curious about. We started out by asking ourselves “What is a question?” and “How can we find the answers to our questions?” The goal of this process was to get the children excited about learning, and interested in finding out the unknown. By using language such as “I wonder…” and “I’m curious…”, the wheels in their brain began to spin a little faster and we opened up a world of exciting, new things for them. To enhance this process, we traveled to the Smithsonian National Portrait Gallery to see a piece of art called Caja De La Memoria Viva II by Adrian Roman.
The objective of the lesson was to get the children thinking about their own thoughts. Thoughts are constantly rushing through our heads but it is hard for children to conceptualize those abstract thoughts. This lesson allowed the students to see a visual representation of thought, which sparked their curiosity about the artwork as well as the things they were thinking about in their own heads.
One thing that made the lesson so effective, was the freedom the children had with their minds as well as their bodies. We were surprised to see how each child interacted differently with the piece. When they were given the journal pages and told they could go anywhere in the room to work on them, some children gathered under the woman’s head to get another look inside, while others stayed back to get a larger view of the piece. Some children laid on their stomachs, some sat on their knees, while others laid on their backs looking up into the inside of the cube. They were all completing the same activity but we were fascinated by the variety of ways each child approached it. Logistically, the space in the museum was also crucial to the effectiveness of the lesson. It was quiet and empty, which freed us from the distractions many museum visits can have. If we could go back and change something about this lesson, we would have allowed more time to discuss the journal pages with each child one on one. When you wait and have the children explain their pictures later, you can sometimes lose exciting details. Providing the students and teachers with a quiet space with extra time to finish this part of the lesson is ideal.
It is amazing to see the looks on the children’s faces as their minds race with ideas and thoughts. During our walk back from the museum, we could hear many children saying things like, “I’m curious what they are building in that construction site” or “I wonder what country that flag is from”. Modeling this language for young children and showing them your own excitement about the world helps children feel confident in their own thoughts and questions. It is important to support each child as they bring up questions and past experiences they would like to share so that they grow to have confidence and a love for learning. Setting up experiences like these, lights a fire of curiosity in the children that is only built upon as the year progresses, and helps us as teachers follow their interests and enhance their education. This lesson allowed the children to balance a structured activity with the freedom to express themselves and that is when they are most susceptible to learning and fully experiencing the world around them.
Here are a few images from their lesson on Thinking about Thoughts:
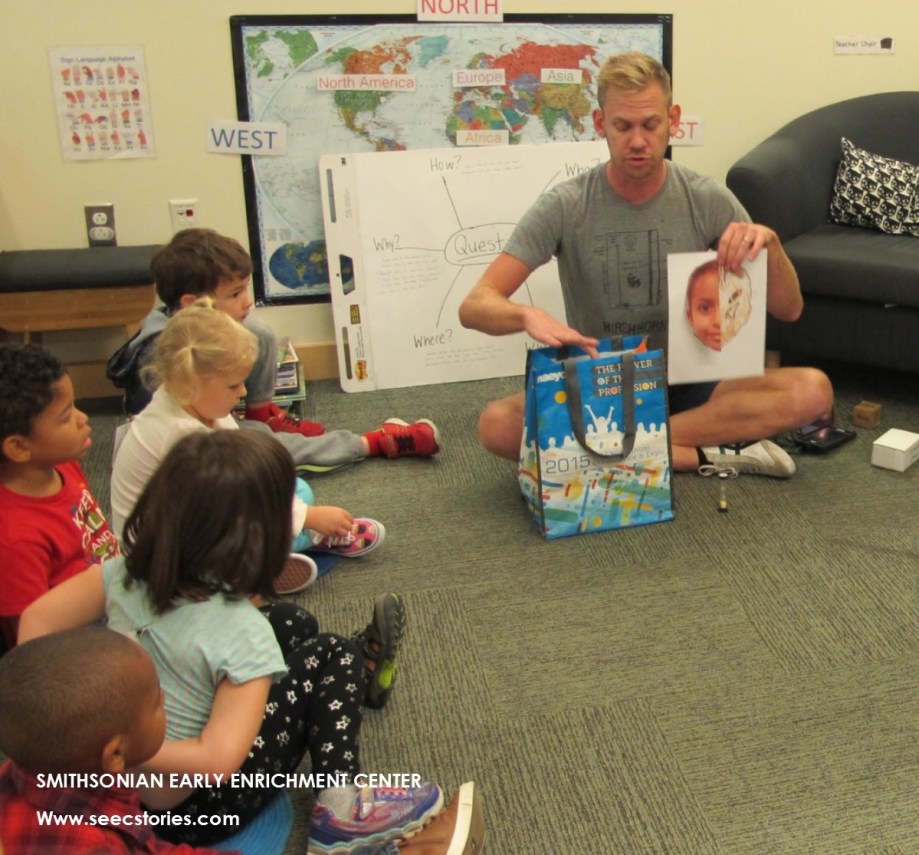 Before traveling to the museum, Will began their lesson by introducing the concept of thoughts in our head. To do this he shared a portrait that one of the children created in a previous lesson. The children noticed that they could tell what the child looked like based on the portrait, but they could not tell what the child was thinking about. Will explained that they would be visiting the National Portrait Gallery to see a portrait that has objects inside its head to provide clues about the person’s memories and what they are thinking about.
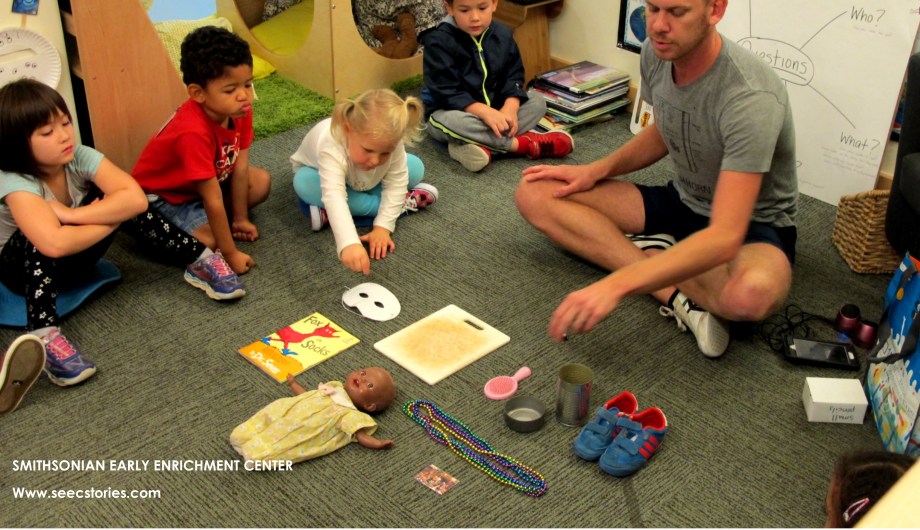 Will showed the class objects that are similar to the ones they would see at the museum. After laying out all the objects Will set a sand timer for the children to look at the objects and think about what this person might be thinking about based on the objects. After looking silently the children shared their thoughts including that the person might like to wear jewelry, that the person might like disguises, and that the person might be thinking about a baby sister because of the doll. Now that the class had a context for the piece they headed to the museum.
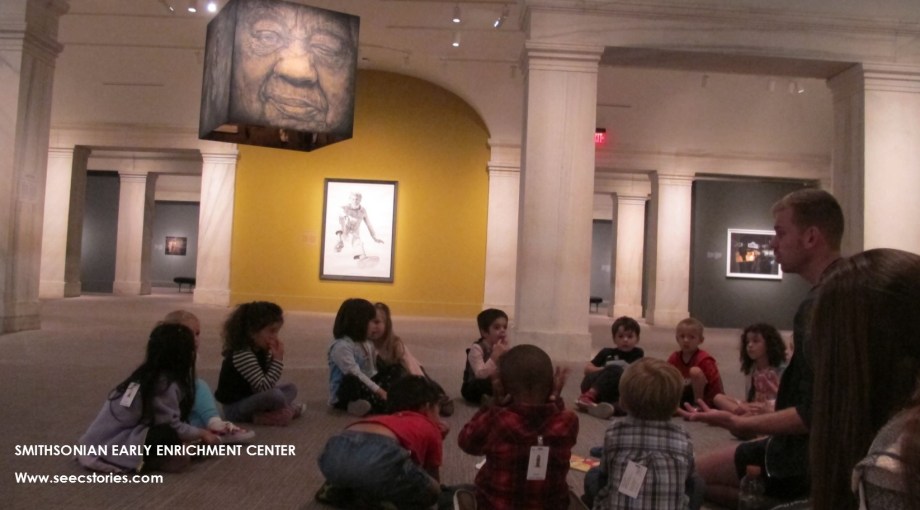
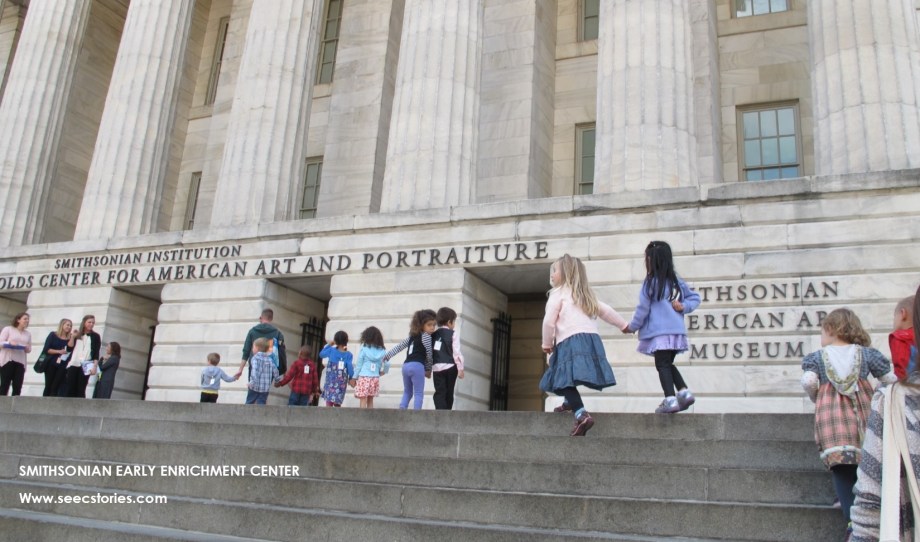 While in the elevator on the way to the exhibit Will asked the children to look for the portrait with the objects inside. He reminded the children that the portraits they see are usually flat, but the portrait they would find today would have an inside that that they could look in. This reminder from Will helped the children refocus their attention after the walk to the museum, and they ventured into the gallery with a purpose. It didn’t take long for the children to find the portrait!
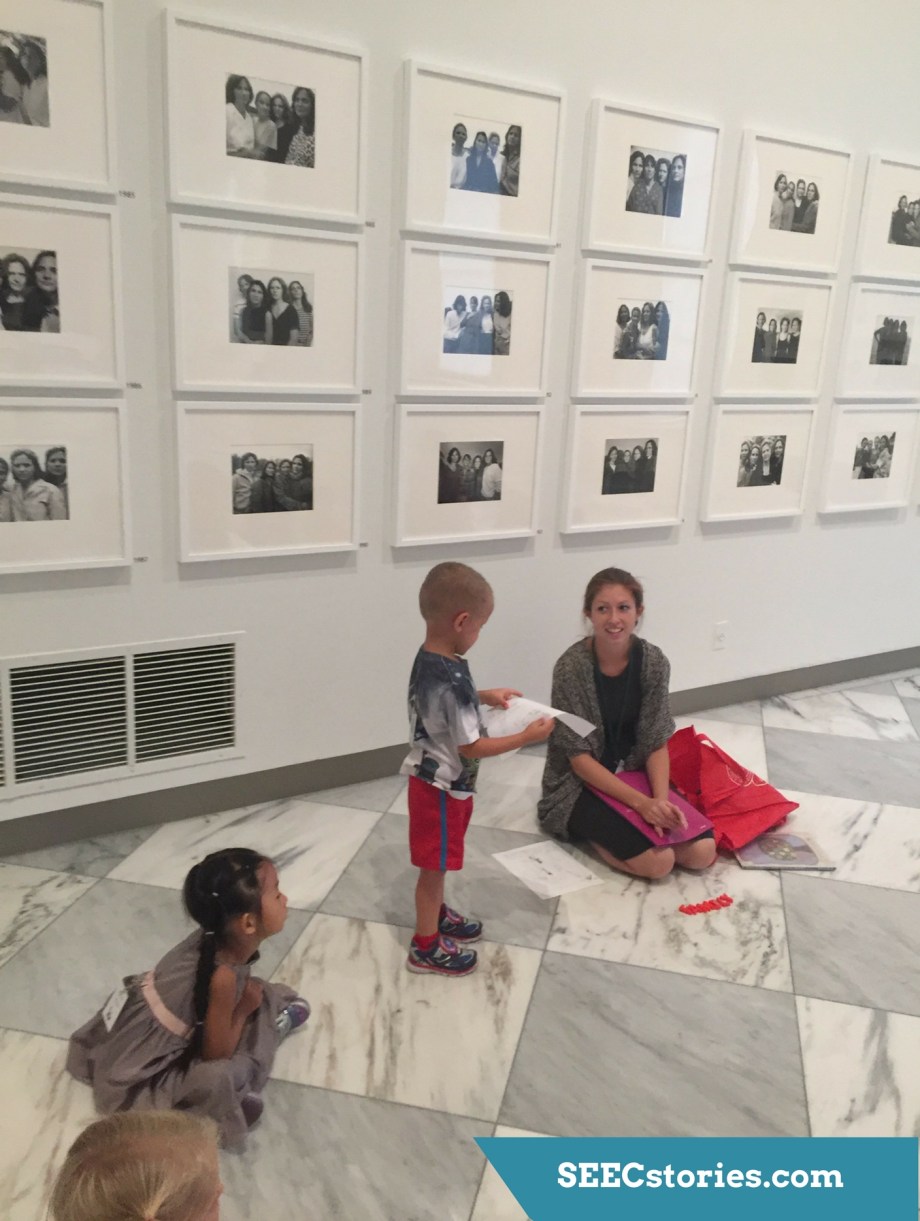
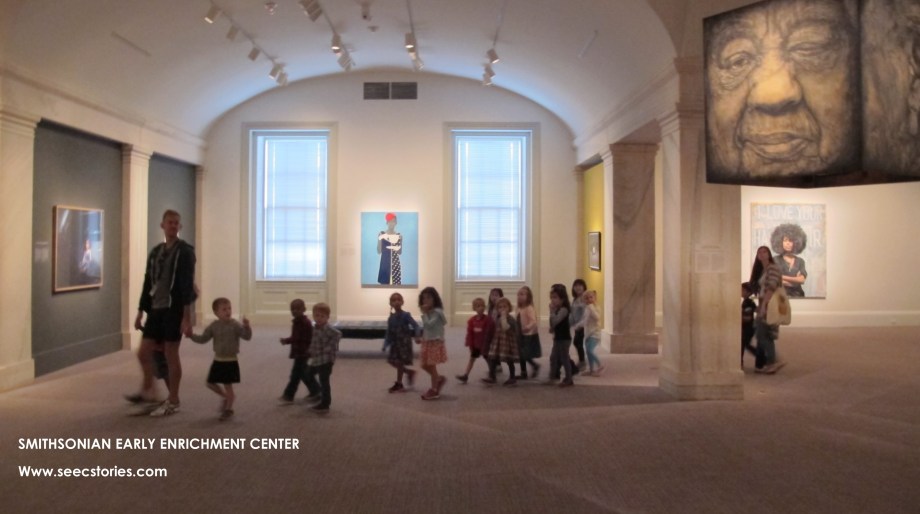 Once the class spotted Caja De Memoria Viva II: Constancia Clemente-Colon by Adrian “Viajero” Roman, Will led them around the entire piece to see it from all sides. They stopped in front of the face section and Will asked what they noticed. One child said, “I see one eye is closed”, while another child noted that the person had a nose. They noticed that they didn’t have any ideas what the woman was thinking about.
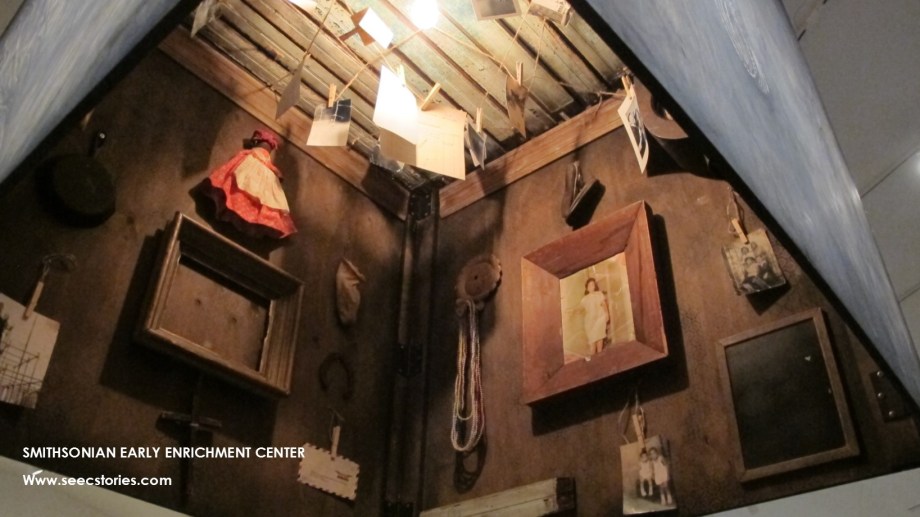
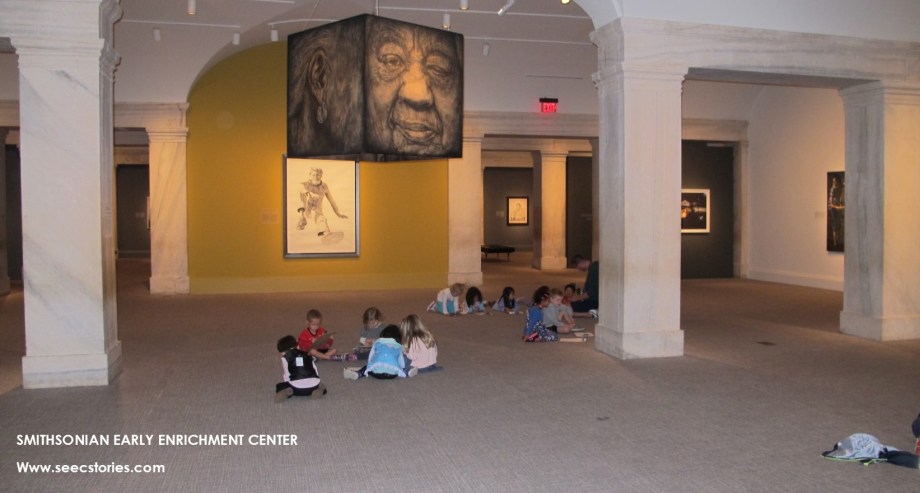
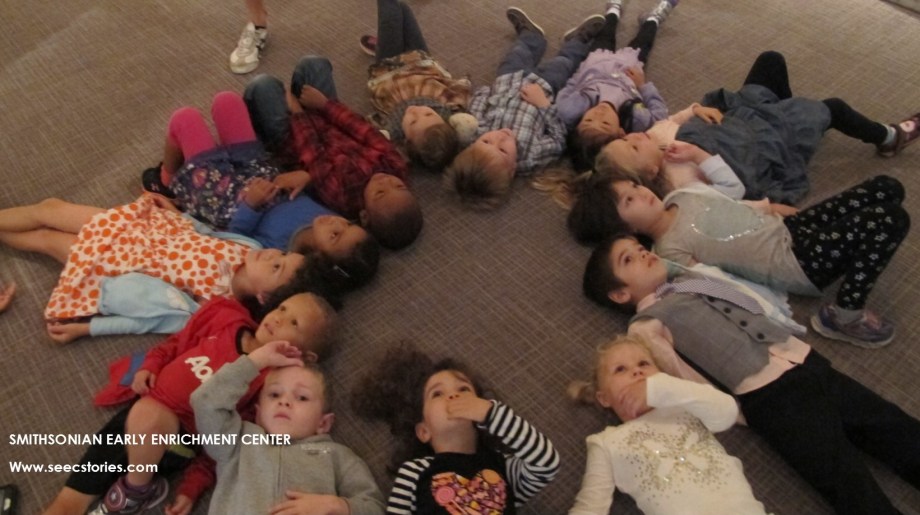 To take a look inside the piece, the children laid in a circle on the floor, facing up. From this vantage point, all the children were able to see the various objects inside the artwork.
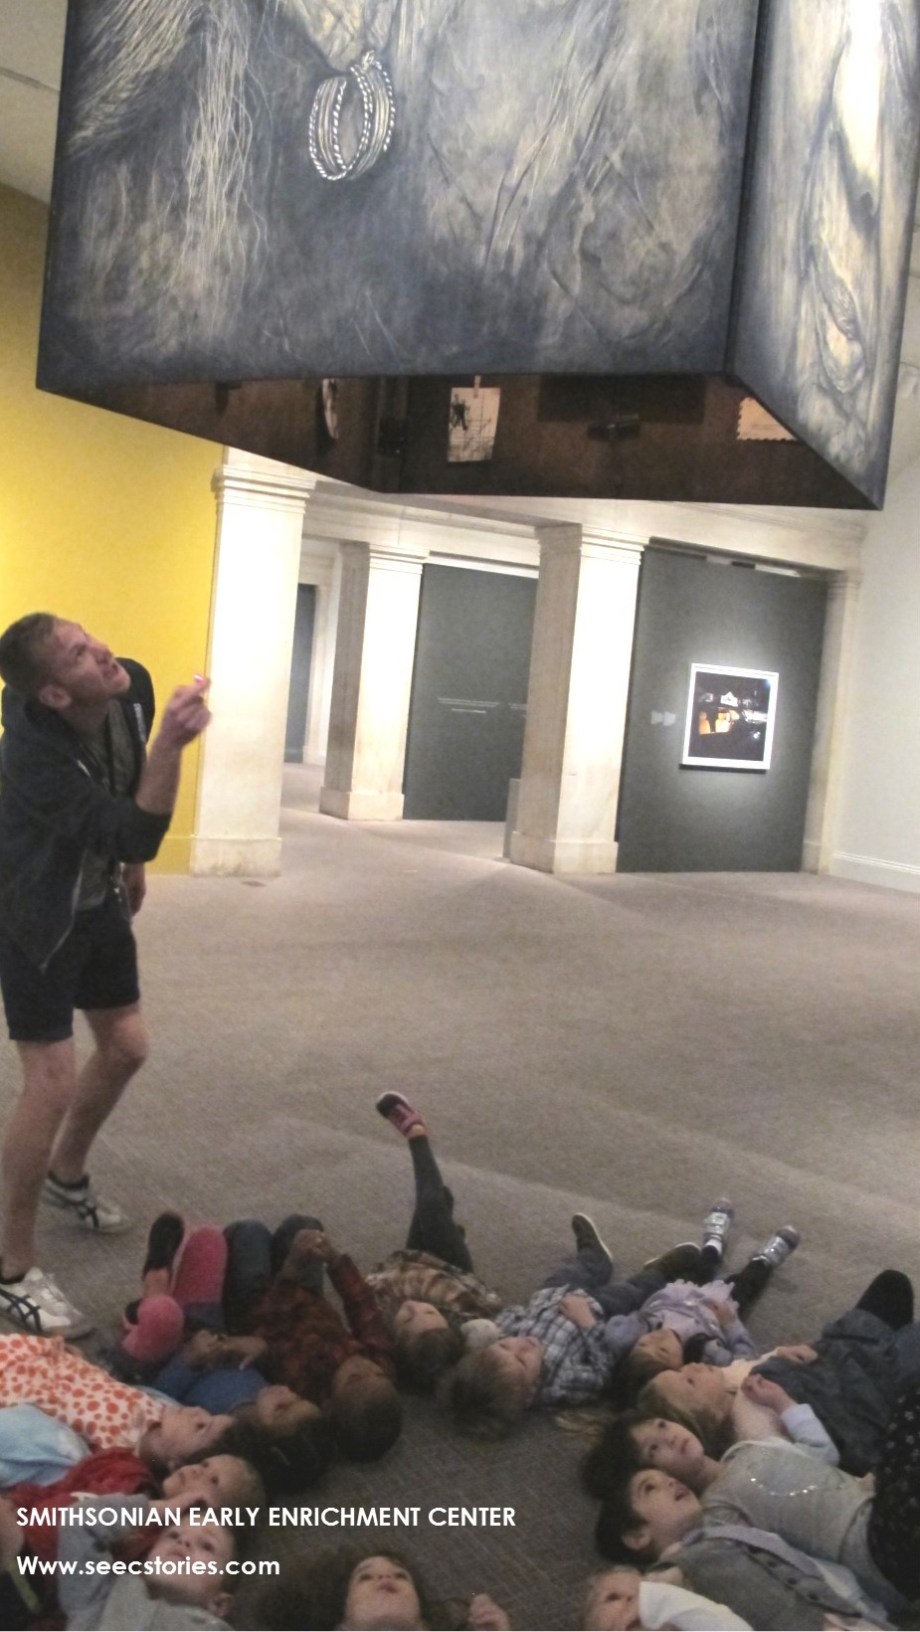 As the children shared their observations, Will used a laser pointer to point out what objects the children were noticing. They discussed what they thought the person was thinking about using the objects as a guide.
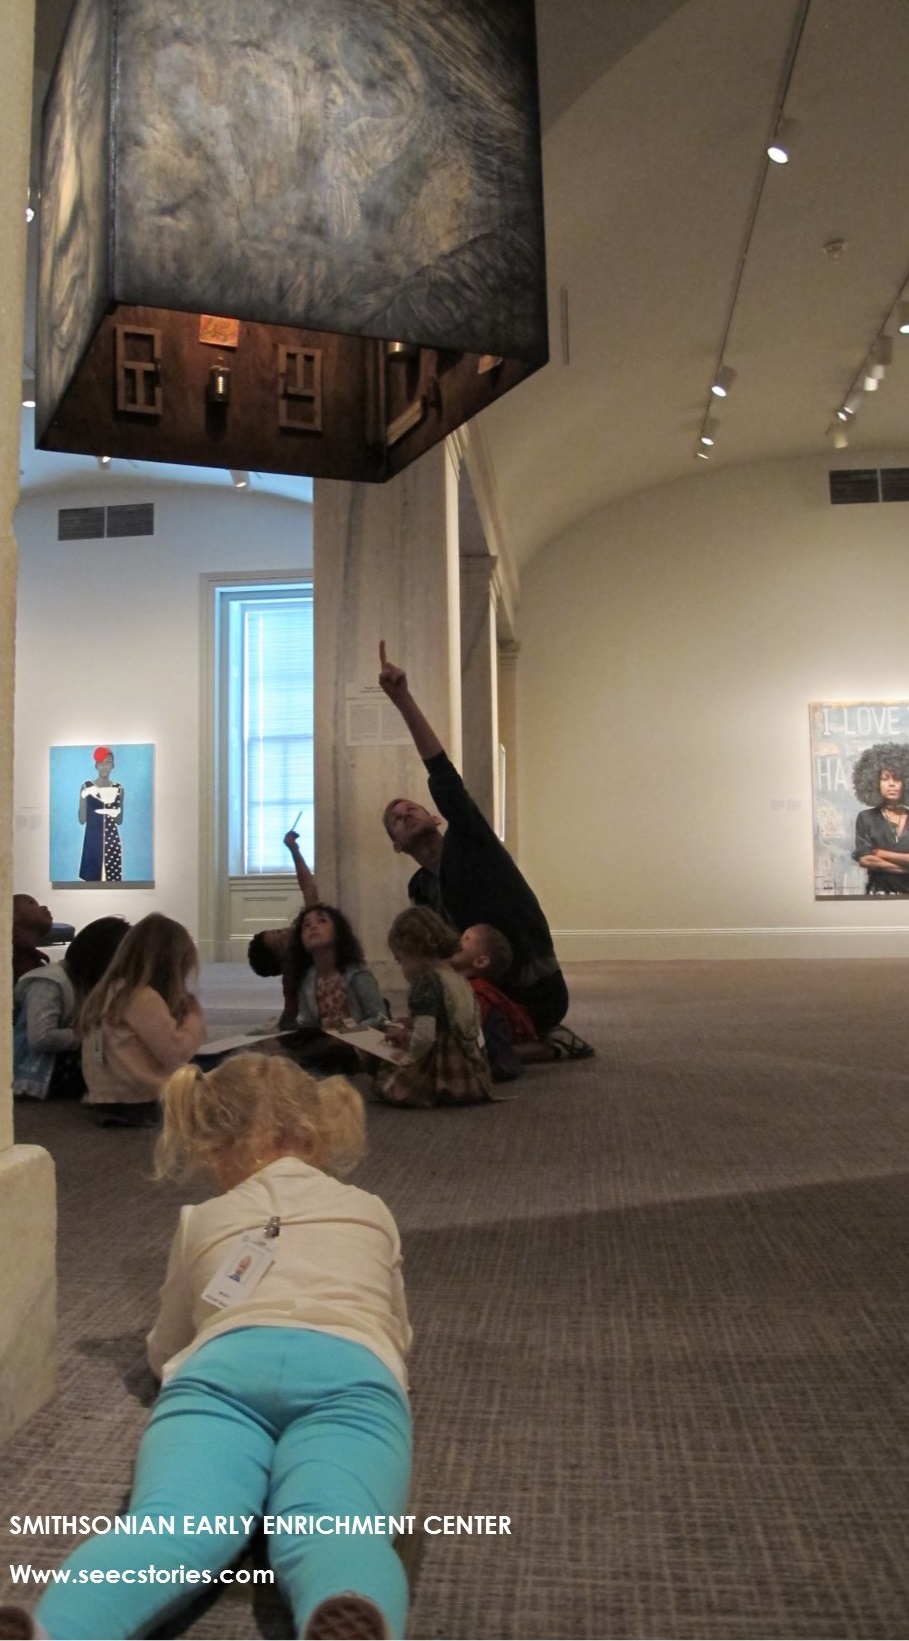
 After looking inside, the class came back together in a circle. Will asked if they felt they knew more about what the woman was thinking now that they had observed her portrait on the outside and the inside. The children agreed they felt they had a better idea of who she was, but had some questions including, “did she live a long time ago?” Will said, “That’s a good question, and I don’t know the answer. What could we do to find out more information?” The children suggested they read the label on the wall, so Jessie did, and they found out that the piece used a recording of the woman’s voice, so she most likely didn’t live a very long time ago. By respecting and responding to children’s questions, Will and Jessie were creating a community of thinking where curiosities, and information-seeking are valued. (To read more about how to create a culture of thinking, check out the article “Making Thinking Visible” by David Perkins.)
 Will asked the children if the thoughts that the woman was thinking were important, and they all agreed that her thoughts are very important. Will emphasized that all of our thoughts are important and asked the children to think about what they think about in their head. Will explained that they would draw whatever those important thoughts were if they could be represented in objects. Will handed out clipboards with paper and a pencil to each child and said that they could go anywhere in the room to draw.
 Many children started in one location, but got up and moved after some time to look more closely at the piece or to get another view. They looked at the piece for inspiration, but drew objects that were familiar and important to them.
Some of the items they drew included their family members, hair, fireworks, remote control cars, bones, sharks, and boats. These drawings helped the children to practice meta cognition – to think about their thinking, and gave them a way to communicate it. These drawings also helped Will and Jessie see the important things the children were thinking about, so they have a better idea of what topic to explore next.
Through their mini-unit on curiosity, the four-year-olds practiced careful looking, asking questions and thinking about their own thinking, which will set them up for a thoughtful, inquisitive, and meaningful school year. Check back next week for the Round Up to see how this lesson and their exploration of curiosity fit into their larger unit of Me, Myself, and I. See you in two weeks with our next Teacher Feature!


 Cause and Effect/Consequences


 classroom, I found myself getting reacquainted with the


 To discuss families, the class went to
  The class discussed how all families are unique and different, but all families enjoy spending time together. After talking about their favorite family activities, they played family charades. Jessie printed out images of families doing favorite activities and placed them in a hat. Each child got a turn to pull a picture and act it out for the class.
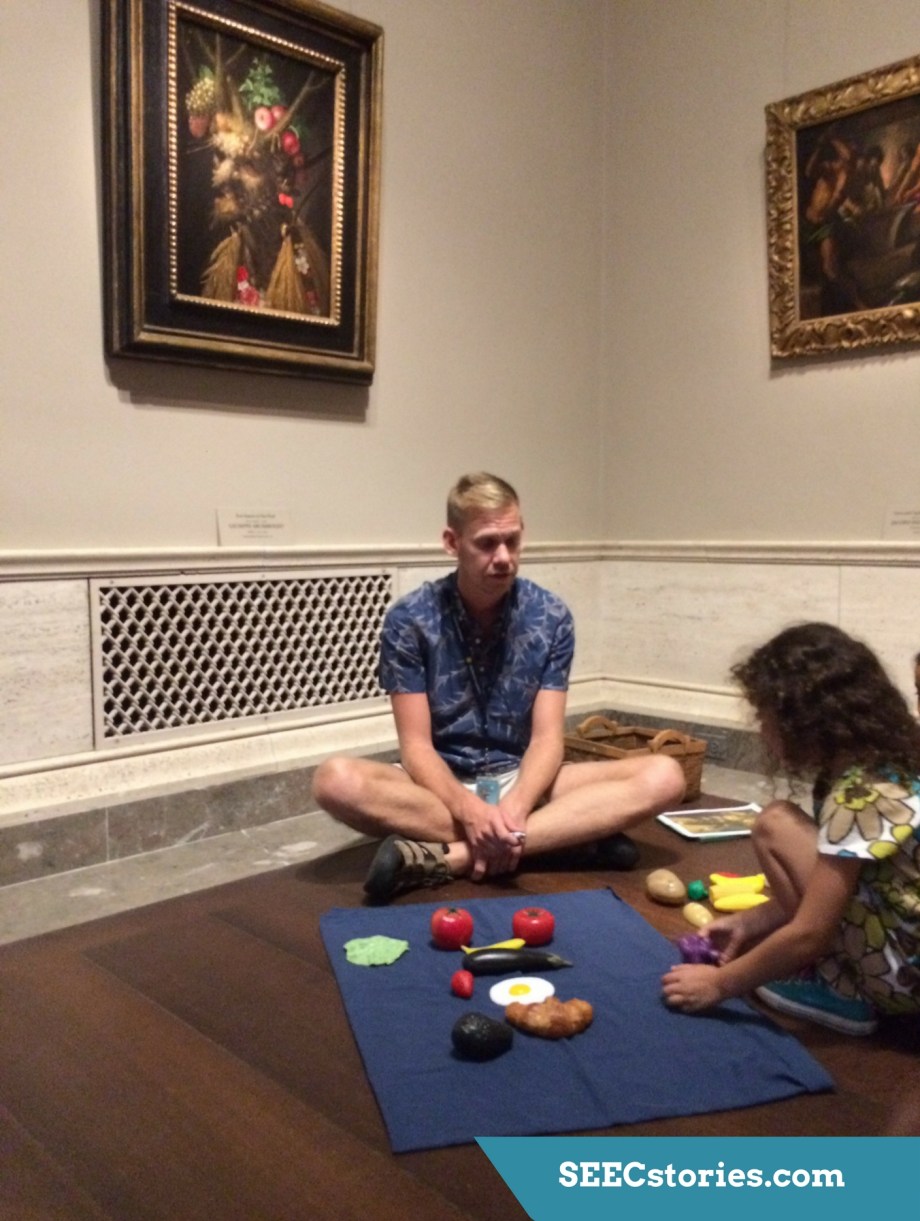 After talking about their families, the Honey Bears turned more attention to themselves. They visited
  Back at school the children made their own food portraits using food print outs on a paper canvas.
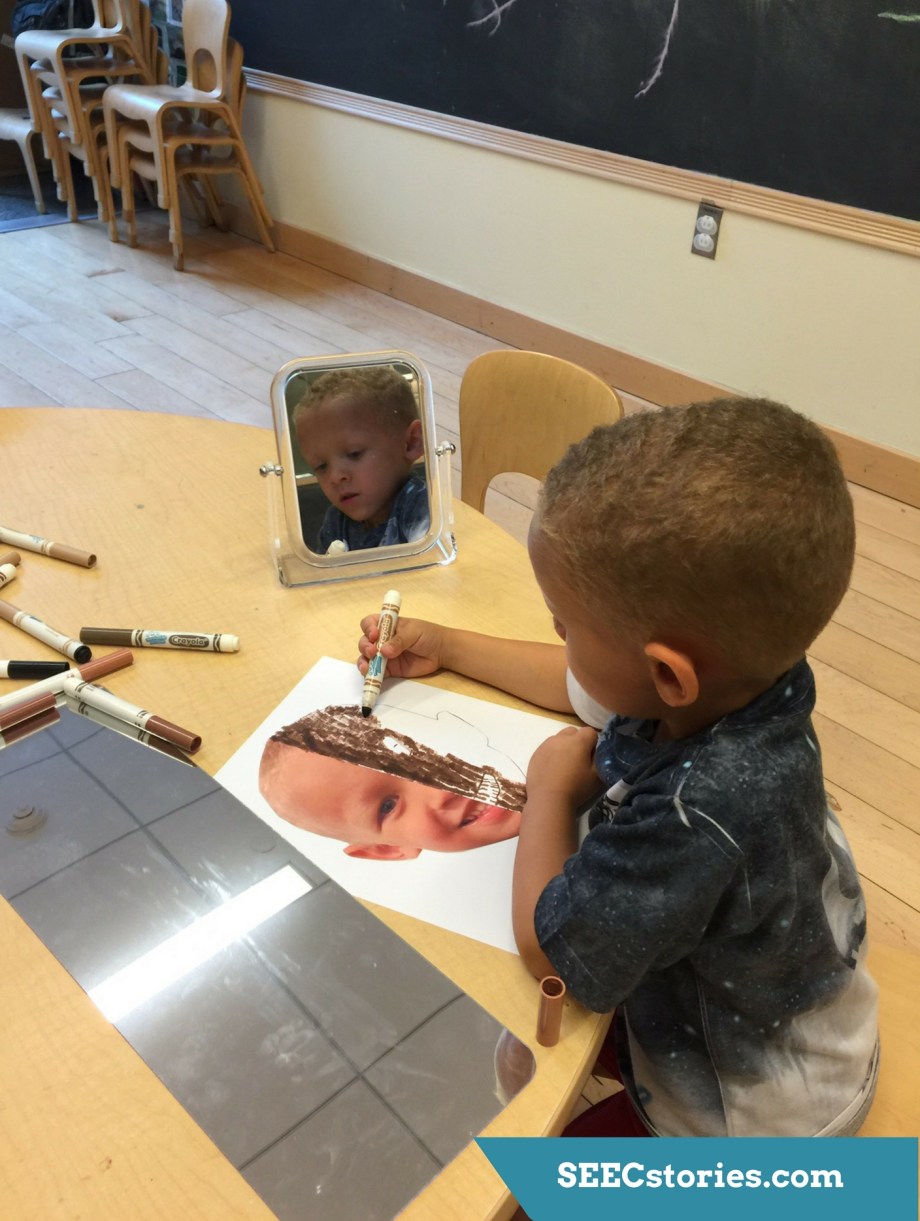 Later in the week the children made their own self-portraits. Will and Jessie printed out each child’s face, cut it in half and glued one half to a piece of paper. They provided the children with mirrors and flesh tone markers to create the rest of their self-portrait.
 To end their week on “myself” the class went to the
 Since the class ventures out to the museums and community daily to support their learning, Will and Jessie wanted to spend some time talking about our local community. The class took a community walk and added pictures of local buildings they visit to a big map of our surrounding area. They displayed the map in their classroom and reference it each morning when they discuss where they will be visiting.
 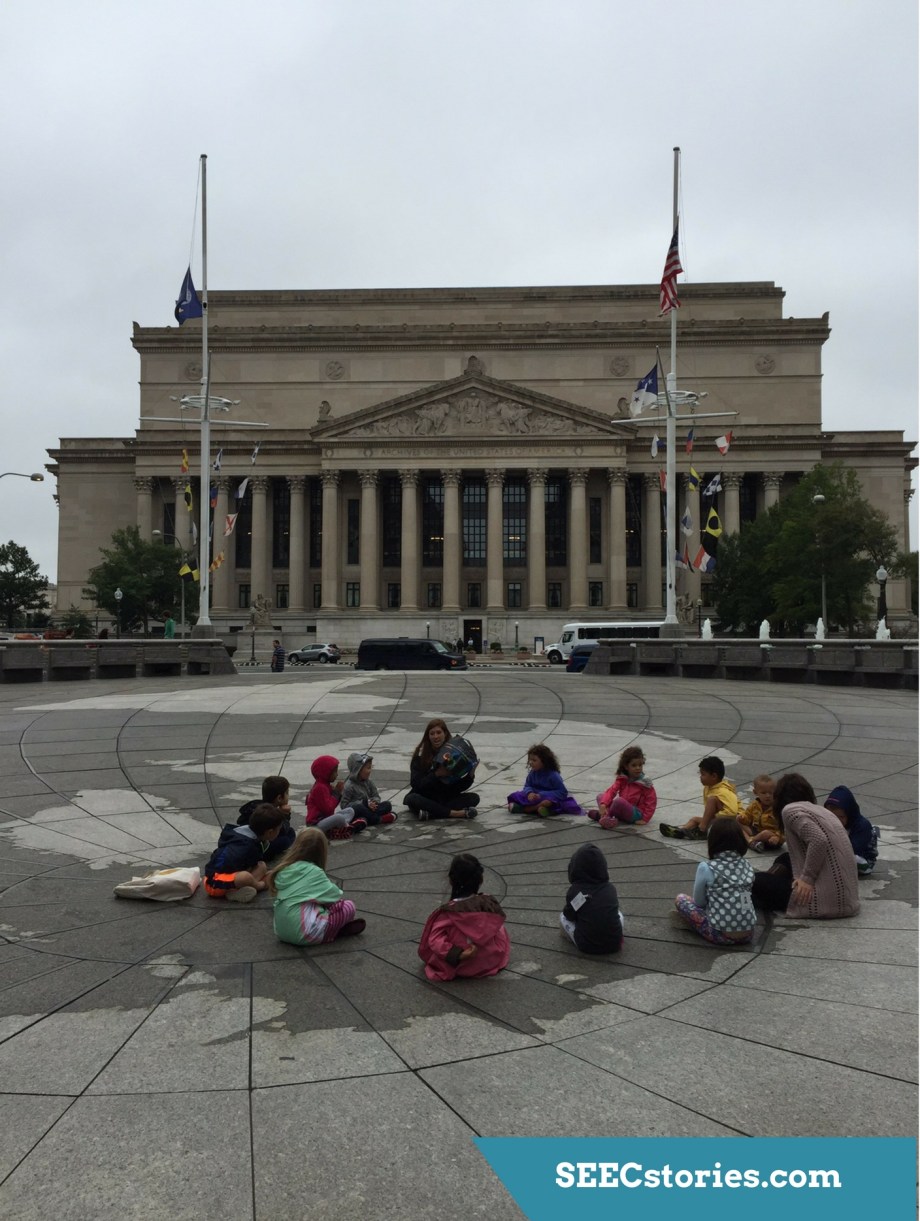 To talk about how our local community fits into the larger global community the class visited


 To learn about cloud types, the Kindergartners sat outside on a cloudy day, looked at images of cloud types, and observed the sky. Kindergarten teacher Silvana Oderisi taught the class a fun cloud song by Cynthia Sherwood that she found on
 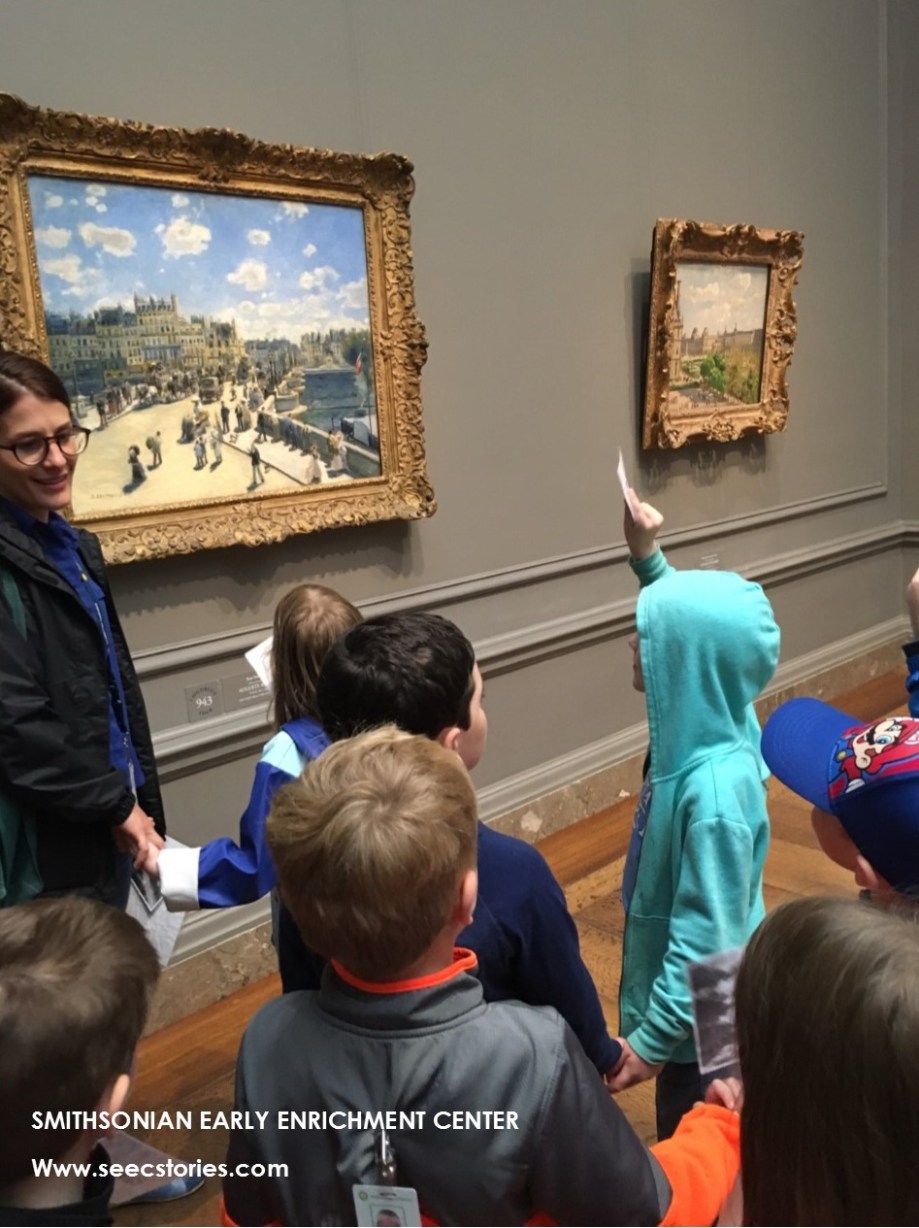 The class also went to the
 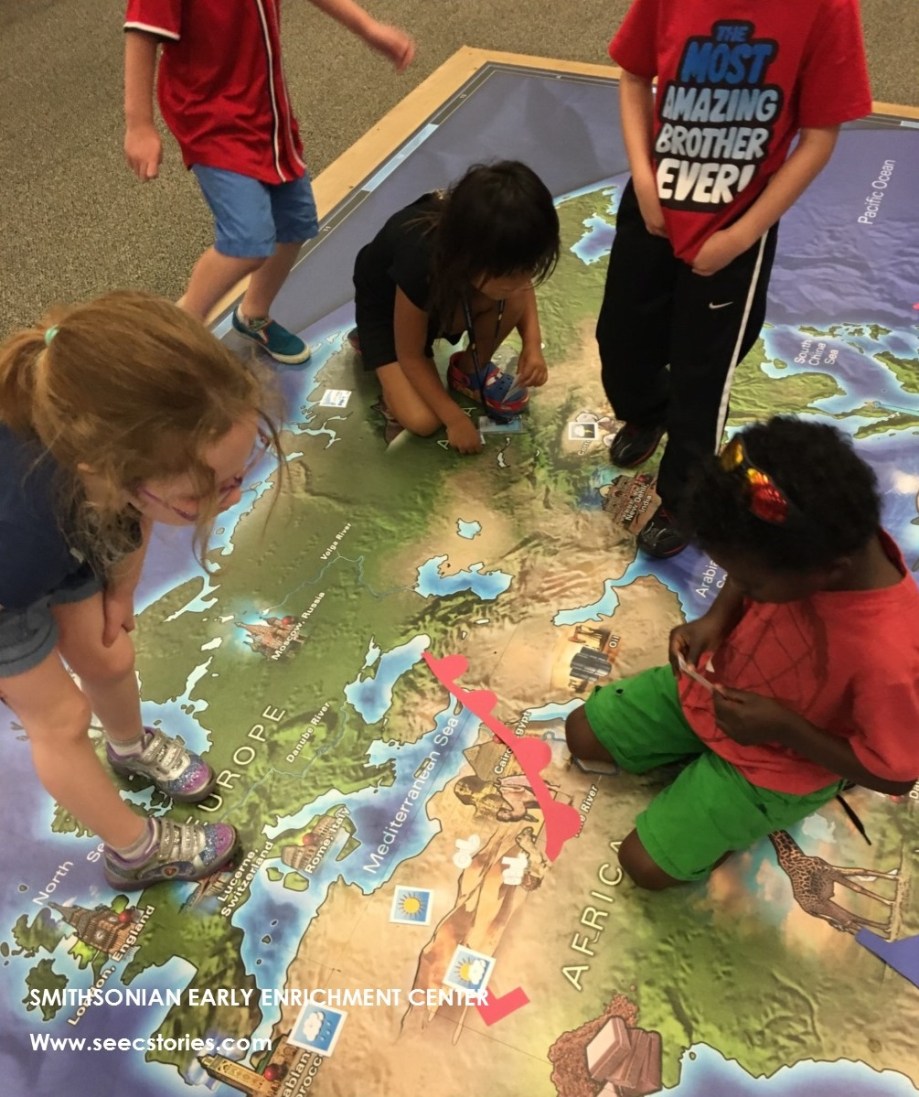 The class went to visit a large world map on the floor of the
 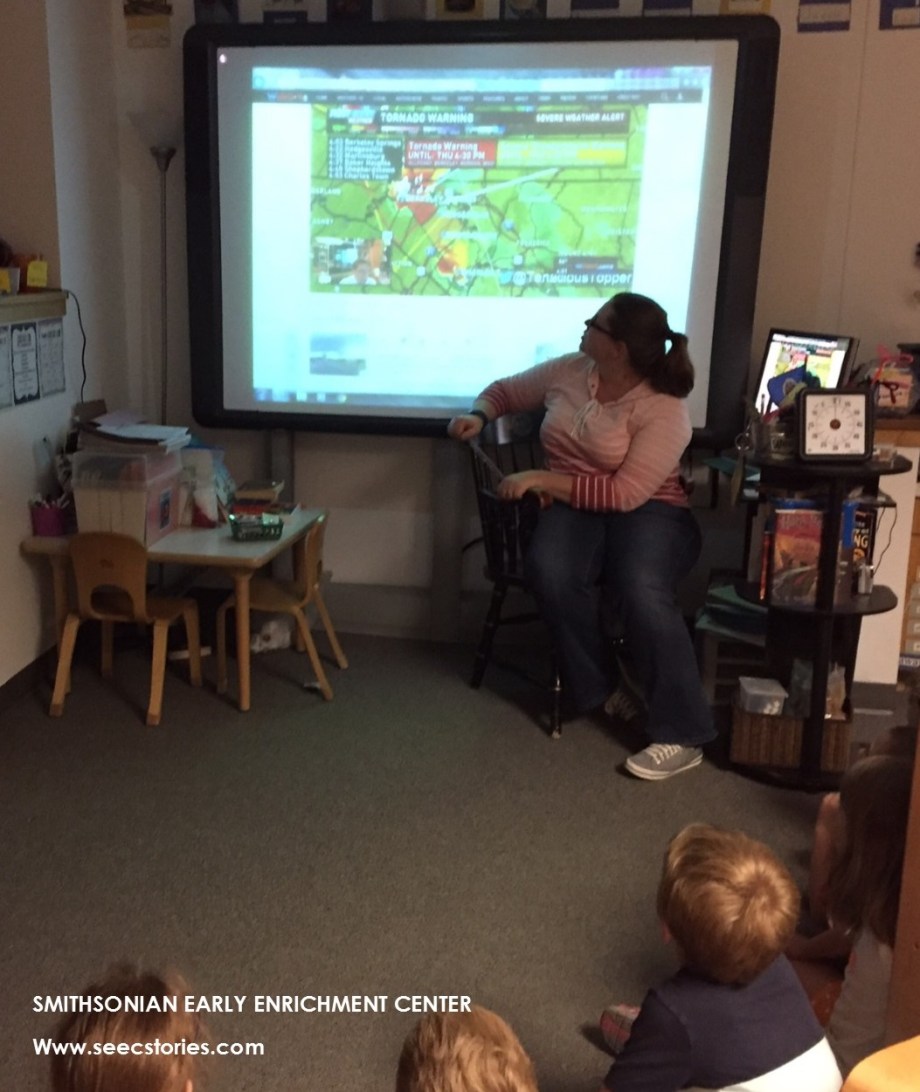 Back in the classroom, kindergarten teacher Cathryn Prudencio, showed the children how radars are used in weather forecasting. The children used the radar projected on their Smart Board to report the weather for their classmates.
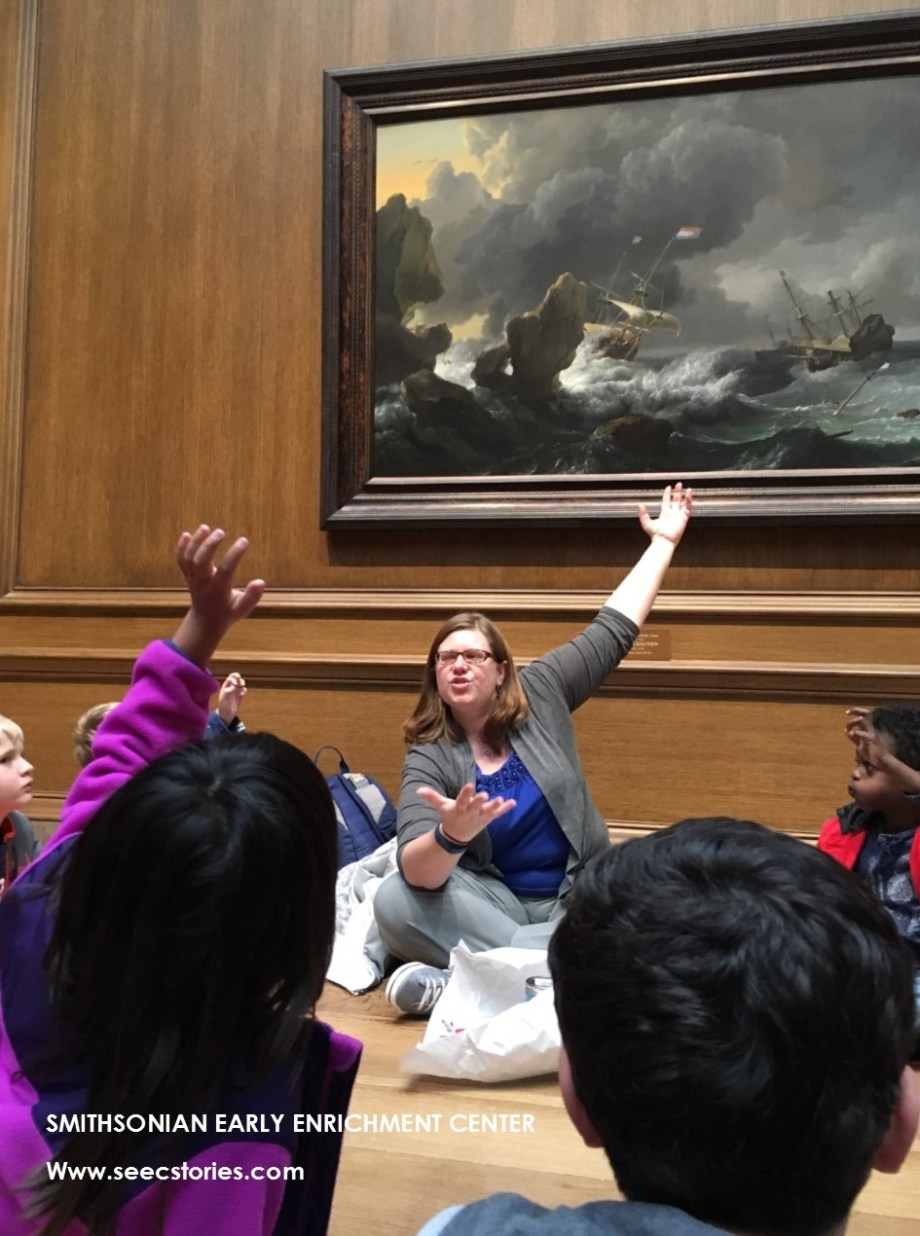 When learning about hurricanes the class went to the
 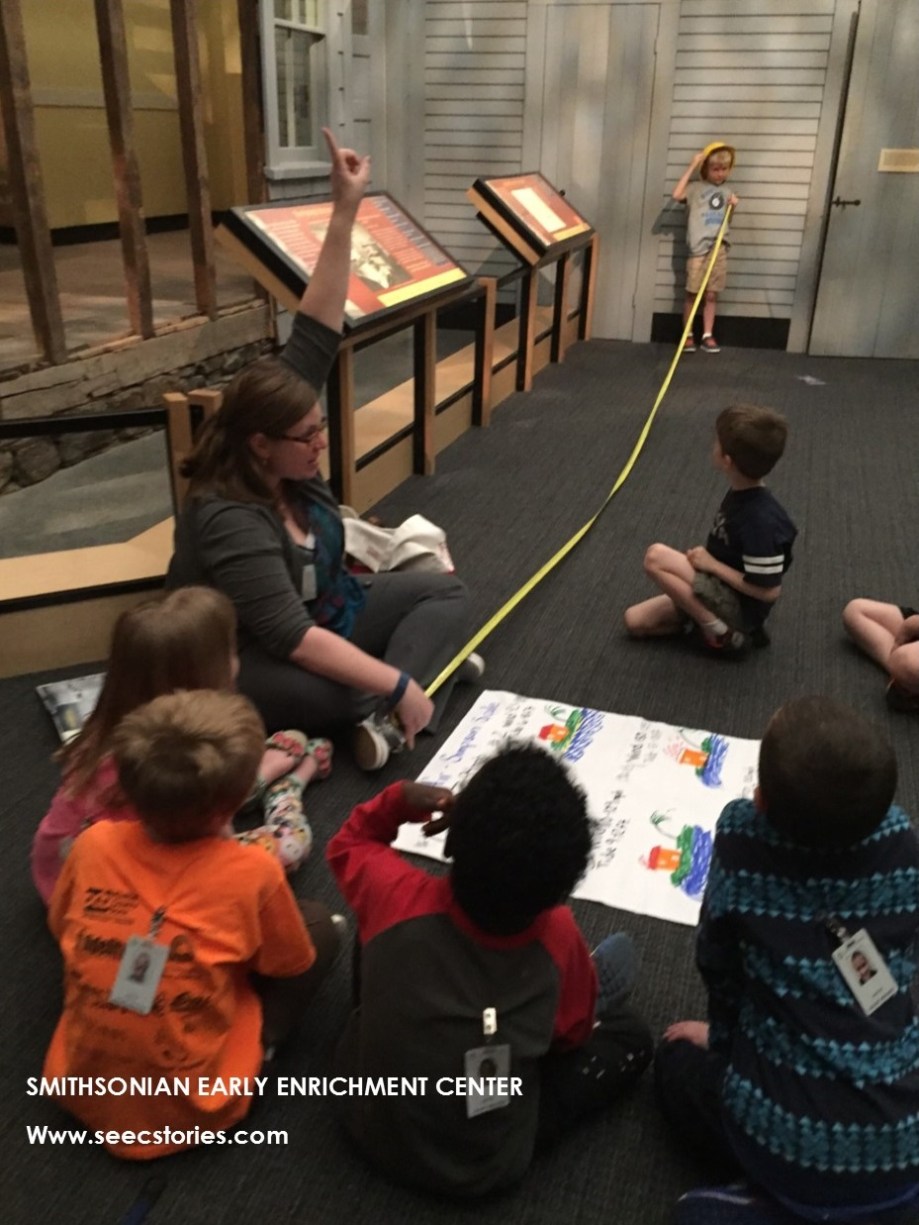 The class also went to the National Museum of American History’s exhibit
 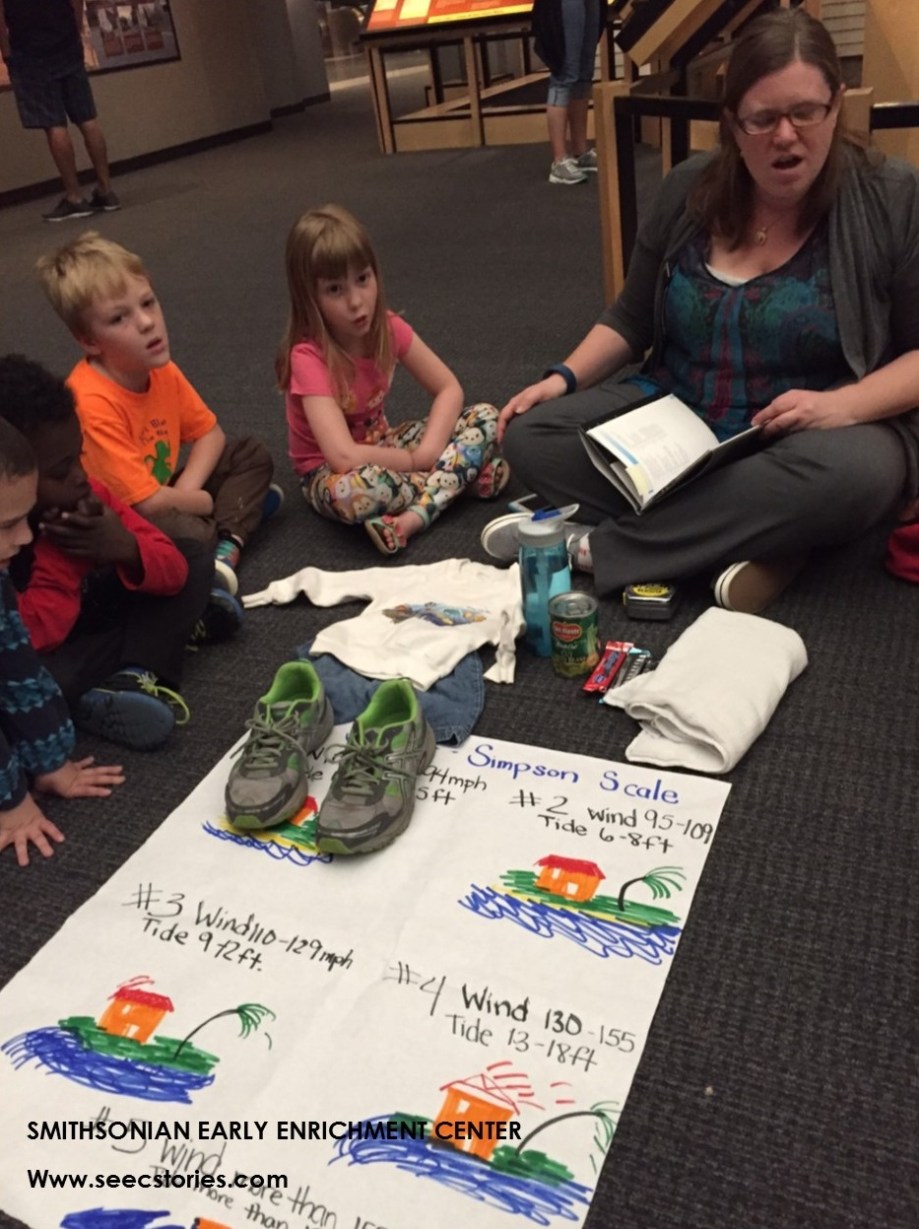 Cathryn explained that in areas where hurricanes are more common people prepare by packing an emergency bag that they can take with them if a hurricane comes. The children brainstormed what might be in the bag and helped pack one.
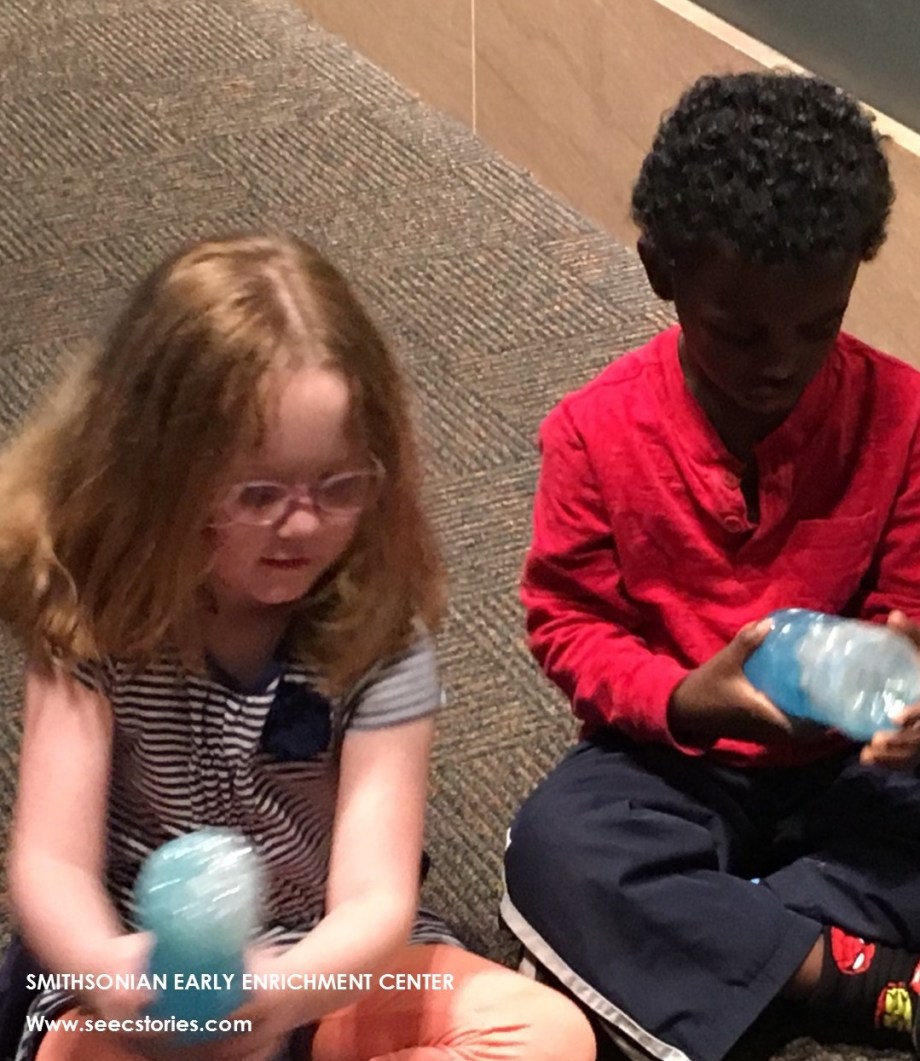 When learning how a tornado forms, the children enjoyed swirling water in a bottle to mimic the way a tornado twists.
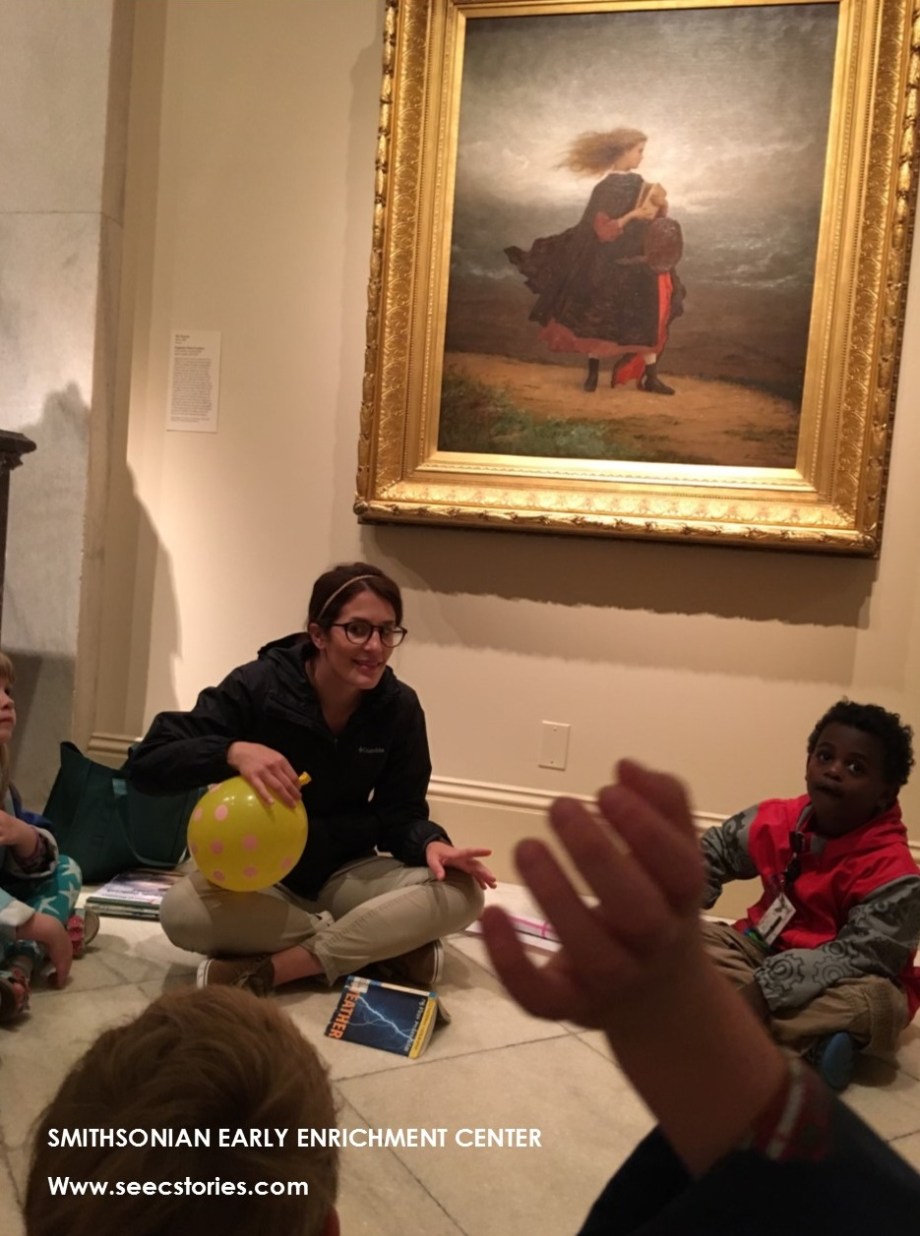 The class visited the
  Also in the Smithsonian American Art Museum they visited No Mountains in the Way: Photographs from the Kansas Documentary Survey to learn about Tornado Alley – the part of the US where tornadoes happen the most, and why they form there during warm months.

 Smithsonian and stop by the Sackler Gallery to see the


 The class made it to the Hirshhorn and went to the Robert Irwin’s “All the Rules Will Change” exhibit.
 They found a piece entitled, “Jake Leg”. Silvana asked the children to think about what the artwork reminded them of. Some of the children shared that this piece’s color reminded them of a dust storm, the desert or dust devils.
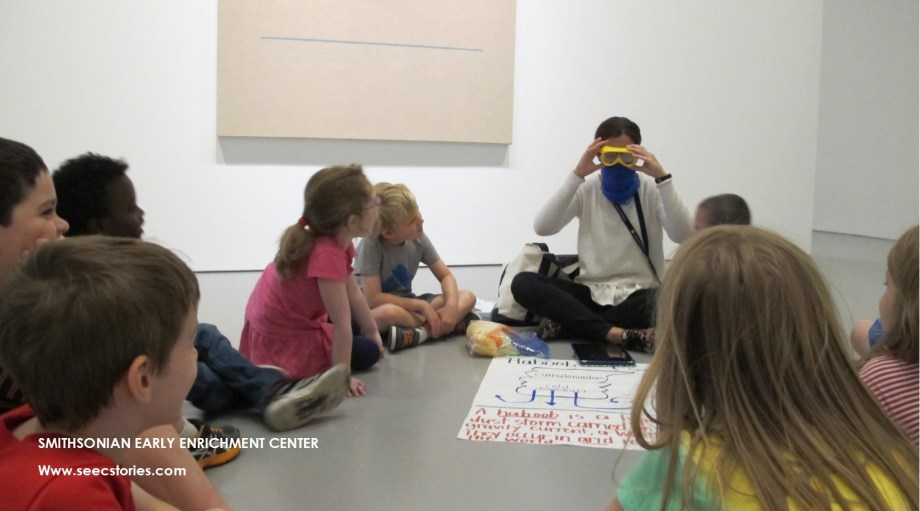
  Next Silvana showed a diagram of a haboob, and pointed out that she had written haboob in arabic, which means, “strong wind”. She explained what a haboob is and how they form using the diagram and a video of a haboob.


 Next they focused on what it would sound like to be in a haboob. They brainstormed sounds they might hear such as crashing noises, gushing winds, sand blowing, footsteps, and people saying, “I want to get inside!” Then they used their voices and bodies to make these sounds together to make a soundscape of a haboob.
 Silvana told the class that haboobs typically happen in the southwest from mid June to the end of September, but they cannot be predicted like a rainstorm. She said that in order for people to stay safe and protected in case of a haboob, people might carry a scarf and goggles with them. She put on a scarf and showed the children how this protected her ears, nose and mouth, while the goggles protected her eyes, keeping her body safe.


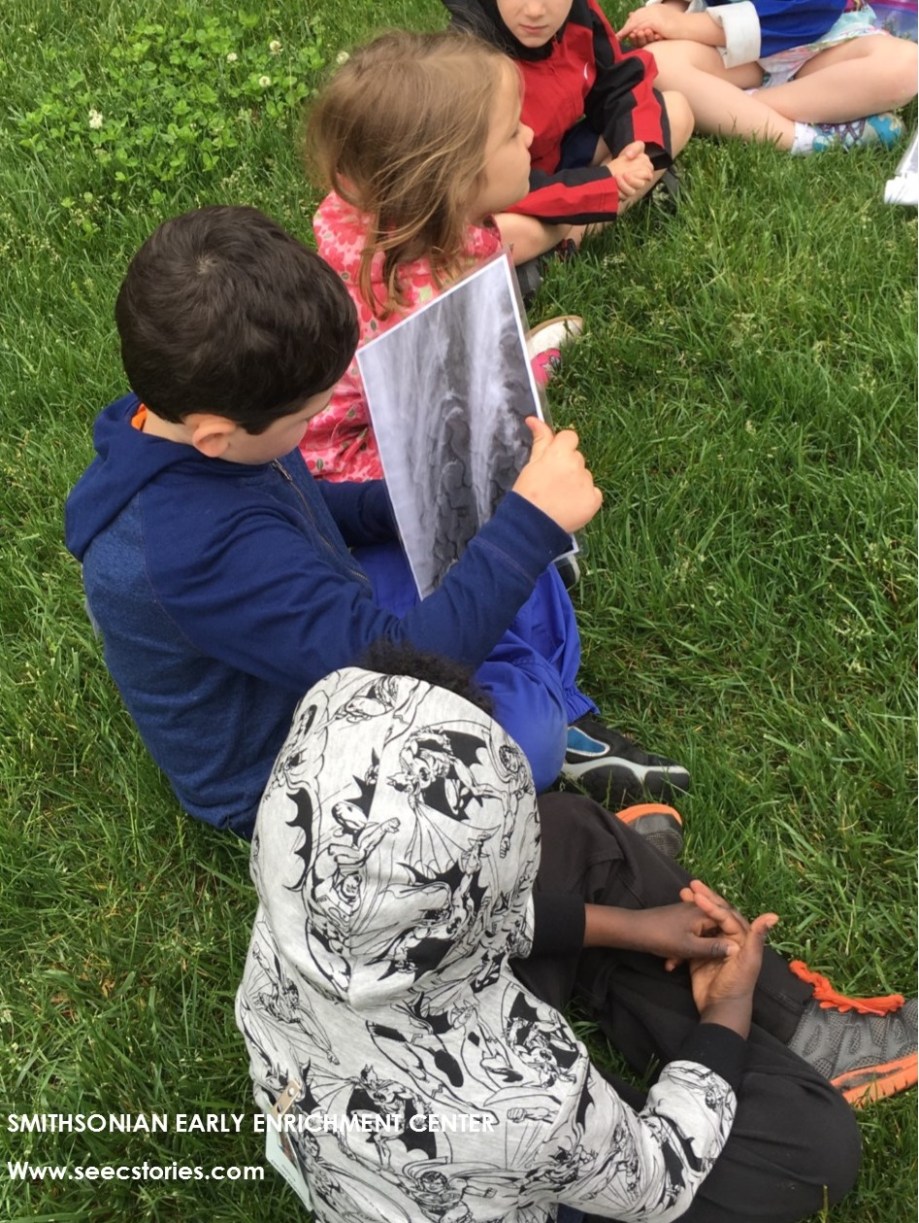
 As they crossed the construction site their faces were protected from the dust and dirt by their gear, much like it would be in a haboob.
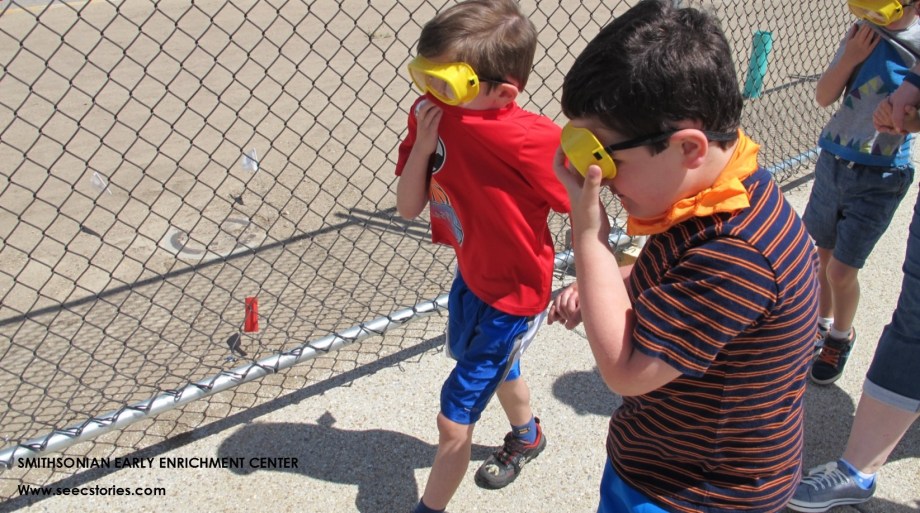 While the conditions of a haboob are much more intense, the strong wind and blowing dirt helped the children imagine what it would be like to be in a haboob.